Here’re the Best Printing Practices for the 4th generation Makerbots: the Replicator 2 and 2X. A big thank you goes out to the support trainers at Makerbot and Joseph and Ryan from the Makerbot Operators Google Group for sharing some valuable knowledge with us.
The following topics will be covered:
- Hacks & Upgrades
- Print Settings per Material
- Speed vs Quality settings
- Support types and use cases
- Machine Hygiene
Hacks & Upgrades
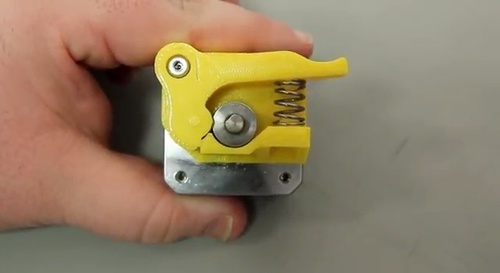
Spring Load Replicator 2 Block
The most popular hack is the spring loaded drive block for the Replicator 2. This block squeezes the filament in between the drive gear and bearing with a constant amount of pressure, resulting in a much smoother flow of filament. This hack was created by the Makerbot community and has been verified and adopted by Makerbot itself.
Gantry Realignment
This is more of a maintenance operation than an actual hack, but is a problem encountered by many Makerbot Replicator owners. If your stepstruder (moving print block with fans and nozzle) is not hitting the endstop, your gantry (the rods and belts that support your stepstruder) could be misaligned, preventing your printer from working normally. This video will walk you through the entire process of realigning it again.
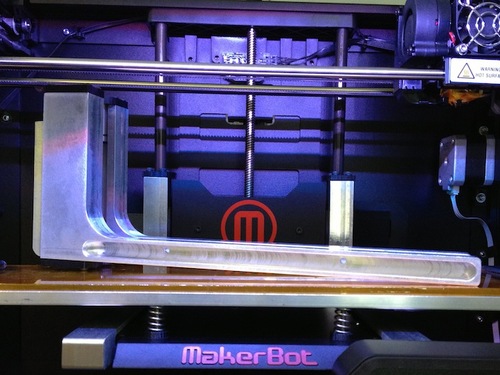
Metal Arm Upgrade
This upgrade replaces the standard plastic arms supporting the build platform. The standard arms are more likely to bend over time and can wobble during prints. This metal version will drastically improve your platform’s stability.
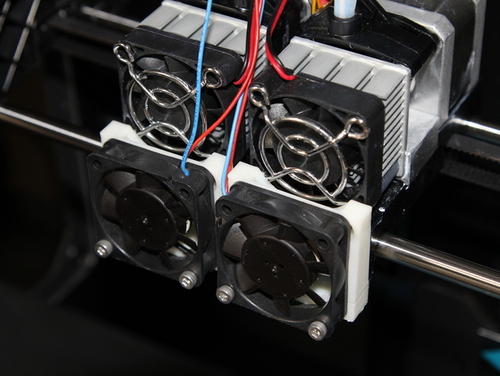
Makerbot Replicator 2X PLA Hack
Unfortunately, the Replicator 2X can only print ABS out of the box, however this pretty cool (and expert) hack will cool your build platform, making it suitable for PLA prints.
Print Settings per Material
Makerbot’s slicing tool Makerware has standard settings built in which are more than enough for the beginning and intermediate user. But when you want to create a custom profile to be able to fully customize your 3D printer, Makerware directs you to a plain text file. This tweak adds a simple GUI making the entire experience a lot more user friendly.
Some standard temperature settings for different materials are listed below as a starting point. Play around with them: varying the temperature with 5-10°C will already make a huge difference in the print’s outcome.
PLA (Only on Replicator 2)
Print temp: 210°C (at 100m/s)
Notes: heated bed optional between 40 and 60°C
ABS (Only on Replicator 2X)
Print temp: 230°C (at 100m/s)
Notes: heated bed at 110°C
Other materials are officially not supported but have proven to be printable as well. The settings given below are a starting point and will require tweaking for a high quality finish. Use at your own risk.
HIPS+ABS (Only on Replicator 2X)
Using ABS in first and a dissolvable filament like HIPS in the second extruder gives you an incredible amount of printing freedom. By using HIPS to print the support structure, you can print without having to take overhang into account. Just submerge the structure in Limoneneand the HIPS will dissolve. Keep in mind though that this process requires a lot of tinkering and some 3D modelling knowledge.
Flex PLA
Print temp: 210°C
Notes: it is highly recommended to drastically lower your printing speed to around 20%
Wood
Print temp: 165 (light coloured look) - 210°C (dark coloured)
Notes: heated bed not necessary
Laybrick
Print temp: 175-210°C
Notes: higher temps gives a smoother finish and heated bed not necessary
BendLay
Print temp: 210-240°C
Notes: great for printing light emitting objects
Nylon
Print temp: 260-265°C
Notes: very strong and flexible, great for jewellery or durable prints. Cover your build plate with painters tape and heated bed is optional.
Speed vs. Quality settings
Quality
For the highest quality print choose 10% infill and a layer height of 0,10 mm. Depending on the print, kick down the speed even further to below the Makerware advised settings. Although these settings result in the highest quality, as a beginner it is advised to first get comfortable with all the settings at “medium” or “low” quality. Highest quality prints also have a higher failure rate.
Speed
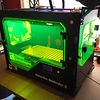
If you want to print very fast you could of course crank up the extrusion speed to 100 m/s but there are other possibilities as well. Setting the infill to 0% will result in a super fast, but hollow print, making your Makerbot Replicator 2 whistle due to its active cooling (no harm done). But be careful: some prints will collapse since they become too unstable to support their own exterior structure.
Support types and use cases
Rafts
Enabling the raft option will provide your print with a broader first layer. This is especially helpful with larger prints because it will reduce warping and help the print stick better to the building platform. However you will have to spend some time afterwards cleaning up the print.
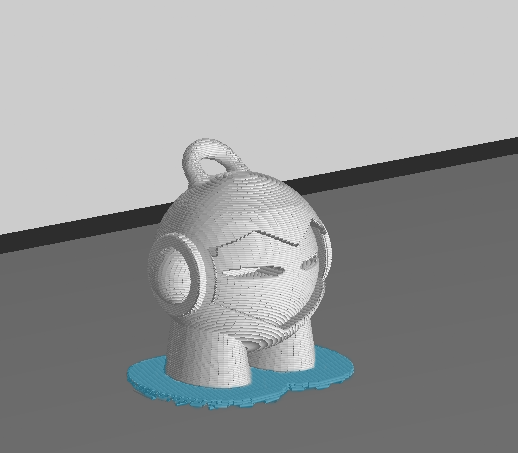
Support
Makerware offers one option for support. This should be used in cases of extreme overhang (over 45 degrees), but is dependent on the shape as well. When crossing a gap between two objects, the overhang can in some case be more than 45 degrees without any need for support.

Machine Hygiene/Maintenance
Leveling the build plate
Leveling the build plate frequently is very important to keep your machine in top notch condition. Even a very small inaccuracy can make the difference between a good and a poor print. Run the standard procedure from your printer’s menu and use a business card for the correct distance between your nozzle and build plate.
Cool Down Time
The best thing to do after a print has been completed is to cool down your machine entirely before switching it off. But, if you are in a rush, make sure to at least get it under 100°C before switching it off.
Build plate cleaning
It is important that your build plate provides a rough surface in order for prints to be able to stick to it. Grease from either your hands or lubricating the machine is something you do not want. Make sure you completely clean the build plate on a regular basis, preferably with some acetone and a lint free towel. Need a quick fix for adhesion problems? Try prepping your build plate with a thin layer of glue from a glue stick.
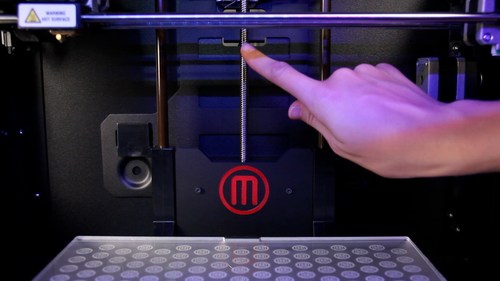
Lubrication
Nearly all the parts of the Replicator 2 & 2X are self lubricating apart from the threaded rod and x-axis idler pulley. To improve the overall life of your printer, make sure to lubricate them once you start hearing squeaky noises or after 50 hours of printing.
On a final note: the recommendations above are just an indication to get you started. There are no “perfect” settings to print and the key to a good print is experimentation. If you want to share your knowledge or get help, drop a line below 
Do you own a Makerbot Replicator 2 or 2X or want to find one?
This post was initially published here, on May 14, 2014