wayne
30
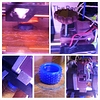
Hi, where did you get the green panels from?
wayne
31
wayne
32
The attached guide also has some tips and nice exploded block diagrams. (I can’t find the original link, but the document is in the public domain)
Makerbot Replicator 2 Guide Public Edition.pdf (1.23 MB)
While the article says you should level the build plate, I found that the out-of-the-box method is far from accurate. To get a truly level build plate, I haven’t found anything better than an incredibly thin leveling test print ( Leveling Test Print by DamianGto - Thingiverse ) and a dial indicator rigged up on the X rails with some magnets ( Replicator Bed Level Jig by phineasjw - Thingiverse )
Print once, find the point where the print came out the best, set that as your zero on your dial indicator, and then adjust the build plate until everywhere has the same reading. Repeat the process to either verify it’s level and set to the right height, or to find out how you might need to tweak the calibration, oooooorr… discover your build plate is warped in one corner and settle for not printing on that side until you get a glass build plate.
Amen on the test print for leveling. However my thingiverse print only takes 2 minutes to print. Its set to only do hatching at corners and over each spring adjustments. Thing 80227 waste alot of material and time. Yes, I’ve found that the best leveling leaves the back left corner as an area to avoid. (or minimize with a raft)
Its the cooling personality of ABS that makes it warp. Warping can be avoided by building in a heated chamber, by using PEI (PEI bed surface - Hardware - LulzBot) or Buildtak bed liner. Kapton, glue, acetone slurry,hairspray (aqua net), blue tape, white glue mix will all work. The white glue mix can be made so strong that the parts will break the glass coming off so be careful. By using Buildtak we have found the parts become stronger by curing under stress.
Warping can be caused by long unbroken, straight lines of filament being put down in the slic3r engine and breaking up the pattern helps. Build plate heat traces cause some issues too as others have noticed that moving the part around on the plate can help. Avoid drafts and fans with ABS. Use an enclosure.
Currently I am testing and using Buildtak in a production environment. Its been the best stuff that I have used so far.
Two points:
1. The spring loaded mod is a must, but I had to go another step further for exotic filaments. This knob adjust makes it easy to apply just the right amount of force on the filament. Thingiverse - Digital Designs for Physical Objects
2. I’ve found that the NEW large rolls of PLA from MakerBot reguire ABS temps to avoid jamming. That and reduced print speed.
paul_15
37
Acrylic warps over time with heat and is impossible to keep flat. I’ve gone another way with build platform issues… 2 items solved this for me. Buildtak http://www.buildtak.com/ for the surface… I’ve not had to replace it after hundreds of hours of jobs… and an alum platform (because i upgraded to a heated platform ). Glass could do the same. I also enclosed the chamber and put an enviromental control on it for better temperature control.
Even with Buildtak you still need a heated bed right? I’ve got access to an Ultimaker 2 and a Makerbot Replicator 2. The U2 is supposed to be ABS capable, but so far it was not delivered. Buildtak would solve the adhesion and warping issues on it right? As for the Rep2, I’d love to find a cheap way to make it ABS capable.
Could you expand a bit more on what you did for the larger rolls? My school just bought a few of them, and I was the first one to test them out. My jobs, ranging from 3-5 hours, will start out great, and have even worked for hours, but always get some kind of jam before completion. It’s not the printer, as its in good condition, and has printed jobs well with other, smaller spools. However, its a 4th gen Rep2, and the set temp for PLA is already 230 C, so should I try to push up to 240 C for the larger spool? I’m already printing at sluggish speeds of 40 or 30 mm/s trying to keep the jobs good quality at low resolution.
To be honest, I barely get good results with anything I try and I’ve since been avoiding them unless the color is just too perfect to not use. My suggestion is to try and obtain some non MB PLA and see if it helps.
ok, well it’s my schools printers and materials, and I’m too broke to get my own right now, so I guess ill just have to make do. I think I’ll raise the temp, as the issue isnt on the spool, or on the print, so hopefully a bit of an increase in temp will make enough of a difference. Will the PLA be ok at 240 C? How high do you think I could go? Thanks, -L
I would suggest a few small test prints and trying hotter temps a couple degrees at a time.
A heated bed and climate controlled chamber are good for ABS. PLA is much more human friendly so I use PLA when I can. May I suggest to make a portable, contained heated bed using a piece of glass from an old scanner tray or a FLAT piece of 1/8" spring steel (stays straight, but flexes) and Buildtak . Go to Ultibots and buy some supplies like the heater trace stickers from 3M then get a controller… etc…
Make sure those big rolls are spinning freely in the holder and try adding a filament cleaner (cloth). It is possible that the filament has dust on it. Dust can accumulate and end up jamming the nozzle. I print at 215C for MB PLA with good results but I switched to 9 euro / kg rolls at microcenter in the USA. The plastic comes from Toner Plastics in Pennsylvania. Makerbot, Lulzbot, Stratasys all use the exact same supplier and formulation for the ABS so maybe its the same for PLA.
Cheers
HELP!!
Alright guys I’m in need of some help, my schools Replicator 2 (4th gen) is officially jank.
Started failing many prints in a row recently, even at very slow speeds. Very uncharacteristic of it. I felt like it wasn’t working at all with a roll of the Makerbot filament, the new(?) larger diameter roll, just PLA black. So I swapped it out with an older roll with a bit of filament left, and its still being wierd. It had an issue where it stopped extruding mid print again, and, something that had kinda been appearing showed up again at a much greater rate. PLA keeps oozing out of the top of the extruder, where the kap. tape is covering it. It does not look like its coming out of the hole where you screw the actual nozzle in, but somewhere else on that piece. I cant tell for certain, but the ooz of PLA seems like its coming out of the kap. tape…Anyone have a clue what is going on? Why is it leaking or something? Is it possible that its something as simple as the nozzle being loose? A teacher at my school and I have opened up the head to fix little things a bunch of times recently, and they cracked it open last week, I think right before the issues started. Since then I noticed the screws that go through the fan and everything were loose, I’m wondering if everything is? I really need some help with this, so any ideas, experience, advice, thoughts, ANYTHING, is greatly appreciated! Thanks!
Sounds like you have a gap between your thermal break tube (the silver threaded one) and your print nozzle. You will need to dissasemble the extruder and replace the stock print nozzle and possibly the thermal break tube. When there is a gap hot plastic not only sneeks out the threads but the jam also pushes liquid plastic up the themal tube. If the plastic gets to hot it burns its self in there very well. You can remove the nozzle and preheat the bot, then find a peice of welding wire or a metal punch to tap the clog out. Just make sure its a nice tight fit and has a flat face.
On my 2x i have upgraded the print nozzles to E3d nozzles and i could not be happier
i have also installed a stainless steel drive wheel from ultibots which works amazing!
http://www.ultibots.com/drive-gear-1-75mm-filament/
both upgades are dirt cheap and make the bot much more reliable.
one more note when re-installing the thermal break tube and nozzle make sure you have the brass nozzle about 3/4 engaged in the heat block and the rest for the thermal break. If the thermal break is threaded too far into the heat block it will cause slipping proublems. Also make sure the brass nozzle is fully seated up against the thermal tube. You may need to chase the threads with a tap in the heat block to get everything lined up again.
Crappy stock thermocouples have also been a source of air prints. Makerbot now has some more robust stranded versions available. Start with a new nozzle and clean fillament path though.
1 Like
Thanks for this comment. I’ve recently purchased a new heater block from fargo3d to solve air prints. Although I still am having air prints when I pull out the filament after it’s jammed from an air print there is a noticeable kink in the PLA approximately where the nozzle/thermal tube would meet.
I just doubled up the ceramic tape assuming it was a heat creep issue and the last print worked well but suspect the gap you have mentioned may be the cause.
Can you elaborate any more on what I may be running into?
Thanks
maybe not so direct related to the article, but i was asked to dial in a makerbot for the local hackspace
i started with the pc and formatted and loaded win10, then makerbots desktop software…
did a factory reset of the printer and leveled the bed… messured filament diameter and entered that…
before it was over extruding now its close to ok
2 issue left…
1) on outside walls where layer changes it makes a small blob… on a cube that blob is at the same spot on every layer… very annoying
2) also single wall objects come out wrong width… how to i adjust the flow?
the software is all nice and dandy but not easy to tweak…
HEEEEELPPP