Im using an Ultimaker 2 Extended, and we have had it about a week or 2 now. Im trying to make a prototype for work and i admit its quite the tricky part but ive been having issues with support in cura, so im now working with simplify3d which i love. Ive been tinkering with settings but stil l have these issues…
No I can get the support on simplify, but the issue is in the picture, but after doing some tinkering i tried to add another shell to the surface layer if that would help?
First try tightening the short belts connecting the x and y motors to the guide rods. That should help a bit.
It also looks like you’re running the plastic slightly too hot, about 5°c less might help, especially with the warping around the bottom support.
Upping the infill overlap or just the flow rate might help as well. If the part is going to be under any load, then the higher flow will help a lot.
Also, try to keep at least 6-8 layers for the top/bottom infill.
If you’re having issues with support, the best bet would be to design your own, that you can remove later. If you have a 0.4 nozzle and layers under 0.15, a simple double wall beneath the rod will be enough and it’s easy to remove afterwards.
Like Munjeni says, try upping the outline overlap percentage: infill > outline overlap (mines on 20%) should get rid of those gaps between infill and shell.
I suppose that your problem is caused by slack belts. to verify this print a large circle and check if the geometry is correct. If you obtain an ellipse you must tighten the belts, moving the steppers properly.
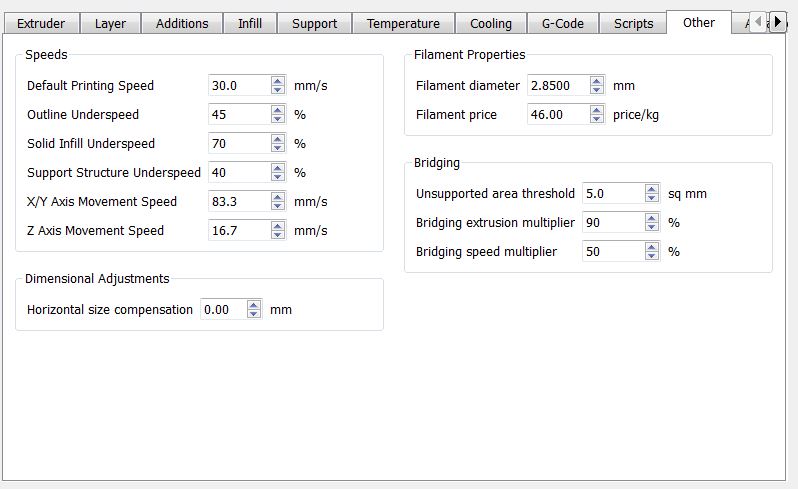
In your infill properties window change the infill “overfill” (something like that, cant think of them item currently) to 60%. I have not tried it lower than 60% but 60% seems to work. This means that the infill will go over the outer shells by 60% vs the std 20% that it is set too.
Btw I have an Ultimaker 2 Extended I have had for about 3 weeks or so and had to learn this one the hard way with lots of bad prints.I love simplify but takes some times to get the right settings for the printer and what you want to accomplish. I also print at 230C which a bit over the spec of the material.
Yea i was thinking about making my own support but how? should i use solidworks or autocad and add like triangle supports or like you said double walls beneath my design or is there a way to import my own, i see the import option in Simplify3D but no idea where to begin
Okay so after reading all the suggestions, here are all my settings with the changes mentioned. Please let me know if you see anything i can do different.
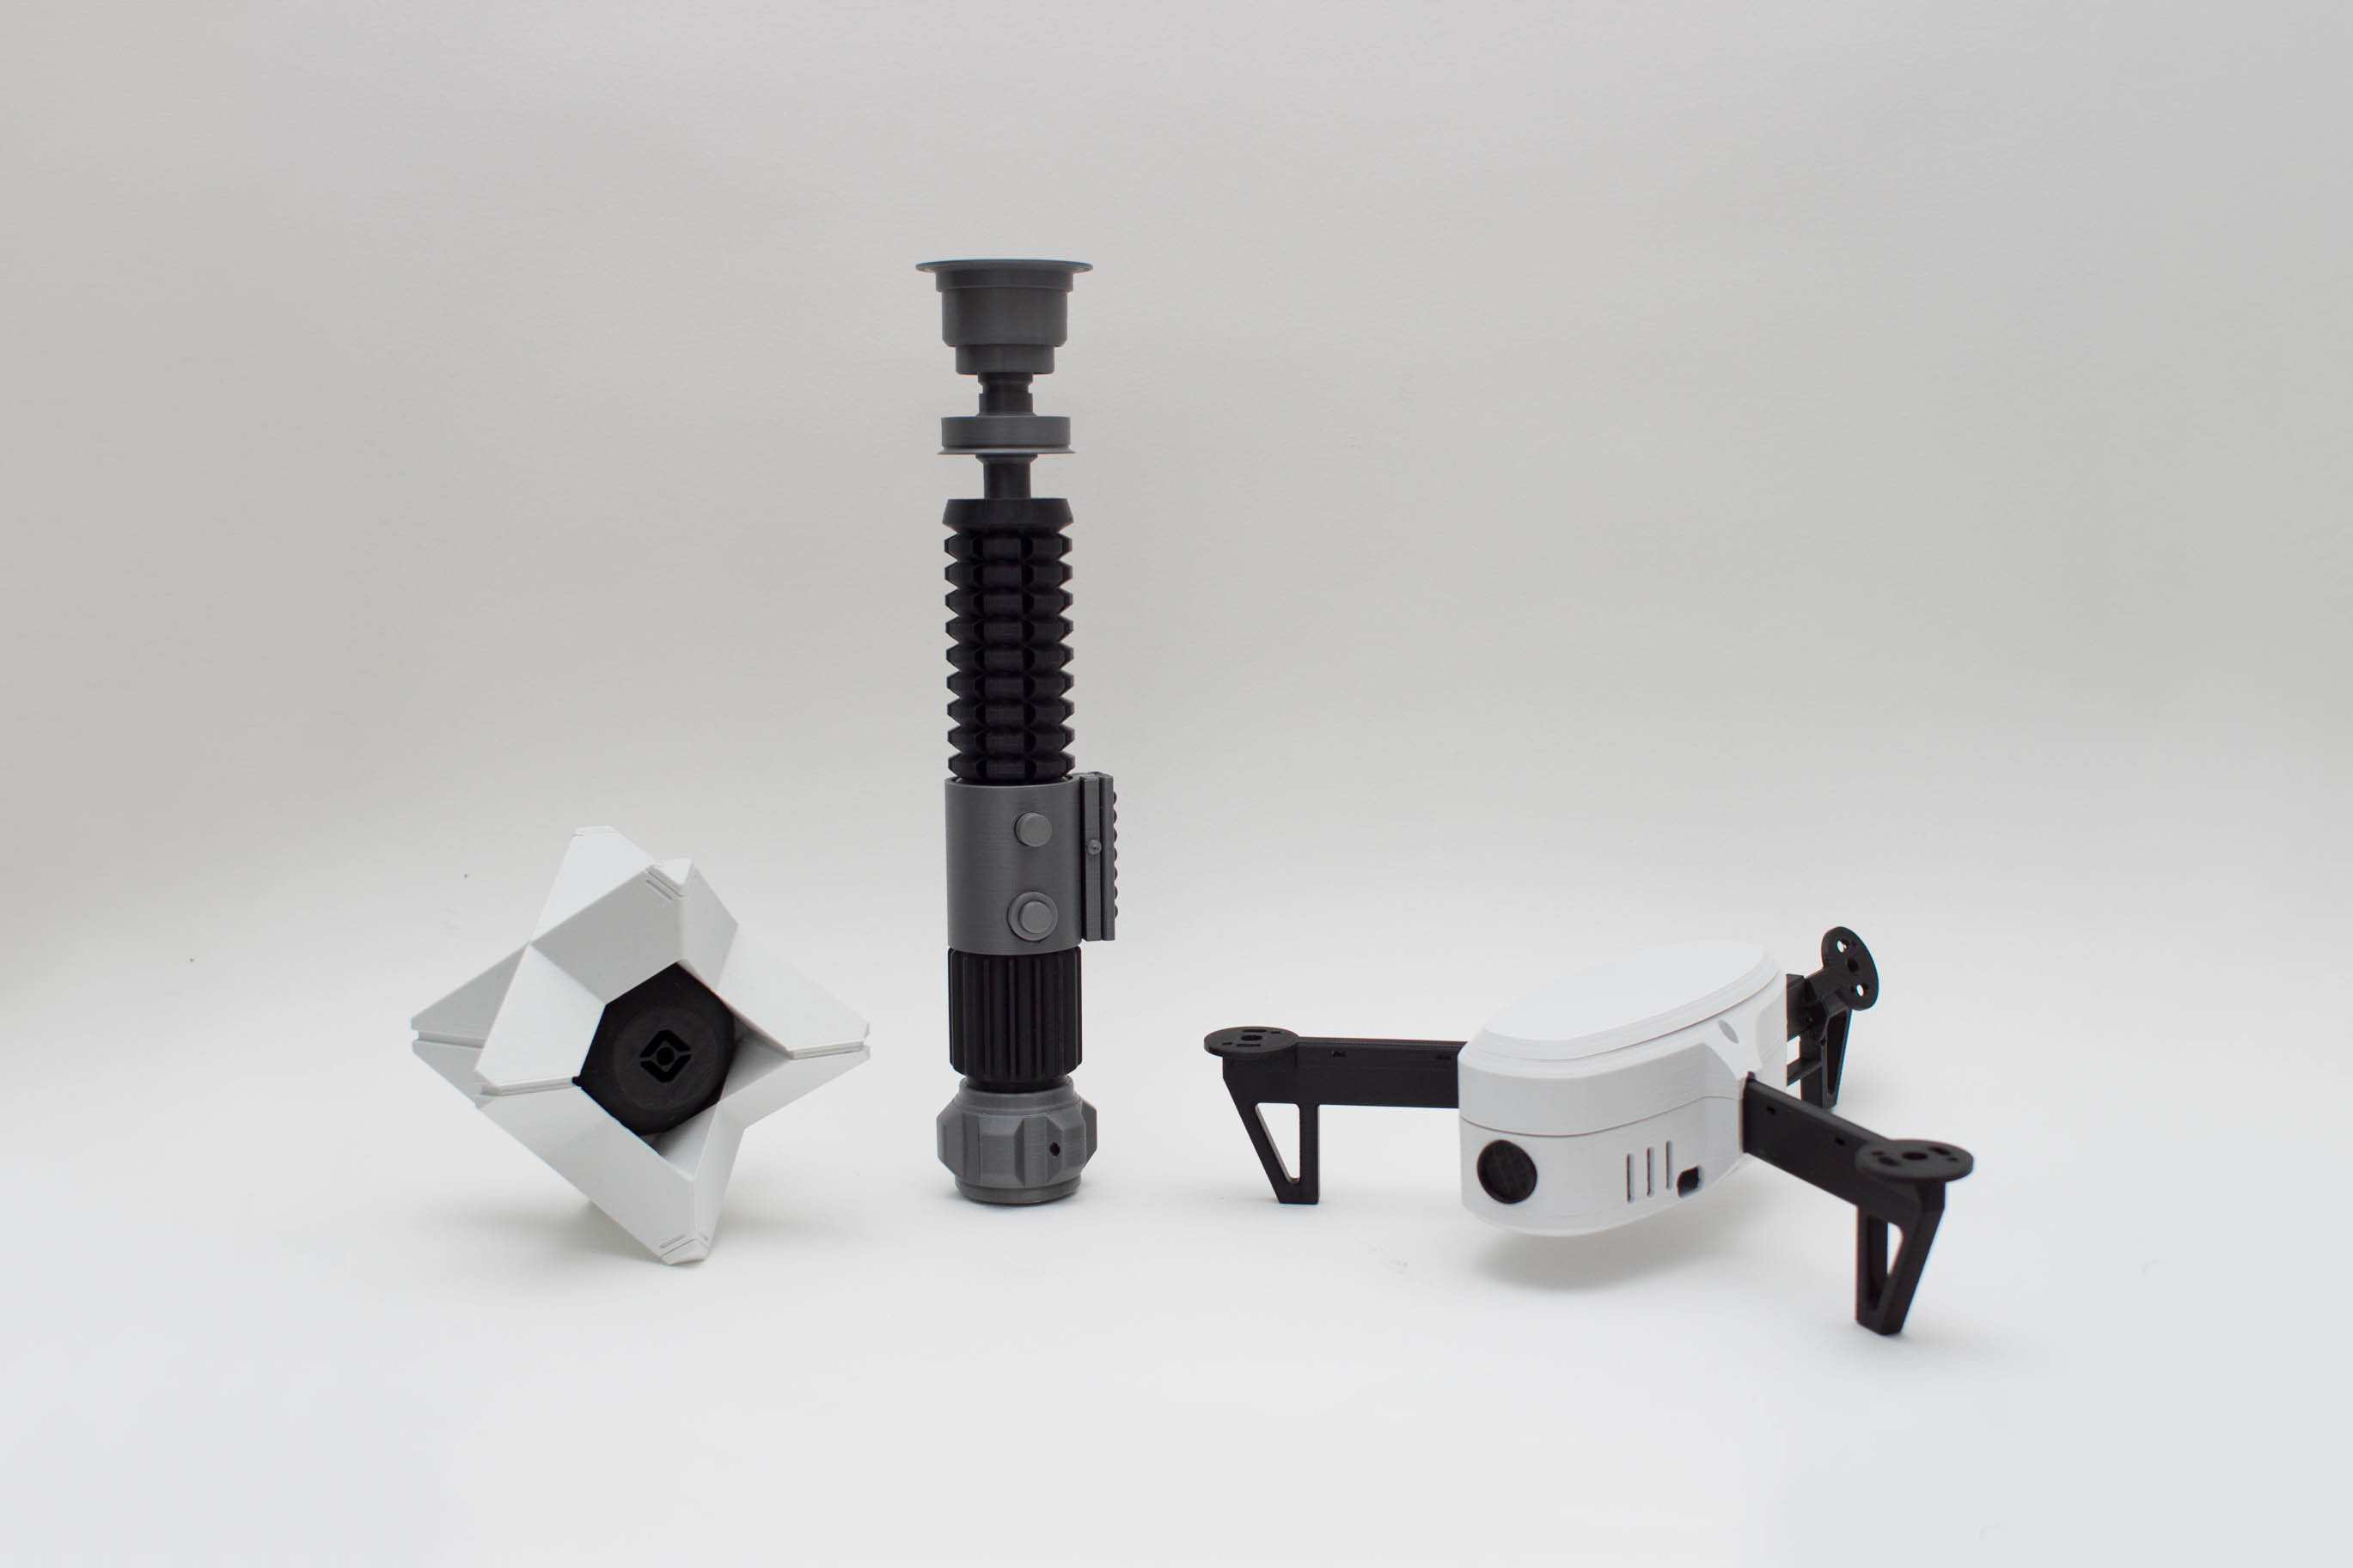
OKay checked this possiblity but i dont think its the issue, game em all a nice tighten though. The ultimaker robot did fairly well but a little drooping on the bottom below the body
The simplest way would be to open it in solidworks or even blender and add a box 0.8 mm wide along the length, intersecting the model. I use Rhino for my modeling and it’s about 3 clicks of work there. Just add some geometry that you can cut off later to hold it down. Also, Cura has a very good line support
The temp should be between 190 and 210 for pla, if you’re printing slow, go for a lower temperature.
The infill overlap I was referring to was the infill and walls not touching and therefore giving you a bad part with no structure. I you use this feature at 60% it will give a better result since the infill will overlap the outside shell more and be more structurally sound.
You should get a nice print by reducing the speed of your print. Keep layer height at 0.15 and make changes to your materials : For PLA keep Temp 230 deg C, Build Plate: 80, Cooling Fan : 100%. Also, add supports, Touching Build Plate.
I agree with John - you have some underextrusion - most likely printing too cold and/or too fast. Try printing at 210 or 220 and cut speed in half. UM2 can print up to 10 cubic mm per second at 230C but best to keep it under half that speed (5 mm^3/sec) at 230C. At 200C the PLA is much more viscous and difficult to shove all that PLA through that tiny hole so the filament slips in the feeder. I recommend you post the above pictures on the UM forums also - lots of good help there.
Thats where i did post this issue first but I have gotten way more responses on 3D hubs. Either way I think I may have finally got it down after a bunch of tweaking and trial and errors. Thank you everyone!
It was really a result of all the suggestions above haha, I just had to turn up the heat, slow it down a bit, add more layers to shells, a few other things and im pretty happy with my results now, also just printed a new fan duct and installed with a breeze