I recently bought a Printrbot Play, and I’m experiencing some problems with my first layer. The first layer looks acceptable for small objects, but when I print some bigger objects (with a greater surface) it just looks terrible.
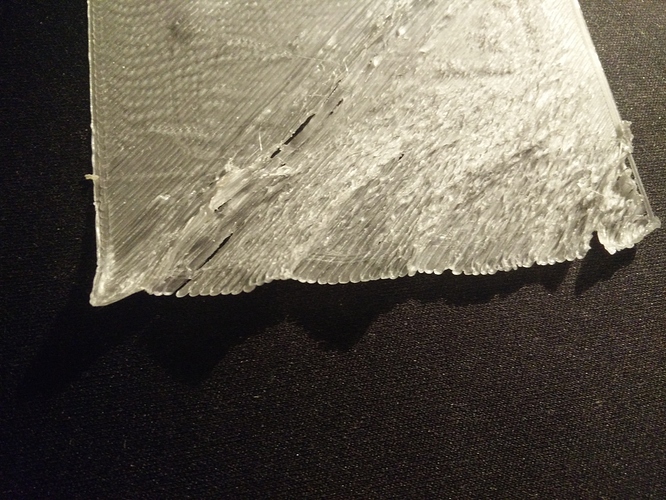
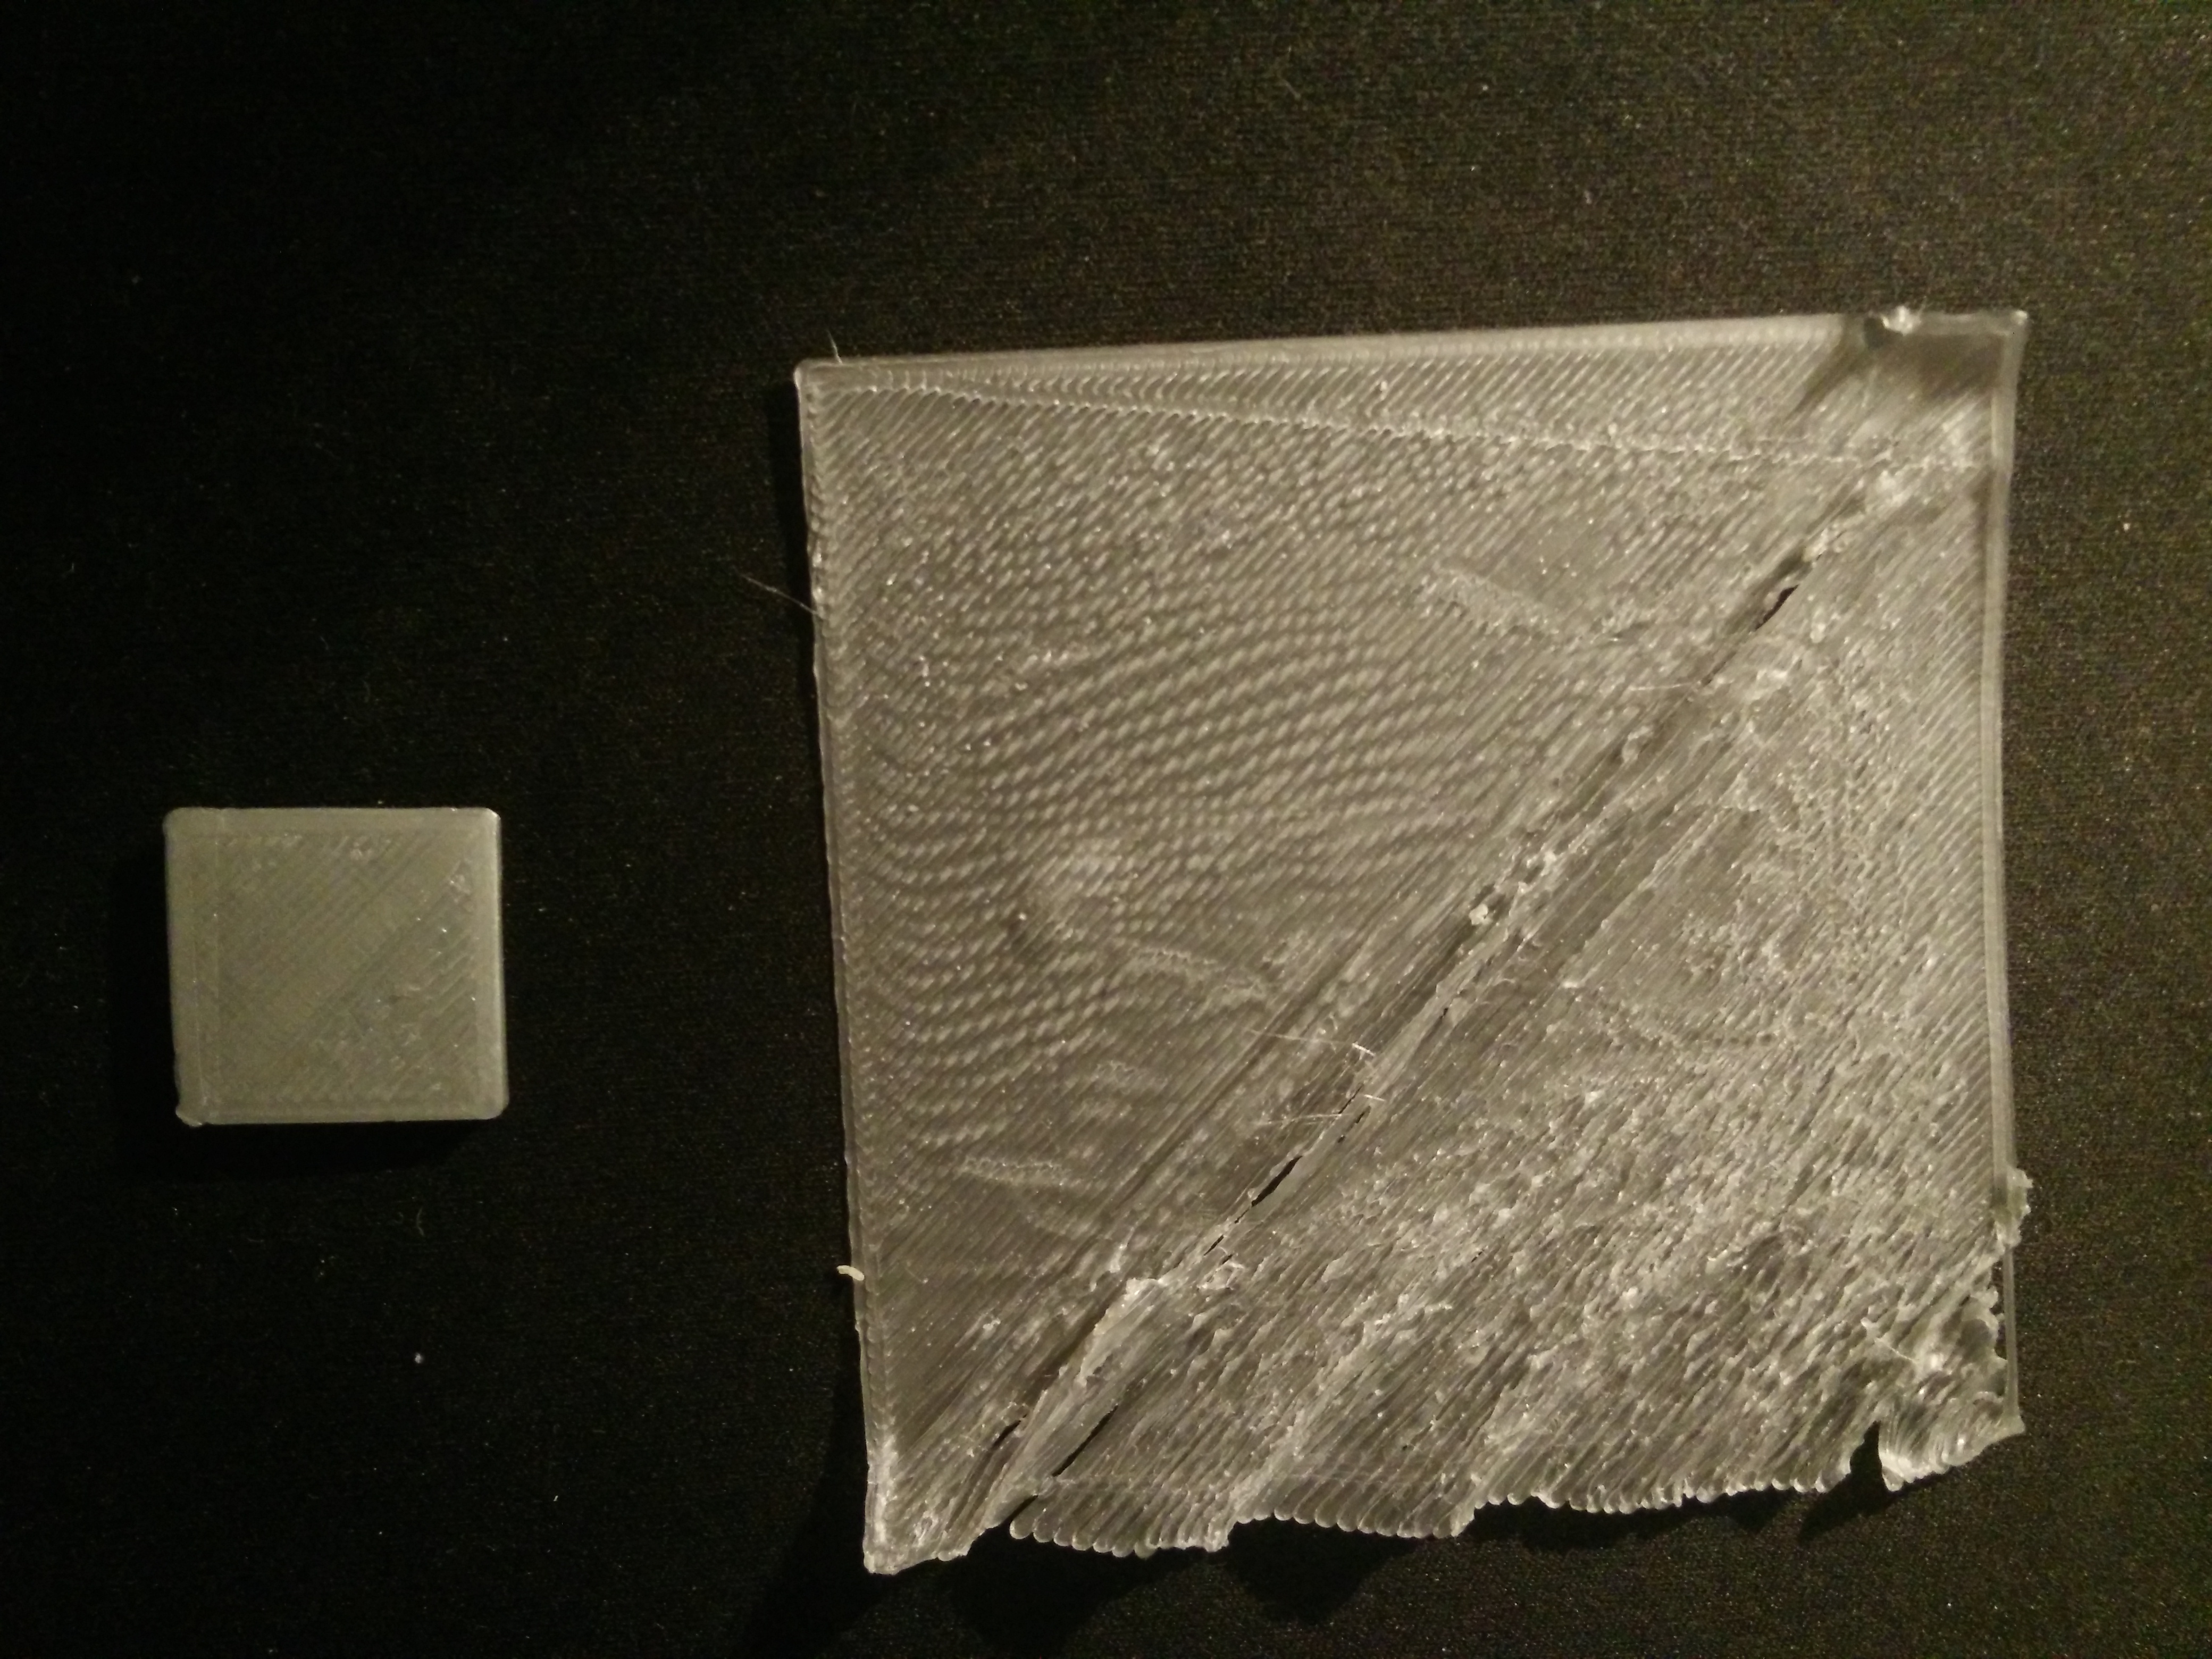
As you can see on the picture, it looks like the infill is way to big to fit inside the perimeters of the first layer. It is actually crossing the bottom perimeter, and causing the layer to “wave”.
The small square on the left has this issue also, but less because of the smaller surface.
I use PLA to print with, and I use blue painters tape for the adhesion. I also use the G29 command for auto bed leveling.
I’m trying to find a solution for this problem quite some time now, but I had no succes so far.
You shouldn’t need a raft, they are a pain to remove. You are too close to the print bed. You need adjust the Z height with the M212 Z command. When your layers are being slightly smashed, the results become more and more evident as the head moves away from its origin. This is because the roughness compounds on itself. I would suggest moving the Z up .1 MM at a time and printing the same object. Eventually the first layer should come out very smooth. Also, make sure your bed is fully tightened down so there isn’t any vertical movement during printing.
Your first layer is too much “squish”, raise your nozzle by 0.1mm in relationship to your bed and try again. If your machine has auto bed levelling Enter “M501” into your console and it will give you a list of settings, look for the M212 line and note the z value. To adjust your nozzle up away from the bed make the number larger by 0.1mm (ie if it says z -0.6, make enter “M212 Z-0.5” if the number is positive ie Z0.6, enter “M212 Z0.7”
if if your machine just has an end stop for z homing simply adjust it up by 0.1mm intervals until your first layer looks flat.
this is all assuming you have your extruder and filament calibrated correctly.
I thinks your nozzle is to close, you need to calibrate the Z offset. Or is the filament flow is to high, with cura you can the the parameter to 90%. If is the second case you can cali rate the number of steps for E motor by asking to extrude 10cm of filament after ad a mark at a 10cm on your filament.
I have 4 printrbots and I have first layers down to a science.
First: purchase 3m blue painters tape #2094 (see inside of role)
Then lay tape across your print area.
Second: Use a cloth and rubbing alcohol to remove the waxy film that is on the top of the tape, you may want to rub it a few times to make sure its clean.
Third: lower your Z height (M501 to see what your height is, M212 Z-X.X to set it closer to the bed, them M500 to save and M501 to check our change was saved)
You want the first layer to be pretty close to the bed, it should come out thin-ish, but not be too squished.
Fourth: I print at 210 degrees for the entire print. You can try cooler or hotter based on your filament. I use Hatchbox PLA.
Fifth: Print your first layer slow. I use a 60mm/s total speed with a 25mm/s first layer speed and 200mm/s travel speed.
I have over 5000 prints logged on my 4 machines and these settings have been golden! Hope they help!
It looks like somethins is up with your Y-axis calibration. It seems to be drifting during the print. I think it’s probably best you check out the belt see if it loose, is there anything snagging on the print bed? Else check the EEPROM settings.


