Go to homepage
21 / 24
Jun 2016

For anybody that’s a 3D printing enthusiast, you’ve more than likely ran into a clog or two - especially on those long prints that need to be done on time. I have a few tried and tested methods of my own to stop / fix clogs and have researched a few others. Here’s a compilation of the research that I’ve done and some tips and tricks along the way. As always, please feel free to add more in the comments :slight_smile:

Preventative measures to stop clogging and jams

The best way to fix clogs and jams is to fix them before they actually happen. Here are a few things to pay attention to in regards to that.

Switching Filaments

When you are switching filaments a lot, there’s a higher probability of jams. Not all filament is created equal and sometimes those diameters or other properties are slightly off. Also, different filament requires different settings. When you are changing filament and settings, there’s usually some residual material left during the change. If you can, have a few go to filaments that you know work and stick with that. However, experimenting is fun. If possible, try and keep filament types standardized with the 3D printers you are playing with (this assumes you have more than one 3D printer). Alternatively, read on to see how to fix the jams when they happen.

Quality Filament

Don’t be surprised when that $20 filament doesn’t print too well. The cheaper filament tends to lack any sort of quality control. Do your research when purchasing filament!

Filament Storage

Ambient moisture get absorbed in PLA and a lot of other common thermoplastics that are 3D printed material. I would recommend storing your filament in a ziplock bag with a small thing of Cat litter or desiccant ( any moisture absorbers will work). I then keep it in a big tupperware container. It’s a little bit of overkill, but better safe than sorry.

Proper Temperature

Refer to the material page that has temperature best practices - These are available on most 3D printing filament manufacturers websites. You can have some variance here, but stay within the range for most use cases.

Hotends

If you are looking to experiment with more exotic material that requires higher printing temparature, an all metal hot end is a must. I’ve heard very good things about the E3D or Prometheus. I’d also recommend getting a 3mm nozzle. Once properly dialed in, a 3mm nozzle prints very well. Since there are more ‘particles’ in the exotic filaments, the 3mm nozzle prints them a bit smoother.

Canola Oil

Don’t laugh, apparently this works. Put a small amount on your fingertip and wipe it on the start of your filament spool prior to printing. Apply this sparingly, you don’t really need too much and it will was a long time. Basically, the oil is acting as a lubricant in the heat chamber. If anybody has more details on the science behind, I’d love to learn more.

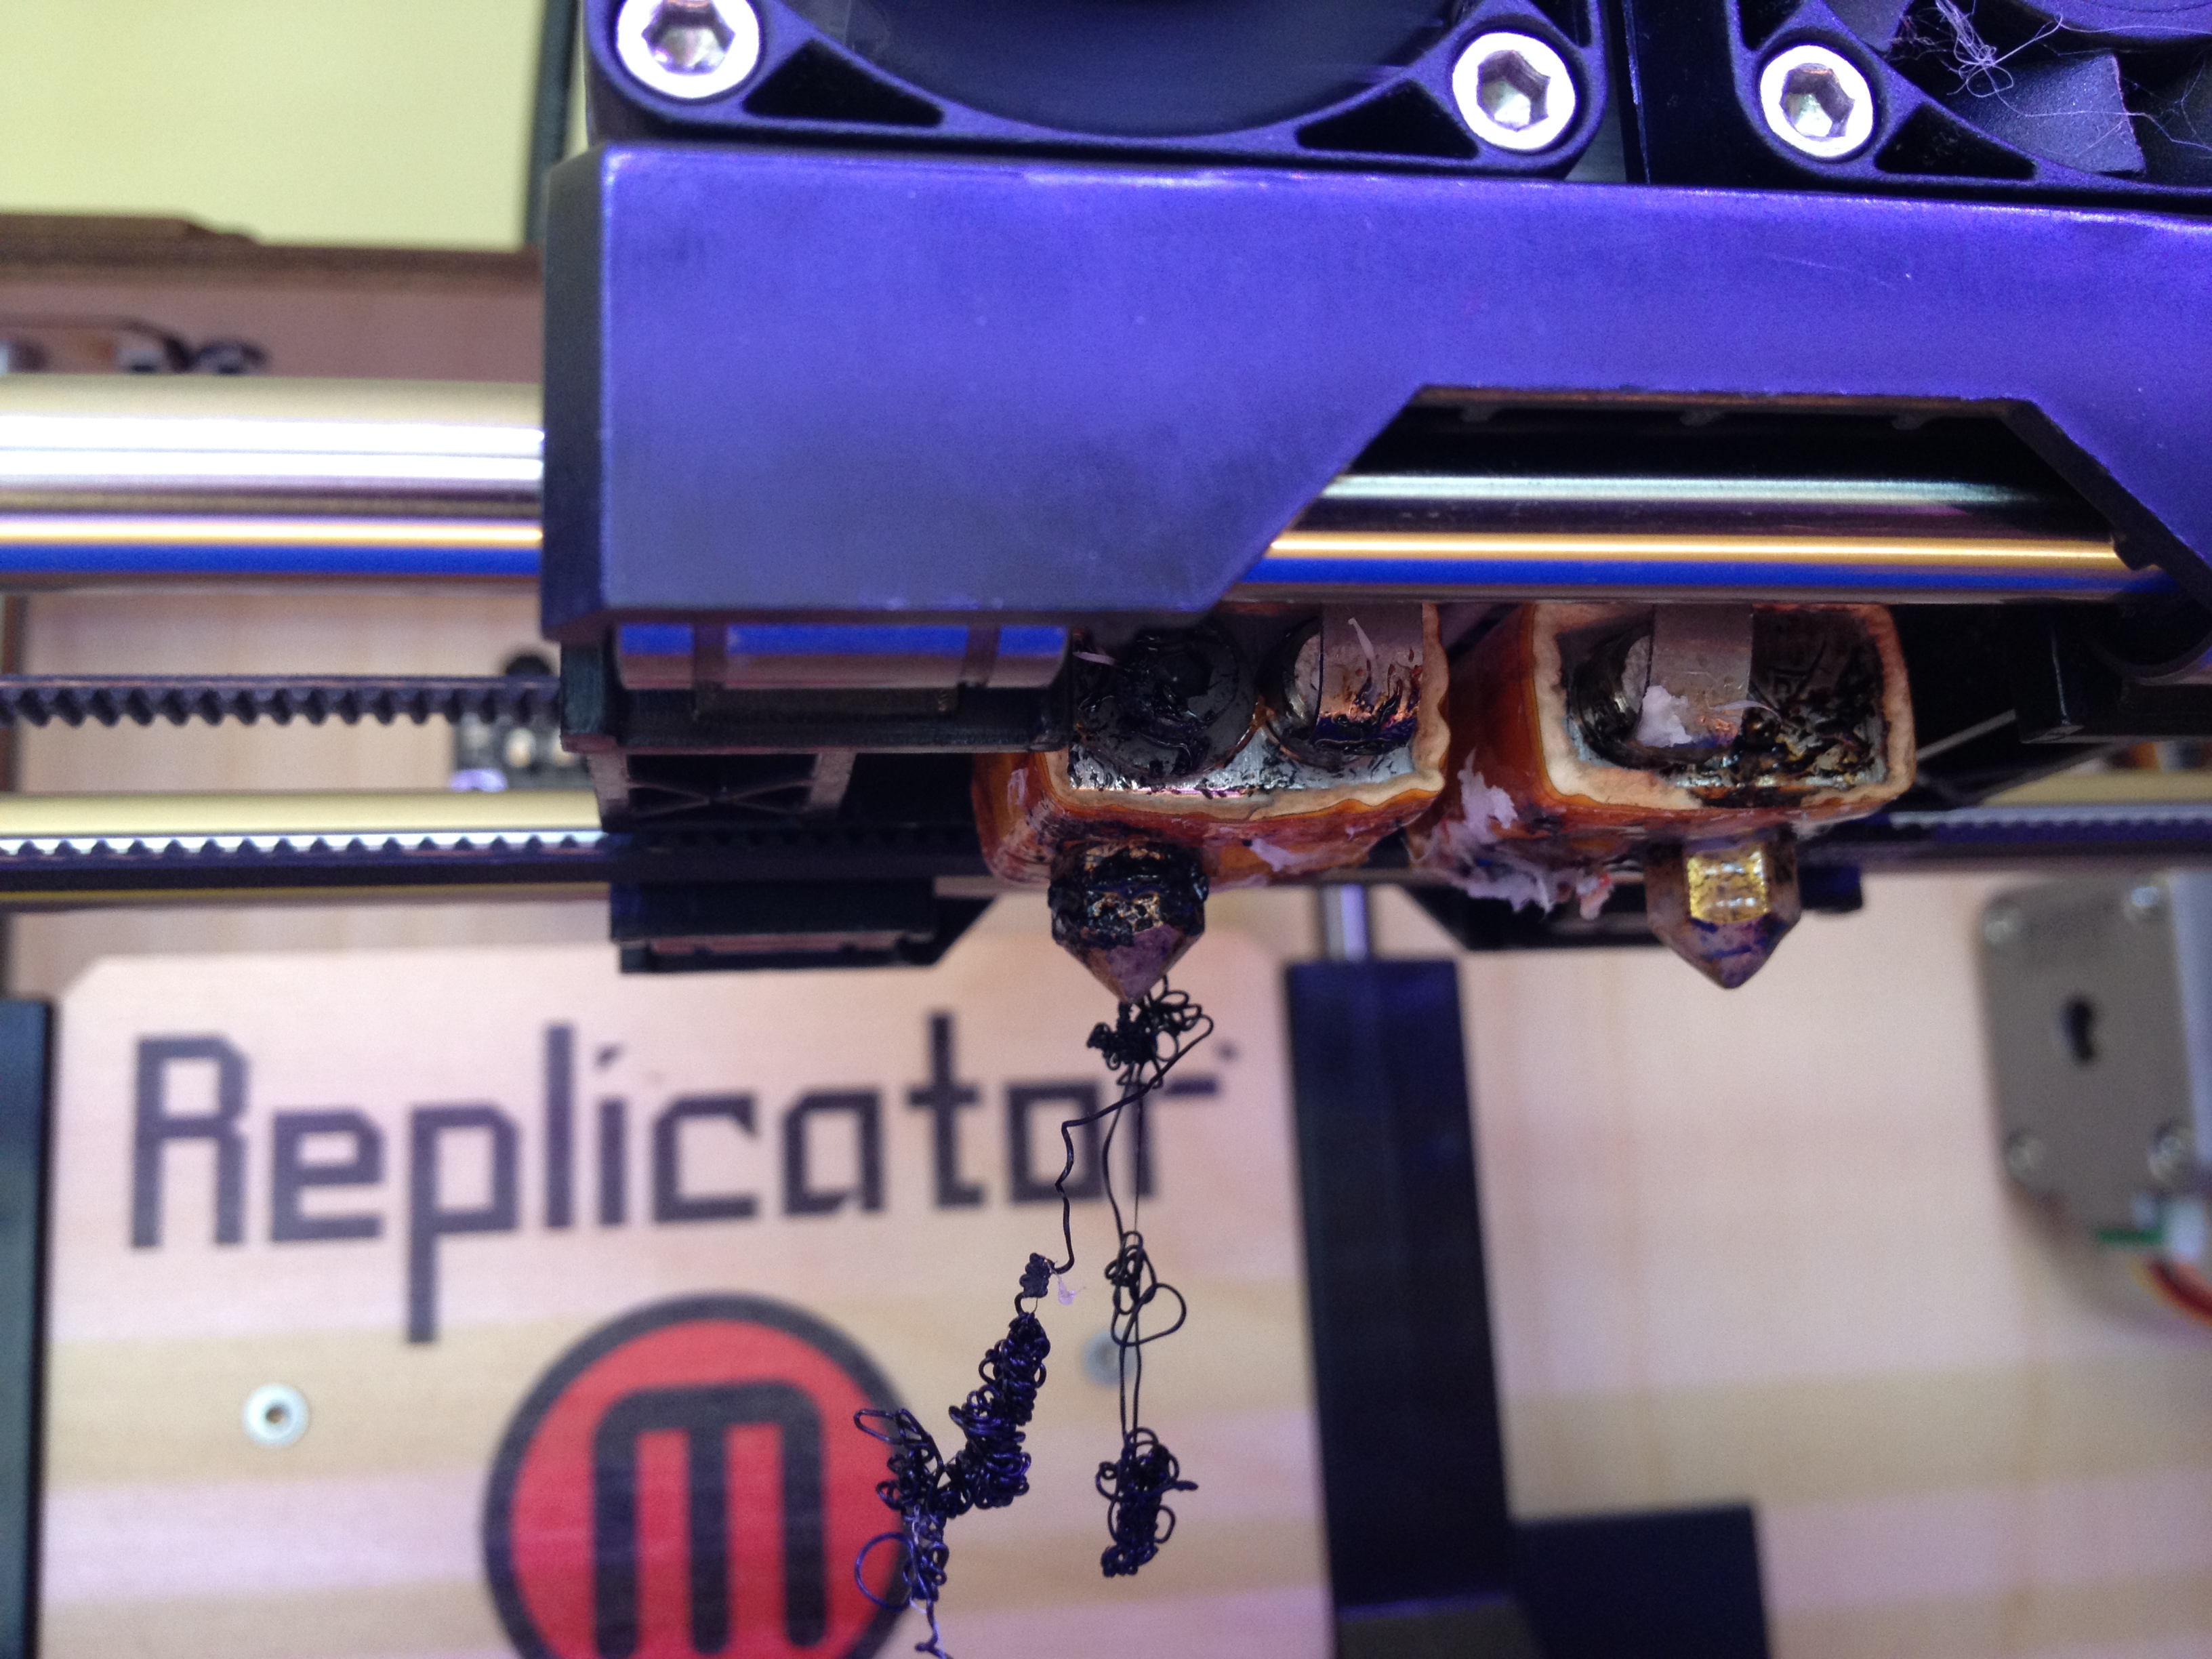
My Extruder still jammed - now what?

No worries! There are methods to get rid of the jam, it’s just slightly more difficult. I try and avoid disassembly with these methods - I’ve broken a few hot ends by not applying the right amount of torque and putting things back together is less fun than taking things apart. Refer to your manual if the method recommends removing parts.

“Assist” Method

Once clogged and not printing, ramp up the heat a couple of degrees and manually force the filament through. Check the flow of the filament - if its not being pushed to the side, then it should be fine.

Modified Tooth Pick Method

Grab a tooth pick and print yourself this Thingiverse project 348. This can be used to quickly clear most filament clogs. Follow the instructions on the thingiverse page - its fairly straight forward and doesn’t require disassembly.

Guitar String Method

Get a guitar string that matches your nozzle diameter. Push it through while its heated. This can work if the clog is not very bad, but oftentimes it does not get the hard to reach places on the nozzle.

Torch or lighter Method

Slightly dangerous, but does work. Use a torch or flame to heat the nozzle. Use your own discretion, but I recommend removing the nozzle first. Can also damage other equipment, so I would avoid this method if possible.

Acetone Wash

This method requires disassembly. Essentially, remove the nozzle (easier said than done) and put it in a small cup of Acetone. Clear some of the hard to reach places out with a toothpick. Let it sit overnight. Be sure to do this in an open area, you don’t want to inhale too much Acetone fumes. This method definitely works, but depending on the extruder you have, removing the nozzle is not always straight forward.

That’s about all I can think of. If you’re printing a lot, its not a bad idea to have some spare extruders lying around for easy swapping. Like most things 3D Printing, tinkering is required and encouraged. What is everyone else’s tips and tricks for preventing and fixing filament clogs?

  • created

    Mar '15
  • last reply

    Aug '18
  • 23

    replies

  • 11.4k

    views

  • 17

    users

Cool! How does an extruder look from the inside, like in a cross-section? Where can all this material get stuck?

My method of unclogging / cleaning between colors is to use nylon (http://bukobot.com/nozzle-cleaning 3):

1. Heat to 235, extrude 10 mm of nylon ('til the color change and you are dispensing nylon.

2. Reduce heat to 120, fan on, and keep forcing the nylon (slowly) in. It will stop when it gets < 200… don’t force it any more.

3. Wait 10 minutes to make sure the temp is down.

4. Break off the tip that has gone beyond the nozzle.

5. Release the hobbed bolt and pull the nylon back through. This will require force… if you get back a “little tip”, you got it all.

6. Snip the used end and Repeat until the Nylon comes out clean.

As far as oil goes, I’ve heard that it’s based on the same idea as “seasoning” cast iron… more updates in a couple of days. I didn’t need it with the “traditional” hot ends, but I have needed it for both name brand hot-metal units (E3Dv5 and Pico). Note that “ideal temp/speed” varies a *lot* based on the extruder (I think the thermistors just aren’t good enough).

I have my doubts about the nozzle size being 3mm. Maybe you wanted to write 0.3mm.

The only jams I have been having with my E3D is because of bad filament. Some bad pieces that do not want to melt, even at higher temperature add up after many hours and will eventually clog the nozzle. Even heating on a higher temp does not help anymore then.

Fortunately the acetone treatment works very good to clean the metal parts of the hotend.

This is a very good list. Nothing more too add!

this looks good if you have time to strip the head

cheers

Barry

For good-quality extruders, it’s a straight bore of ~1.8mm diameter until the last 1mm where it necks down to the desired diameter.

For a cheap knockoff, they sometimes have wide spots in the middle (usually they use a brass insert to go “Bowden-less” – and that insert isn’t long enough to go all the way to the narrow channel)… which really sucks because you can’t use the Nylon method (nor anything else besides an acetone bath and cursing).

Problems that cause stuckage (from my experience):

1. If you have a PTFE tube (conventional hotend, or some metal ones with a PTFE insert except the E3Dv6), if you get it too hot, the PTFE tube melts and you gotta replace it.

2. If the “melt zone” is too large (all metal hotends primarily), the filament gets soft in the 1.8mm section and sticks to the walls, requiring too much force to get it pushed through). Use a fan. Use (a little!) oil (ABS and Nylon seem to do better). Some old E3Dv5’s had a brass nozzle that was incorrectly machined which exacerbated the problem (use lots of oil – 2 drops at start of every print).

3. When changing filaments going low (ie, going from ABS to PLA), you could have some ABS residue. If that makes it to the tip, it will jam because it won’t extrude at the low temp.

4. When changing filaments going high (going from PLA to ABS), you could have some PLA leftover. That can carbonize at high temps and cause a clogged tip.

5. If your thermistor falls out, the tip will get too hot and will carbonize anything in it (and probably set off a smoke detector!).

6. I imagine, if you’re commonly printing with filled filaments, you will start causing scratches on the plumbing. I’ve not noticed that yet (and I don’t run anything that exotic often)… disassemble and polish with a pipe cleaner and rouge (rinse when done!).

2-5 can be dealt with using Nylon-clearing if you have an all-metal-hotend (230 kills your PFTE tubes).

Oh… and for the “acetone wash” - to make it more effective (and freaking dangerous, so proceed with caution):

1. Mix 50-50 MEK-Substitute and Acetone (MEK substitute [NOT MEK] works better on PLA). [Not the dangerous part, but makes vapors more easily than pure acetone]

2. Heat the parts before you drop them in. Agitate afterwards. Danger! Do not light on fire or blow yourself up as these are explosive/flammable!

You forgot about the “cold pull” method! That’s the easiest and best. There is a version below talking about doing a nylon-cold-pull but any filament will do.

Heat the filament a bit below printing temp (200C is fine for ABS or PLA) and shove some filament in there so there is good contact (this is in case there was a retraction). Then cool the head to the “cold pull” temperature (about 90C for PLA and 120C for ABS but temperatures can vary by 60C depending on nozzle design and filament diameter). Then pull real hard on the filament. It should take at least 1kg force - usually more like 5kg or 10 pounds. If it comes out too easily then lower the temp. If it doesn’t come out at all raise the temp until you learn proper cold pull temp for your nozzle and plastic.

It should come out in the exact shape as the inside of the nozzle. Complete with black specs of gunk and any cloggint things like sawdust or dust.

7 months later
8 months later

Thanks for the awesome info! These are the top problems I’ve had: Heat creep, hot end temperature too low, nozzle too close to the bed, inconsistent filament diameter and dust/particles that get stuck.

When particles get stuck, I also use the cold pull method:

Step 1: Heat the nozzle to printing temperature and manually feed about 10cm of filament through the hot end (where the bowden tube was). Try and keep the filament as straight as possible. Natural or clear coloured filament works best so you can see the residue when you pull it out. If your hot end is too clogged to get anything out of the hot end, take a thin wire and a pair of plyers and stick it into the tip of the nozzle to clear the blockage.

Step 2: Once you have some filament coming out of the nozzle, bring the nozzle temperature down (120C for ABS, 90C for PLA, and 100-140 for Nylon). Try to use the lowest temperature possible for this step. It should be hot enough that the filament is malleable but not so hot that it is too soft. Be sure to cut any filament off that is dripping from the nozzle before you start the pull.

Step 3: Pull on the top of the filament until you feel it start to slowly give out. If it comes out too easily and there is no residue on the end, lower the temperature. If you have trouble pulling it out, raise the temperature until it does.

I give a more detailed break down of fixes to some of the other problems as well in my blog 1. Hope this is helpful!

11 months later

I’ve found a great way to clear a ptfe tube. Set the oven to 400F (for a PLA clog) and put the tube in there for 10 minutes tilted on a piece of aluminum foil. When you pull it out, the PLA will push out very easily.

Ive found that that clears the tube completely but it tends to clog again during the first print.

Experimenting with treating the tube with a silicone based lubricant now…

1 year later

I got a problem like this when I was sharing with my friends who were very enthusiastic about 3D printers, but because this happened they doubted it seemed like overcoming the jam on a 3D printer was quite difficult

this my friends website www.blogprinter.net 2 he share about printer and want to sharing tutorial and design 3D object too

i can vote for this. I have a printer with a titan extruder and a e3dv6 and capricorn tube in between (all direct from e3d). ABS works fine… super crisp prints

PLA would work only for small prints but not the hour long ones. Canola Oil did the trick for me, but it has to be applied all the time but only a VERY thin coat. So i printed a filament cleaner and add a few drops on the sponge inside it

to a great extent that also helped me with my stringing issue