
Im gona build it, i think i learn alot but dont have to start from nothing. It sound fun and if something things are not straight or dont look ok i can machine it with perfect precision here. I love building stuff so i have a wood and metalshop with old but accurate machines. A big thx for answering about firmware!
Skip to main content
Hey
This is a great printer for the price, but does take a good bit of tweaking and patience. I’ve made numerous modifications and documented some of them in a blog here http://www.nutz3d.com/ 2
I had trouble finding the stock firmware for it and had to start with current Marlin release and modify the parameters by recording the values from LCD and then translating them in to the firmware parameters.
You might also find that the boot loader hasn’t been programmed in to your Mega2560 processor which will stop you uploading new firmware. I did manage to crack this and have detailed it in the blog too.
I had some great prints intially but got a few jams to have upgraded to a proper E3D v6 hotend after trying the E3D clones - go straight for the real thing. I also only use Verbatim filament as it rarely jams. Make sure your bed screws don’t come loose, use some loctite on them as this will affect accuracy and layers will not be on top of each other. I’ve also upgraded the threaded bar to lead screws which much improved my layer step.
Good luck and I’m happy to share my Marlin branch with you or help out with anything else.
Cheers
Dave
Welcome to the fun, frustrating world of 3D printing. There’s a lot to take in, so don’t worry.
Building your own 3D printer is a great way to get started, since you know what everything does. You won’t treat it like an Epson that you’re afraid to open up. When building a printer, make sure everything is square. It is absolutely important that the three axes are perpendicular.
You’re more than likely going to need the Arduino software. Go ahead and grab that, and read up about how Arduino works. The controller board that comes with your printer is more than likely going to be Arduino compatible, and this is the software you need to use to get the firmware onto the board.
You’ll probably start with Marlin firmware. It’s a big series of files but not to worry, the only one you really need to deal with is Configuration.h. All the settings for dimensions, temperatures, end stops etc are in there.
You’ll want to have a functional understanding of G-Code. G-Code is the language of CNC machines. It looks a lot harder than it is, and a complete reference can be found on the Reprap wiki (google 'g code reprap" ). This will help you set up your before print and after print routines, makes it a bit easier to calibrate the machine, and will eventually allow you to pull off some cool printer fu by directly editing part files.
I recommend Tech2C’s youtube channel. In addition to his fun Oz accent, he’s got some great information on calibration, upgrades, different filaments, and even building your own printer from scratch.
Thingiverse is a good resource for objects to print. You’ll probably want to start out downloading STL files rather than designing your own models. There you can find parts to help calibrate and test your printer.
You will need a slicer. That turns an STL model into G-Code your printer can read. I have experience with three: Slic3r, Cura, and Simplify3D. Slic3r is free, and it gives you a lot of options for how to set the printer up, but it can be difficult to dial in if you’re new. Cura is made by Ultimaker and released to anyone who wants it for free. It’s my go-to slicer as it’s simple to use and has some neat “magic” features, but it can be difficult to customize and it’s a little schizophrenic when doing things with a lot of bolt holes. Simplify3D is the best on the market, but it costs $150.
Good luck, have fun, and enjoy the process of drinking from a fire hose!
Sturdy and Reliable But you have to Calibrate runs on Merlin with a All in one board and electronic Motor tuning worth what you payed for it Limited to PLA and ABS but you can use PETG and HIPS I warn you not to get a Nozzle smaller then 0.035 thicker more viscus plastics and low Temp plastics (if you intend to cast part’s) will burn and Jam the Nozzle. Also throw out that Aluminum hot end and Use a Block, Cartridge Heater and Brass Barrel. Pain to set up but if you get a Jam it is easy to clear.
I thought all nozzles where made from brass. I guess i will make a new one as soon as i can measure the other one. I think it will arrive tomorrow but then its work and probably no time to even look at it.
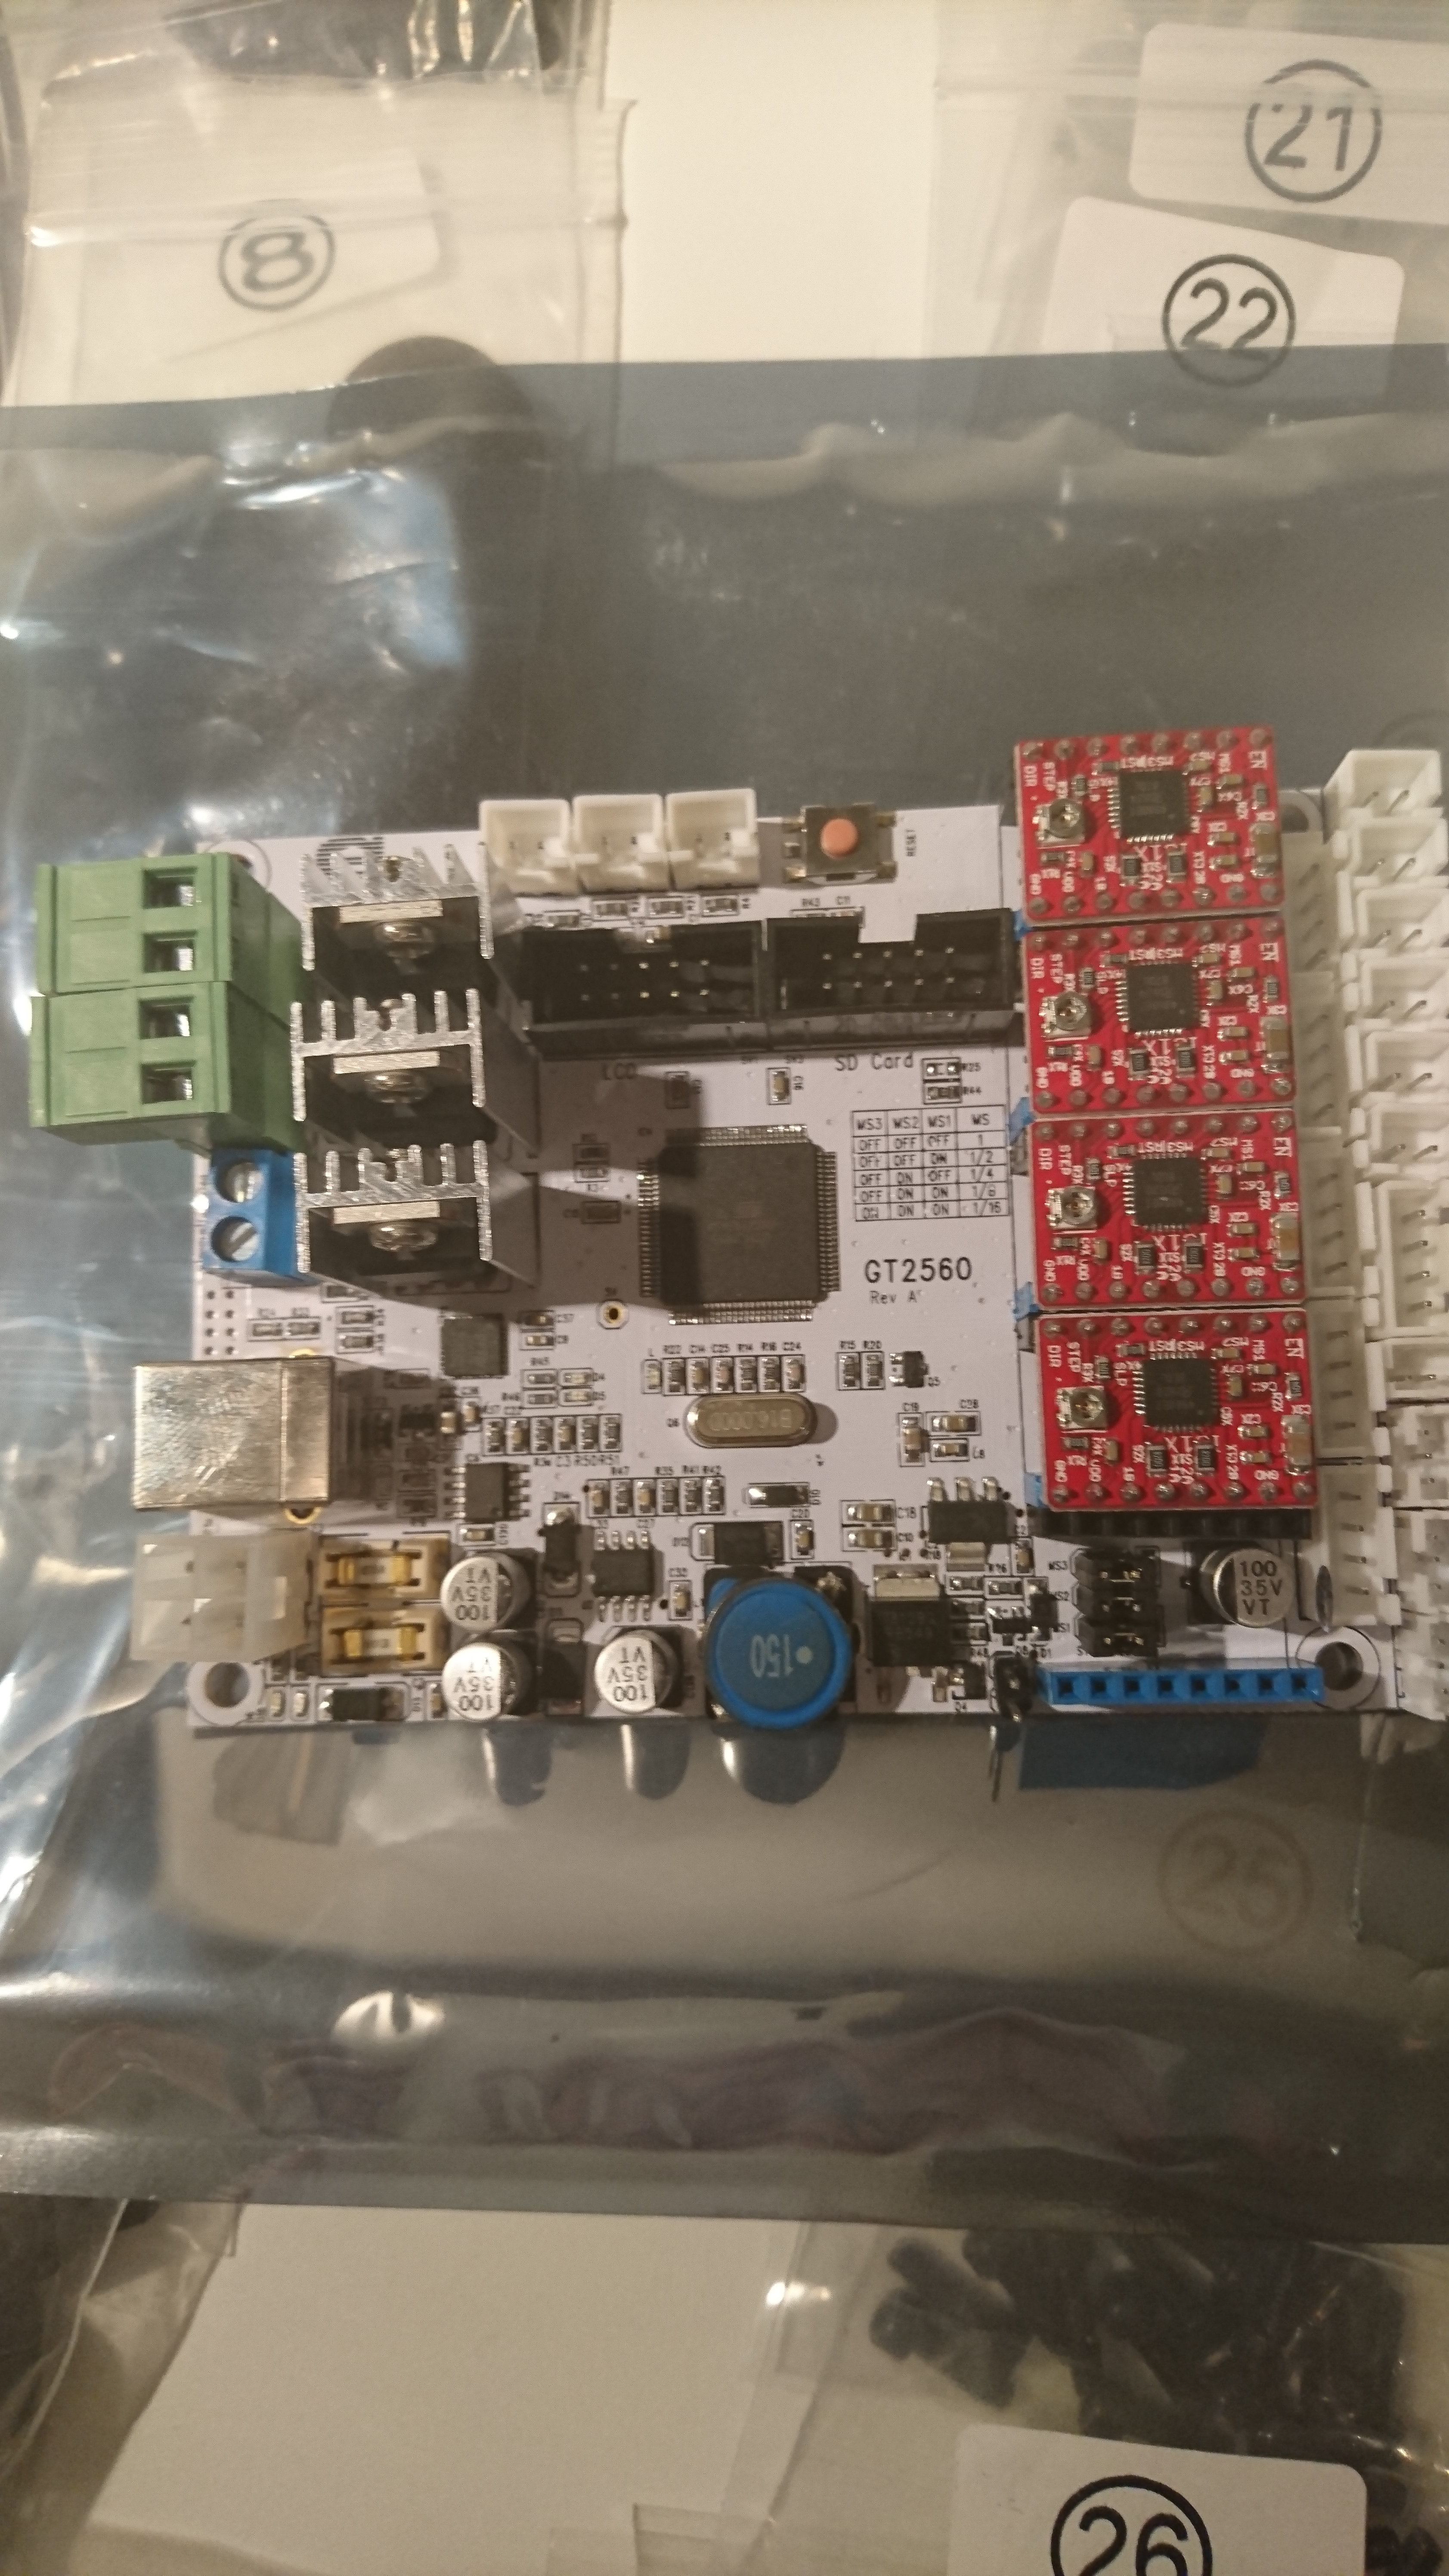

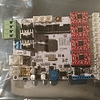
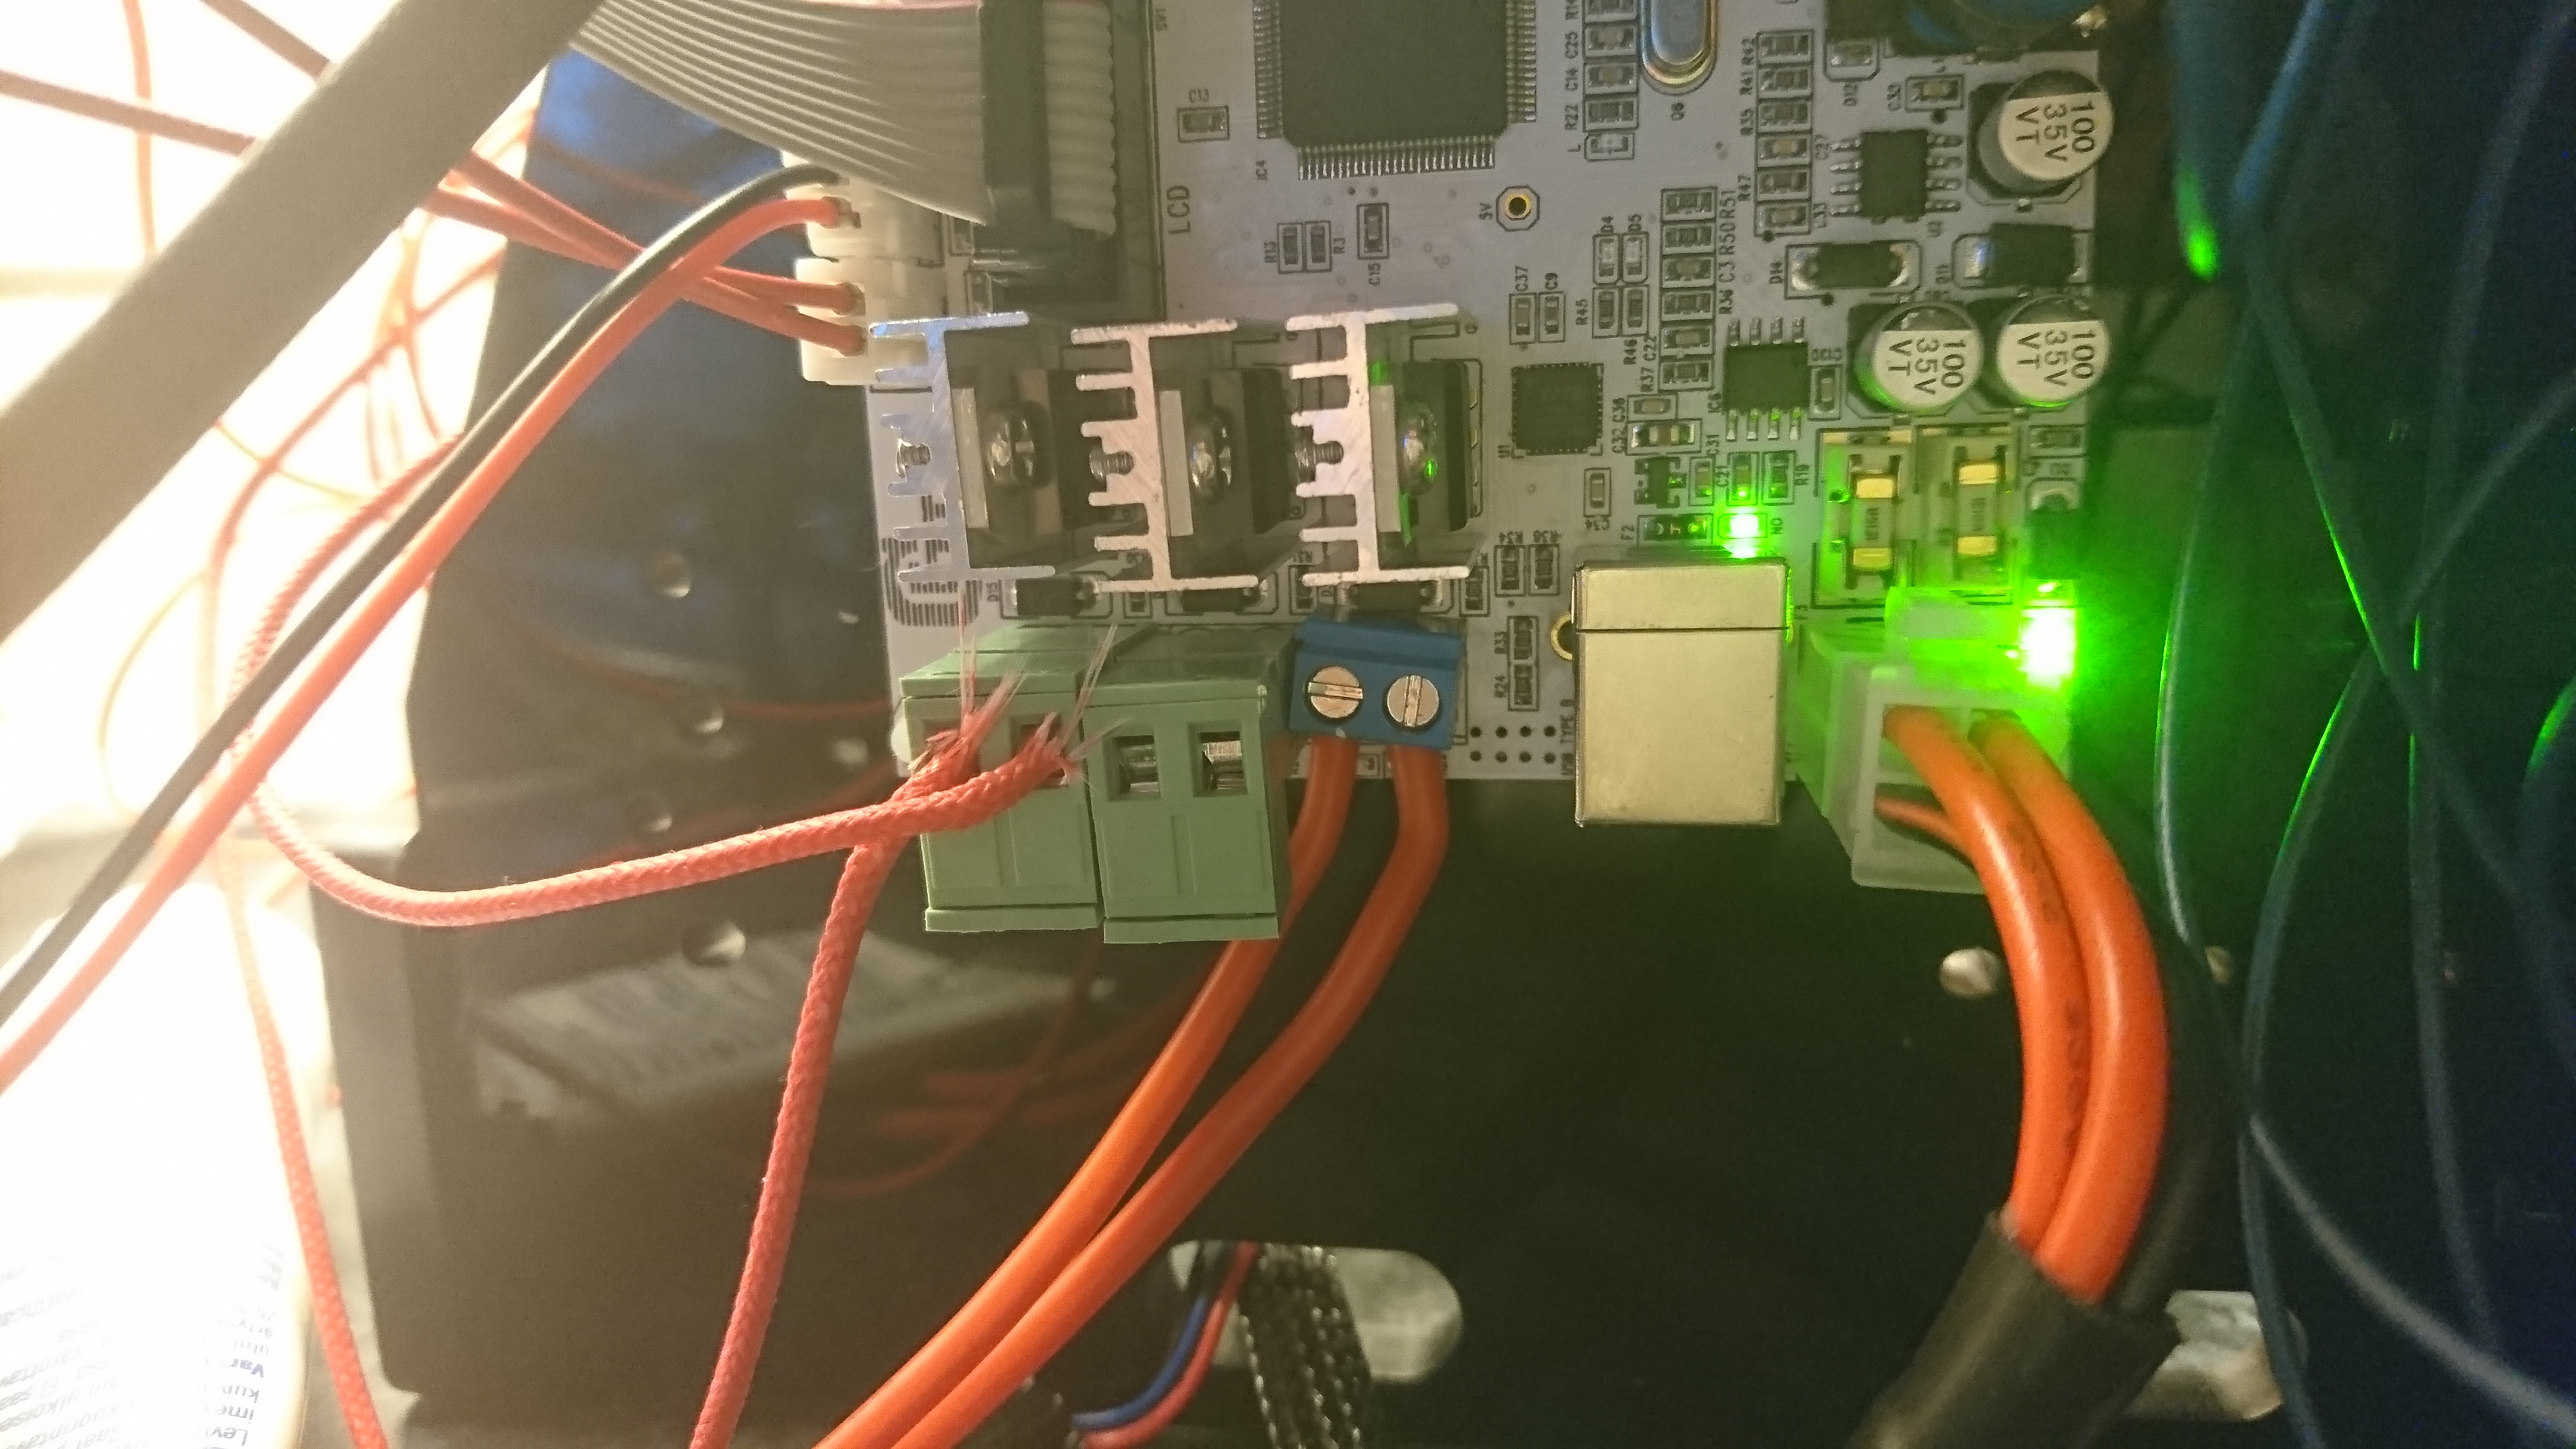
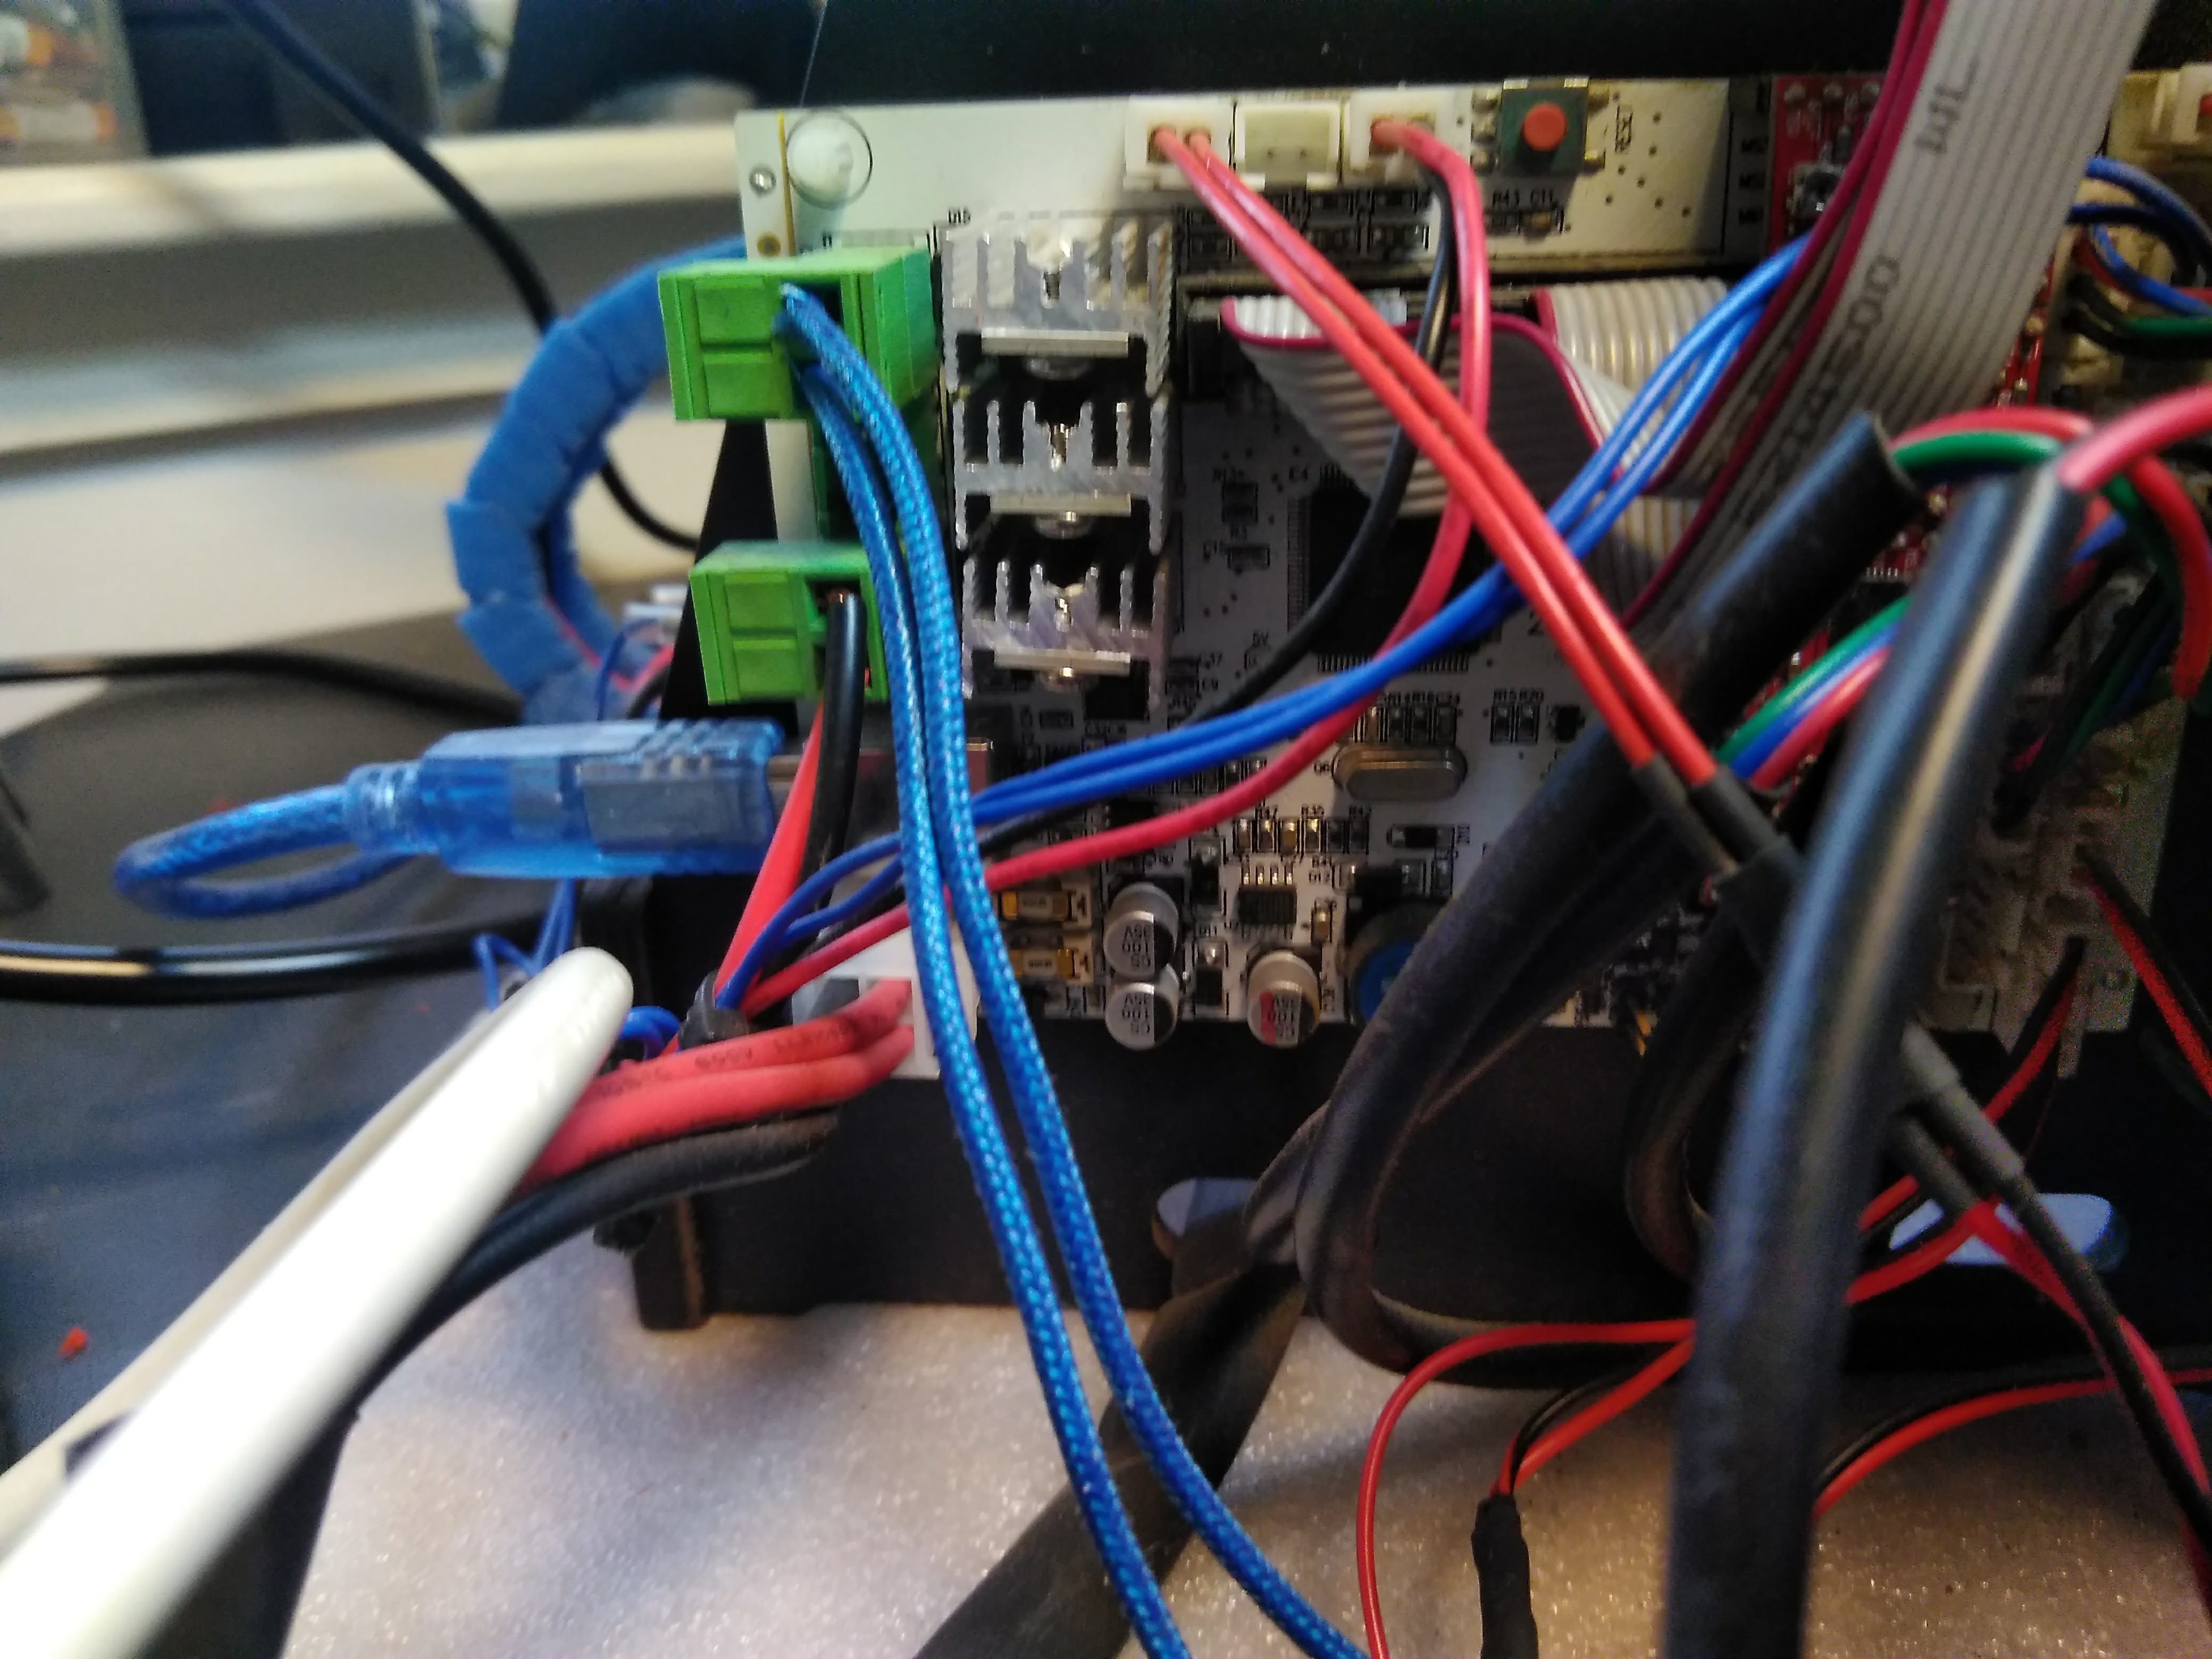
As expected that’s a GT2560 board in case you were wondering! There, I saved you about an hour of internet rummaging 
As a rough guide it took me about 4 hours to assemble my first printer but that may be because I was very familiar with the design due to the amount of research I did beforehand… but it shouldn’t take you too long!
One of the first things you may want to print are some self centering Z couplers.
If you go onto my 3Dhubs page or look me up as Acrimonious Mirth on Thingiverse you’ll see both parts I’ve designed for the same printer build as well as collections of mine that include the Z coupler and printed spares and stuff. You may find those useful 
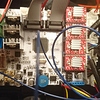
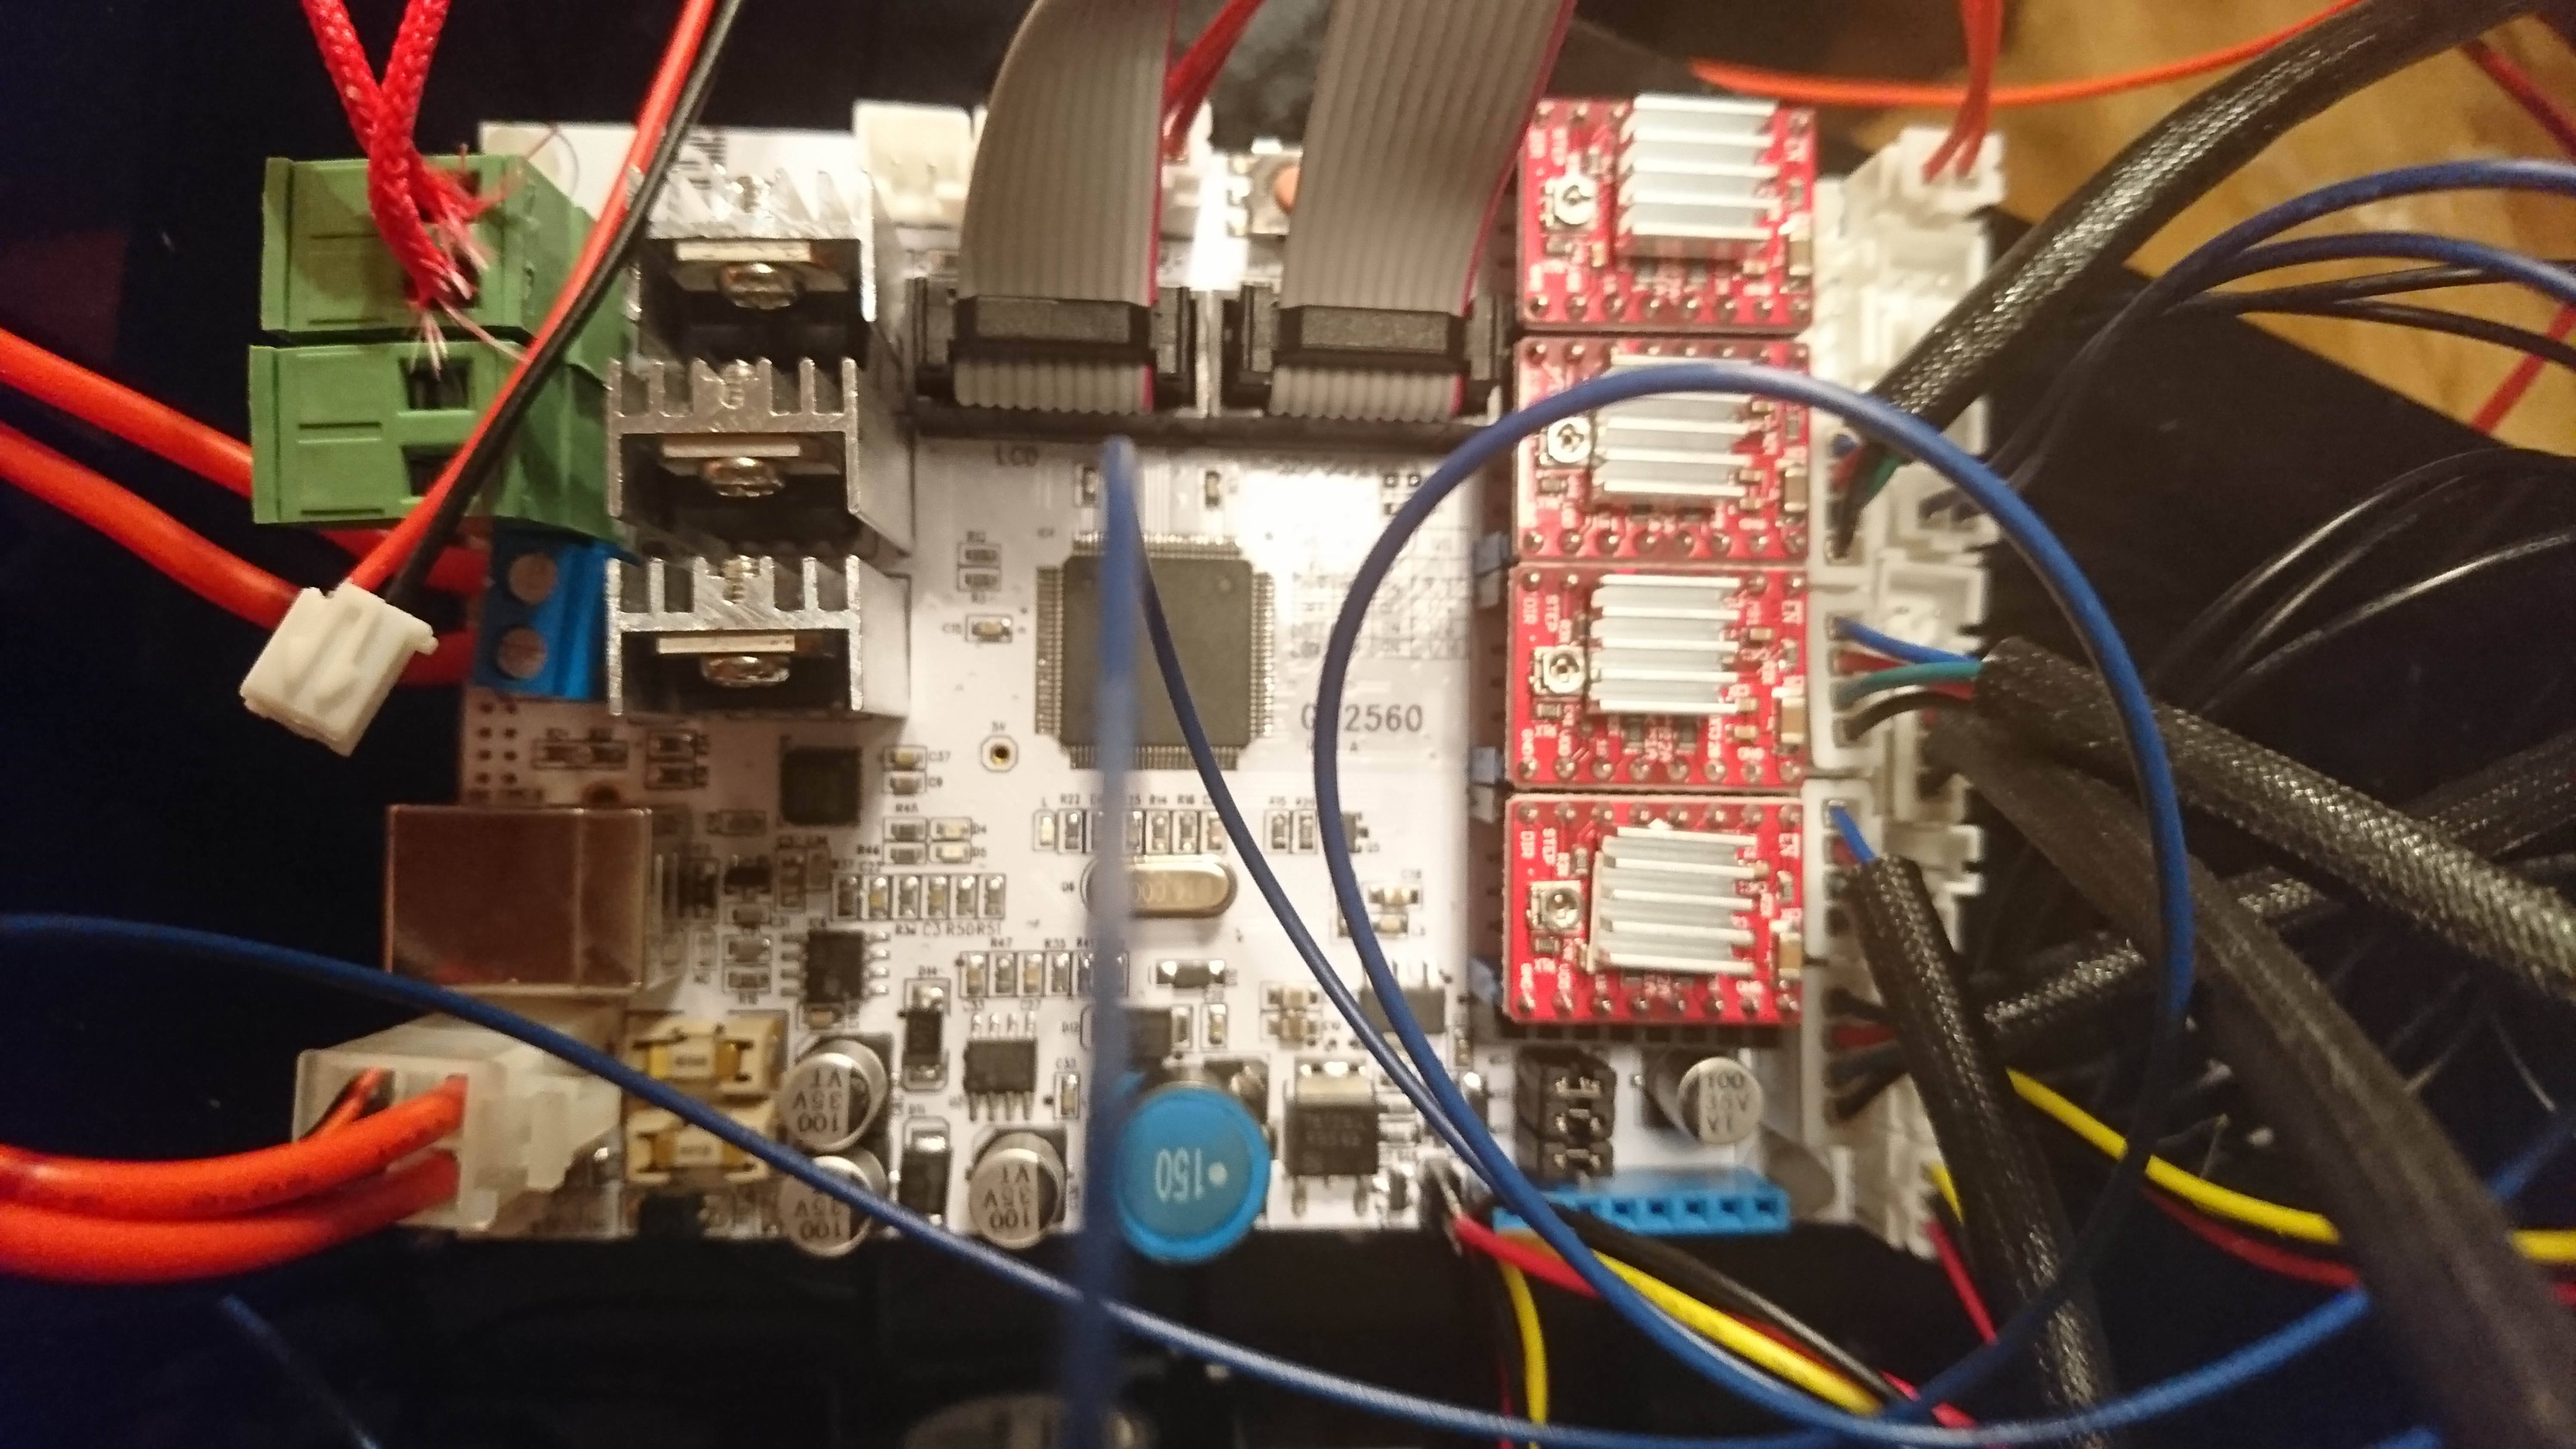
Also the wires going to your X carriage… wrap those in spiral wrap or even electrical tape to keep them tidy and stop them rubbing on the frame as you use the machine. Also get a decent sized fan and search “MOAB GT2560” and your fan size which should get some results for fan mounts that clip onto your motherboard. Keeps things nice and cool!
I hope this isn’t too overwhelming, but we’re always here if you need any help! Having been where you are though, my Thingiverse may help you a lot
I will check them out after the build is done the parts for z axel. I will have 15 minutes here and there with kids home so might take a couple of days. Probably i will post here and give a shout if (when) i get stuck.
Hi again. Its built. Wires everywhere still but eill sort that out after i find what i did wrong… There are a lot of images on gt2560 but whatever i look its the wrong connections. I dont know where rhe steppermotors are supposed to be. Took it by chance and so also with everything else. The z axel is up down or back and forth? And what is the other axels? Guess i sleept on that math lesson… I got a faul also on display. Says error mintemp. Hope you could find the time for this.
Standing in front of the printer, X is right-left, Y is in-out (towards and away from you) and Z is up-down.
I’ll have to leave info about the error to people with more experience with the electronics.
Wiring diagram for this board:
http://www.geeetech.com/wiki/index.php/File:GT2560_wiring.jpg 1
Manufacturer wiki:
http://www.geeetech.com/wiki/index.php/GT2560
As you have two motors for the Z connect both, doesn’t matter witch Z motor to witch connection.
The Error mintemp is an error message meaning that one of the temperature sensor is not connected to the right place(one for print head and one for the heated bed)
Check the wiring diagram and connect them correctly, polarity doesn’t matter as they are a basically a resistor.
The Coordinate system was answered already.
T.
I checked and checked again. Nothing is wired wrong and the cables seems ok. Anything else i should check? Thanx
If i short the connector it shows max temp. That means that the wire to tha heatbet is broken if i understand correctly?
Hey
If you have a multi-meter it is worth measuring the resistance on both your temperature sensors at the cable end. There should be around 100K ohms depending on the sensor type used but can vary from around 10K to 200K - its not really the actual value you are interested though. If it is open or short circuit something is wrong and you’ll get an error which is designed to avoid heaters being switched on if the sensors fail.
You should also trying swapping both temp sensors around to see if the message changes. This helps ensure the connector positions are correct. Also removing one at a time will tell you which one is causing the error.
Failing all of that, try fitting a 100K resistor to the circuit board connector and see if the message goes away. DO NOT run with this in place though
It’s also worth noting, when I was looking over the circuit wiring link above, don’t connect your hotend cooling fan to the PWM connector. The PWM connector is controlled by your slicing software and gets slowed down or switched off. This results in hotend jams for sure. Reserve it for any filament cooling fan you add later where the PWM control will allow it to be switched off during the initial layers.
Cheers
Dave
If you shorted it and it says max temp that is normal as wires have almost no resistance and a thermistor decreases in resistance as temperature rises.
if your wire or thermistor is broken it should say “min temp” and refuse to heat.
Also as previously said, X is left to right, Y is back to front and Z is up and down.
The board should have names for the connectors on its back, mine did.
If you’re all set then put some grease on all the bearings, tension it and get started with moving all the axis individually. Then home, test heating and try your first print
Something is still wrong. In the upper left of the display it says its getting hotter when i preheat the nozzle is that right or should that be the heatbed? The other side (right) is still 0. I dont get errors when i move the heatbed therm checker to the wrong place… But i cant heat the board either way.
Hmm… are you preheating from a preset? From your computer or from the LCD menu try heating bed to 70°C.
In LCD menu that is in the menu, setup/prepare (I don’t remember the name properly, sorry) then preheat ABS or PLA then go to the main menu again and scroll down to control (I think it is, again, my printer isn’t with me right now!) and in it you should see nozzle and bed temp. Change those to nozzle = 0 and bed = 70.
your printer may have a preheat option for the bed only, in which case you can forego the second step.
If your bed doesn’t heat up carefully check the nozzle. If the nozzle is also cool then it may be a wiring issue for the bed.
Im trying now. Heatbed is still cold. Maybe its the wrong connection on the heatbed? The wirediagram say is this one but i will try to set the heatbed on on nozzle two and test since it ony not gives me faultcodes when the bed is connected to the right place. I mean i put the temp wires on the wrong place and than it reads ok. Strange but who knows
Didn’t change a thing. Need to find my multimeter and check all the wires i guess.
Hey
It’s worth noting that the 3 sensor inputs and 3 heater controller outputs are mapped in the software so in theory could be different between different builds/variants.
Best to confirm the sensors are correct resistance, wires ok and start from there. You can also buzz the heater wires for good connection, not sure what resistance they should have - probably pretty low.
Putting a volt meter on the heater output when preheating will also tell you if the heater is being supplied any voltage. This is a PWM output so the value will vary but again your really looking for something or nothing.
Apologies, if I’m telling my granny how to such eggs on the electronics.
Cheers
Dave
Next issue  Downloaded drivers and repetier 1.6.2 and manually tried everything. The z axel only moves on one side. If i take it out of the motherboard the other one can move. Any ideas? Thx
Make sure the both Z motor cable has the same orientation in the motherboard (same order of cable colors also), if the 2 motors don’t work together,it means the motor driver doesn’t have enough power for the 2 motors adjust the small potentiometer to give it more current:
https://www.youtube.com/watch?v=GNfKZ7o_7PI
One more thing, if you have heat sinks for the driver install them now , and prepare a Fan witch will cool the drivers.
It was an easier fault. The z axis isent straight. It wobbles like there i no tomorrow… Will get new onces. Thanx for the help