Go to homepage
39 / 42
Dec 2016

Welcome to the fun, frustrating world of 3D printing. There’s a lot to take in, so don’t worry.

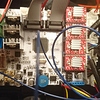
Building your own 3D printer is a great way to get started, since you know what everything does. You won’t treat it like an Epson that you’re afraid to open up. When building a printer, make sure everything is square. It is absolutely important that the three axes are perpendicular.

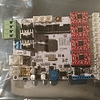
You’re more than likely going to need the Arduino software. Go ahead and grab that, and read up about how Arduino works. The controller board that comes with your printer is more than likely going to be Arduino compatible, and this is the software you need to use to get the firmware onto the board.

You’ll probably start with Marlin firmware. It’s a big series of files but not to worry, the only one you really need to deal with is Configuration.h. All the settings for dimensions, temperatures, end stops etc are in there.

You’ll want to have a functional understanding of G-Code. G-Code is the language of CNC machines. It looks a lot harder than it is, and a complete reference can be found on the Reprap wiki (google 'g code reprap" ). This will help you set up your before print and after print routines, makes it a bit easier to calibrate the machine, and will eventually allow you to pull off some cool printer fu by directly editing part files.

I recommend Tech2C’s youtube channel. In addition to his fun Oz accent, he’s got some great information on calibration, upgrades, different filaments, and even building your own printer from scratch.

Thingiverse is a good resource for objects to print. You’ll probably want to start out downloading STL files rather than designing your own models. There you can find parts to help calibrate and test your printer.

You will need a slicer. That turns an STL model into G-Code your printer can read. I have experience with three: Slic3r, Cura, and Simplify3D. Slic3r is free, and it gives you a lot of options for how to set the printer up, but it can be difficult to dial in if you’re new. Cura is made by Ultimaker and released to anyone who wants it for free. It’s my go-to slicer as it’s simple to use and has some neat “magic” features, but it can be difficult to customize and it’s a little schizophrenic when doing things with a lot of bolt holes. Simplify3D is the best on the market, but it costs $150.

Good luck, have fun, and enjoy the process of drinking from a fire hose!

Sturdy and Reliable But you have to Calibrate runs on Merlin with a All in one board and electronic Motor tuning worth what you payed for it Limited to PLA and ABS but you can use PETG and HIPS I warn you not to get a Nozzle smaller then 0.035 thicker more viscus plastics and low Temp plastics (if you intend to cast part’s) will burn and Jam the Nozzle. Also throw out that Aluminum hot end and Use a Block, Cartridge Heater and Brass Barrel. Pain to set up but if you get a Jam it is easy to clear.

Im trying now. Heatbed is still cold. Maybe its the wrong connection on the heatbed? The wirediagram say is this one but i will try to set the heatbed on on nozzle two and test since it ony not gives me faultcodes when the bed is connected to the right place. I mean i put the temp wires on the wrong place and than it reads ok. Strange but who knows

Didn’t change a thing. Need to find my multimeter and check all the wires i guess.

Hey

Here is a pic of my connections.

Blue wires is my Hotend Heater

Red/Black is my Heatbed Heater

Left Hand Temp (Red/Red) is my Heatbed sensor

Right Hand Temp (Red/Black) is my Heatbed sesnor

It looks like you have a sensor in the wrong place.

Cheers

Dave

Hey

It’s worth noting that the 3 sensor inputs and 3 heater controller outputs are mapped in the software so in theory could be different between different builds/variants.

Best to confirm the sensors are correct resistance, wires ok and start from there. You can also buzz the heater wires for good connection, not sure what resistance they should have - probably pretty low.

Putting a volt meter on the heater output when preheating will also tell you if the heater is being supplied any voltage. This is a PWM output so the value will vary but again your really looking for something or nothing.

Apologies, if I’m telling my granny how to such eggs on the electronics.

Cheers

Dave

Oh so stupid… It works! So simple. It was the temp wires that was wrong. Thanxs!

Next issue :frowning: Downloaded drivers and repetier 1.6.2 and manually tried everything. The z axel only moves on one side. If i take it out of the motherboard the other one can move. Any ideas? Thx

Make sure the both Z motor cable has the same orientation in the motherboard (same order of cable colors also), if the 2 motors don’t work together,it means the motor driver doesn’t have enough power for the 2 motors adjust the small potentiometer to give it more current:

https://www.youtube.com/watch?v=GNfKZ7o_7PI

One more thing, if you have heat sinks for the driver install them now , and prepare a Fan witch will cool the drivers.

It was an easier fault. The z axis isent straight. It wobbles like there i no tomorrow… Will get new onces. Thanx for the help