This must be the most unexpected, yet a such a obvious thing we could have done to start maintaining our Form 1 + resin tanks. If the print fails (which barely ever happens), it is always a struggle to remove all those parts from the tank.
@Alan_Nguyen pointed out an obvious solution - why not printing one of those Tank Combs for it. And apparently there was one already designed and placed on the Thingiverse.

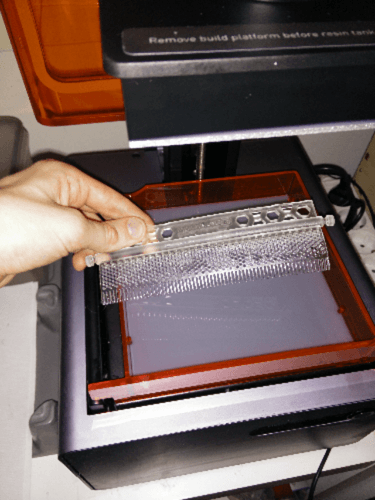
We have just printed it with the Form one to clean the Form one and it works perfectly!
Just make sure to clean it afterwards for the holes not to get filled in. Since it’s made out of resin I guess cleaning it with alcohol is not the best idea - so I clean them with water. Any other ideas?
Make sure to share any of your tips in the comments bellow! 
5 Likes
Hi Arnoldas,
How many times (maby in %) your prints went wrong on Form1? Ive got Form1+ and for me its like 90% of prints are failed. Im trying to work it out but im not happy with my printer
This printer cannot effectively print anything larger than a golf ball. If the slices get too large it just causes too much suction. I fought with them till they gave me my money back. I bought it to print fixtures I had designed for the CMM I run. I had made the designs as skelital and open as possible to create the smallest possible area in each slice, however the prints still failed. After a great deal of research I discovered that I wasn’t the only one with this problem. They will jerk you around there and tell you that they don’t have that problem and say that they will help you to figure out what is going wrong. Luckily I did the research on the forum in the first few days. That said I still had to fight with them and threaten legal action. The printer absolutely cannot use the advertised build volume, and when I contacted them about a return they told me that they cannot accept returns on the printer once it’s been used. I had to threaten them with legal action before they changed their minds and let me return the printer for a full refund.
3 Likes
The form 1+ can happily use it’s build volume. On several occasions I’ve printed large objects taking up most of the volume. My largest used around 350ml of resin and took around 14 hours to complete on the 100 micron setting. It came out perfectly.
I would suspect that this was down to operator error.
3 Likes
Do you expose the PDMS to air before each print? I was having many failures before making sure to do this. With resin in the tank you should use the provided scraper and run it over the PDMS layer exposing it to the air. Do this for a good few minutes. This is also good practice as the pigment in the resin drops out over time to sit on the bottom of the tank obscuring the laser from properly setting the resin.
You may also need to filter your resin. I filter mine through a 125 micron paint filter after every couple of prints.
Have you calibrated the z axis? I had problems getting prints to stick before calibrating the Z axis to move it closer to the tank.
How do your prints generally fail?
I thought the same thing… for a time, but after sending them my models, and trying to orient it several different ways, testing different support settings, basically everything in the book to get the minimum size print I needed, the part would fail. It’s nice you managed to get something that large, but I guarantee the slices had small surface areas. I got some prints to complete with multiple parts, and it had no problem with tall skinny parts. Bottom line is though if the area of a single slice gets too large, and this is a commonly known problem with the peel design SLA 3D printers, the print will either not completely separate from the tank, or cause the printer to bounce and throw things out of alignment. I exhausted every possible option for model orientation and support structure before I gave up on the printer. If this design worked so well, and I was wrong, and it was just user error that caused this problem then they wouldn’t have backed down, and would have stuck to their guns, and not buckled at the first breath of me challenging them on it.
Honestly, we’ve had like 80% success rate at least! We are printing fairly small objects , but there were some complex parts in them for sure. Now we’re on a fairly long streak of none failed prints actually , other than one experiment with flexible resin. I am quite surprised to hear that it fail so often for aome people.
1 Like
You hit the nail on the head though, small objects regardless of complexity tend to work. I printed extremely complicated small objects with no problem, and even printed several small objects at the same time with no problem, it wasn’t until I started getting into larger single slices that I ran into trouble. The problem is the peel step. If you get to where you have larger slices, the peel step can either not completely separate from the tank, or it can cause a bounce that will throw the machine out of calibration. You can build large objects so long as they are lattice structures, it’s why their test model of the Eiffel tower works so well. They make sure this stuff is not out there and super easy to find, but if you go to Google and type in Form 1+ failures, you’ll find form posts all over the place with people having the exact problem, and telling just about the same story of talking to support, being told that it must be user error, and to send them the models, and after a time finding that the printer just won’t do it, if they get a response at all in those cases. I was lucky and discovered all of this quickly and forced them into a corner where they had to refund my money.
1 Like
Can i ask if you filtered your resin through a 125 micron filter or similar? Did you also expose the PDMS layer to the air? I had many failures before doing both these things regularly. I haven’t found the orientation of the model to be all that important at times. I have found that conditioning the resin and the tank makes for more successes.
1 Like
I did the steps where I used the scraper to expose the PDMS to air between every print and actually thought I was having trouble with particles in the resin and completely cleared the tank of all resin, throwing away a small amount in the bottom of the tank, and starting with new resin straight from the bottle. Followed all the instructions to the letter, and had no success. After hours of research and almost an entire bottle of failed prints, I decided to move on and look for a printer that would serve the purposes I needed.
Cleaning it with alcohol should not be a problem. The resin is cured. The only real risk is not getting the uncured resin completely off it and catching little drops of alcohol in with the resin and then introducing the alcohol to the resin tank.
Another options would be to wipe the comb off as best you can and then set it out for the remaining wet resin to solidify in UV light. When it gets too clogged, toss it and use a new one.
2 Likes
Hi,
I’ll get to you on monday when ill be back in my place, and ill show u the pictures. Yest i was filtering the resin (i dont remember hole sizes but ill check it on monday. I was exposing PDMS to air. Nothing works. Some print are better the others but generaly its not working right…
I think I’ll give your second option a go. Is there anything else your using to clean the resin tank?
I printed that comb and have a word of caution. I had used a regular comb before, it was cut to width and worked well. This one printed great on a replicator after I sliced the back flat. I could not get it to fit in my Form for printing. I went to use it with clear resin the way I had used the hair comb and moved it too quickly causing a wave to go over the top front edge of the tank.
The tank was on the machine because it had become stuck in place. There was no amount of prodding I could do to get the tank loose. I ended up sawing a tab off one side, removing the top, front and back covers, removing the 4 nuts that are spring mounted under the tray frame to finally get the tray and frame out. After pouring the resin out. I proceeded to use the metal spreader and an exacto knife to break the surfaces between the plastic tray and metal frame. It was covered with semi cured resin. To do a thorough cleaning job I bought denatured alcohol to soak the metal frame in. It turned out part of the problem getting the tank out is that the spring loaded ball bearings in the metal frame had become stuck and would not move any longer. That got fixed.
As a preventative measure I applied some silicone lubricant to the ball bearings and will no longer be leaving my tank of clear resin in the printer for extended periods of time.
Exactly the same things, we are facing. Larger models tend to fail the reason we figured is also the peeling process. what a shame. Since on 3D Hubs you get queries from people believing in Formlabs advertisement and somewhat expecting these result… quite hard to explain to them, that its not that easy.
Using the Scaper from the Finish kit that you get with Form1+ used to work decently as well 
I am sorry to hear that this happened. It must have been a pain to deal with this…
Let the comb dry after (a short) IPA bath.
Yes, uncured+IPA in the resin tank will be a bad mix.
1 Like