BjornTM
1
Hi!
I’ve spent many hours on getting woodfill to print on my UM2, but after printing for a while the material simply stops coming out of the nozzle.
I’ve tried many things. Started with the Cura profile that was provided by Colorfabb of course. Then tried variations in speed and temperature.
I can’t find any recommendations about the fan speed though, so I don’t know if I maybe should lower it.
Does anyone have the golden tip for me on how to get this stuff printing?
Thanks
Björn
4 Likes
What is the nozzle size on that? I have heard rumors of jamming at and below 4. Just wondering before I take the plunge…
Hey Bjorn, you may find some nice tips on printing with @ColorFabb woodFill in here: Talk Manufacturing | Hubs
Hope it helps!
BjornTM
5
Thanks, I’ll check it out.
BjornTM
6
Hmm nothing I didn’t do yet…
Hi Bjorn,
I can at least share my experience printing woodfill fine on my UM2:
- nozzle temperature at around 205c (you can play with the temp setting to get different color effects; even with a Cura plugin to make it dynamic during the print)
- normal print speed (50 mm/s); faster won’t give better results
- 0.2mm layer height (to assure enough ‘flow’ through the nozzle, else it might block/burn at some point in the nozzle)
- I used glue-stick on the glass plate to fix the print and the plate temp at 40c
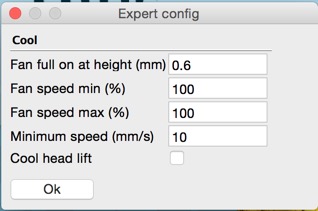
- Fan speed after the first 3 or so layers to 100%
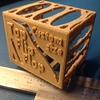
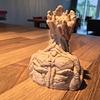
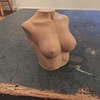
I print some small/delicate stuff and some bigger, more solid items. Woodfill is really good for print more solid/bigger objects. If you go on really fine details, then I might give a rougher finish.
See also the 2 pics attached.
Cheers,
Alain
1 Like
BjornTM
8
Hi Alain,
Thanks for your reply. Do you also print the first layer @50mm/sec?
In Cura you can set different speeds for for example the outline. What are you using there? Or do you print everything at 50mm/sec?
Thanks
Björn
You can use the default profile settings in Cura basically. So the first layers will print slower (I guess it is 30mm/s).
And make sure your nozzle is clean and no burnt residue is left.
1 Like
BjornTM
11
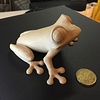
Le grande success!
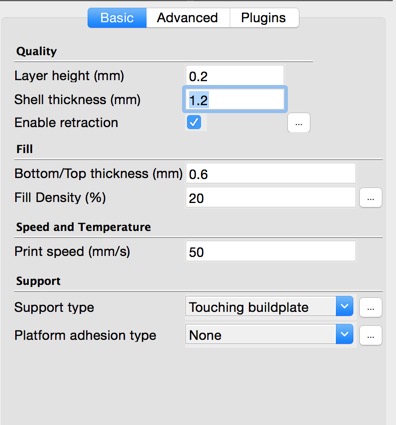
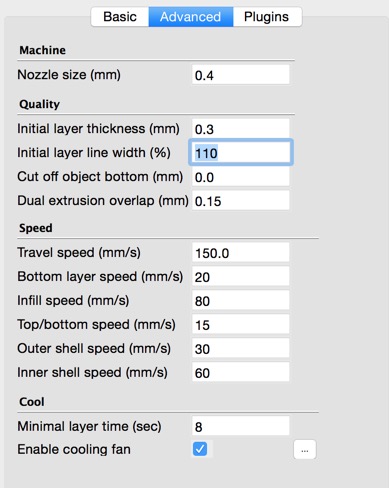
I did as you said and used the normal print settings with some changes (see attachments) and it actually printed just fine. I only need to print the supports a bit further from the rest I think.
This is very interesting, since all my previous attempts were based on the profile provided by ColorFabb on their website. It seems that something in their profile is fundamentally wrong for my situation.
Thanks for your help 
Björn
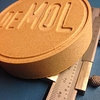
Filemon
13
Ps. what kind of print bed do you have? Looks amazing
That looks really nice indeed!
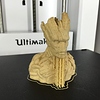
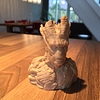
“I am grut” 
BjornTM
15
That’s buildtak. Works great. I have never used anything else, so I have never experienced the inconvenience with glue and tape etc.
It works in 90% of all cases, but I will get a second build plate without buildtak.
1 Like
BjornTM
16
The second attempt did fail again… Damn. It was over 2 hours in, and then suddenly the extrusion stopped again. It’s still way better than before since it stopped within 30 minutes before, but still no 100% success rate yet.
BjornTM
17
This is still my ONLY successful print with woodfill. I tried several other prints and all failed. My nozzle blocks every single time…
I have the same problem Bjorn, and I’m still searching for the most optimal setup. Any luck since the last post here…?
P.S. since i have lots of people asking me about woodfill and other special filament so I ordered 3dsolex “Olsson Block”, new modification for UM2 (link to the UM forum: http://umforum.ultimaker.com/index.php?/topic/7689-custom-heater-block-to-fit-e3d-nozzle-on-ultimaker-2/) and since it will allow me to change nozzle easier and to even be able to print with bigger nozzle I hope it will make all the difference when printing woodfill. But untill then still frustrated with failed prints.
BjornTM
19
I actually have an update: I printed 3 (Three) wooden objects without any problems now.
The trick in the end was to set the speed even higher.
I now have:
First layer: 20mm/sec (I think you might need to raise this for larger objects when the first layer takes very long)
Layer 0.2mm
Outer shell layer: 50mm/sec
Rest: 80mm/sec
Retraction: 5.5mm @ 40mm/sec
Layer 0.15mm
Outer shell layer: 50mm/sec
Rest: 100mm/sec
Retraction: 5.5mm @ 40mm/sec
For the rest of the settings I used the standard Cura Normal Print settings.
I noticed that even though I set 80 as overall printing speed and set the others to 0, that top and bottom still had variable speed. When I set the speed on 80 manually (so not on 0) it seems better and less risk of getting stuck at the final layers.
I tried the outer shell @ 80mm/sec but that gave a very ugly result.
Another trick I learned: In cura, you can add a second Ultimaker to your machines, but in stead of ultigcode you choose the Reprap / m… something. This gives you more options in the gcode, like printing temperatures, retract settings etc., so you don’t have to set them manually on the printer. I added a line to the starting gcode to make sure 30mm of material is extruded though, since in the default settings there is NO extrusion at the beginning. I’ll upload my profile later, so you can simply open it in Cura after adding and selecting the UM2 with different gcode setting.
1 Like
BjornTM
20
Whoops I pressed submit before I was ready.
The Marvin above is scaled 200% and printed @ 0.15mm layers. The others (attached in this post) are print at 0.2mm.