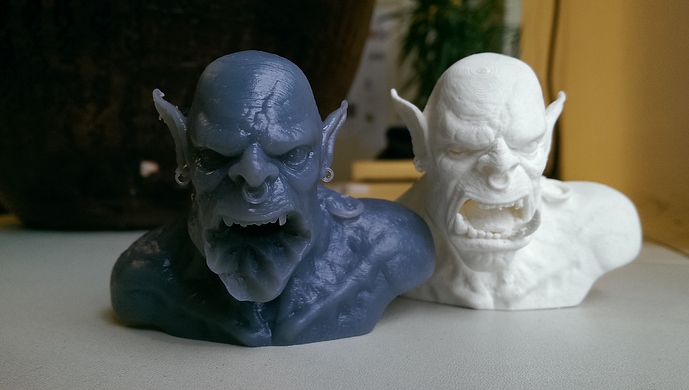
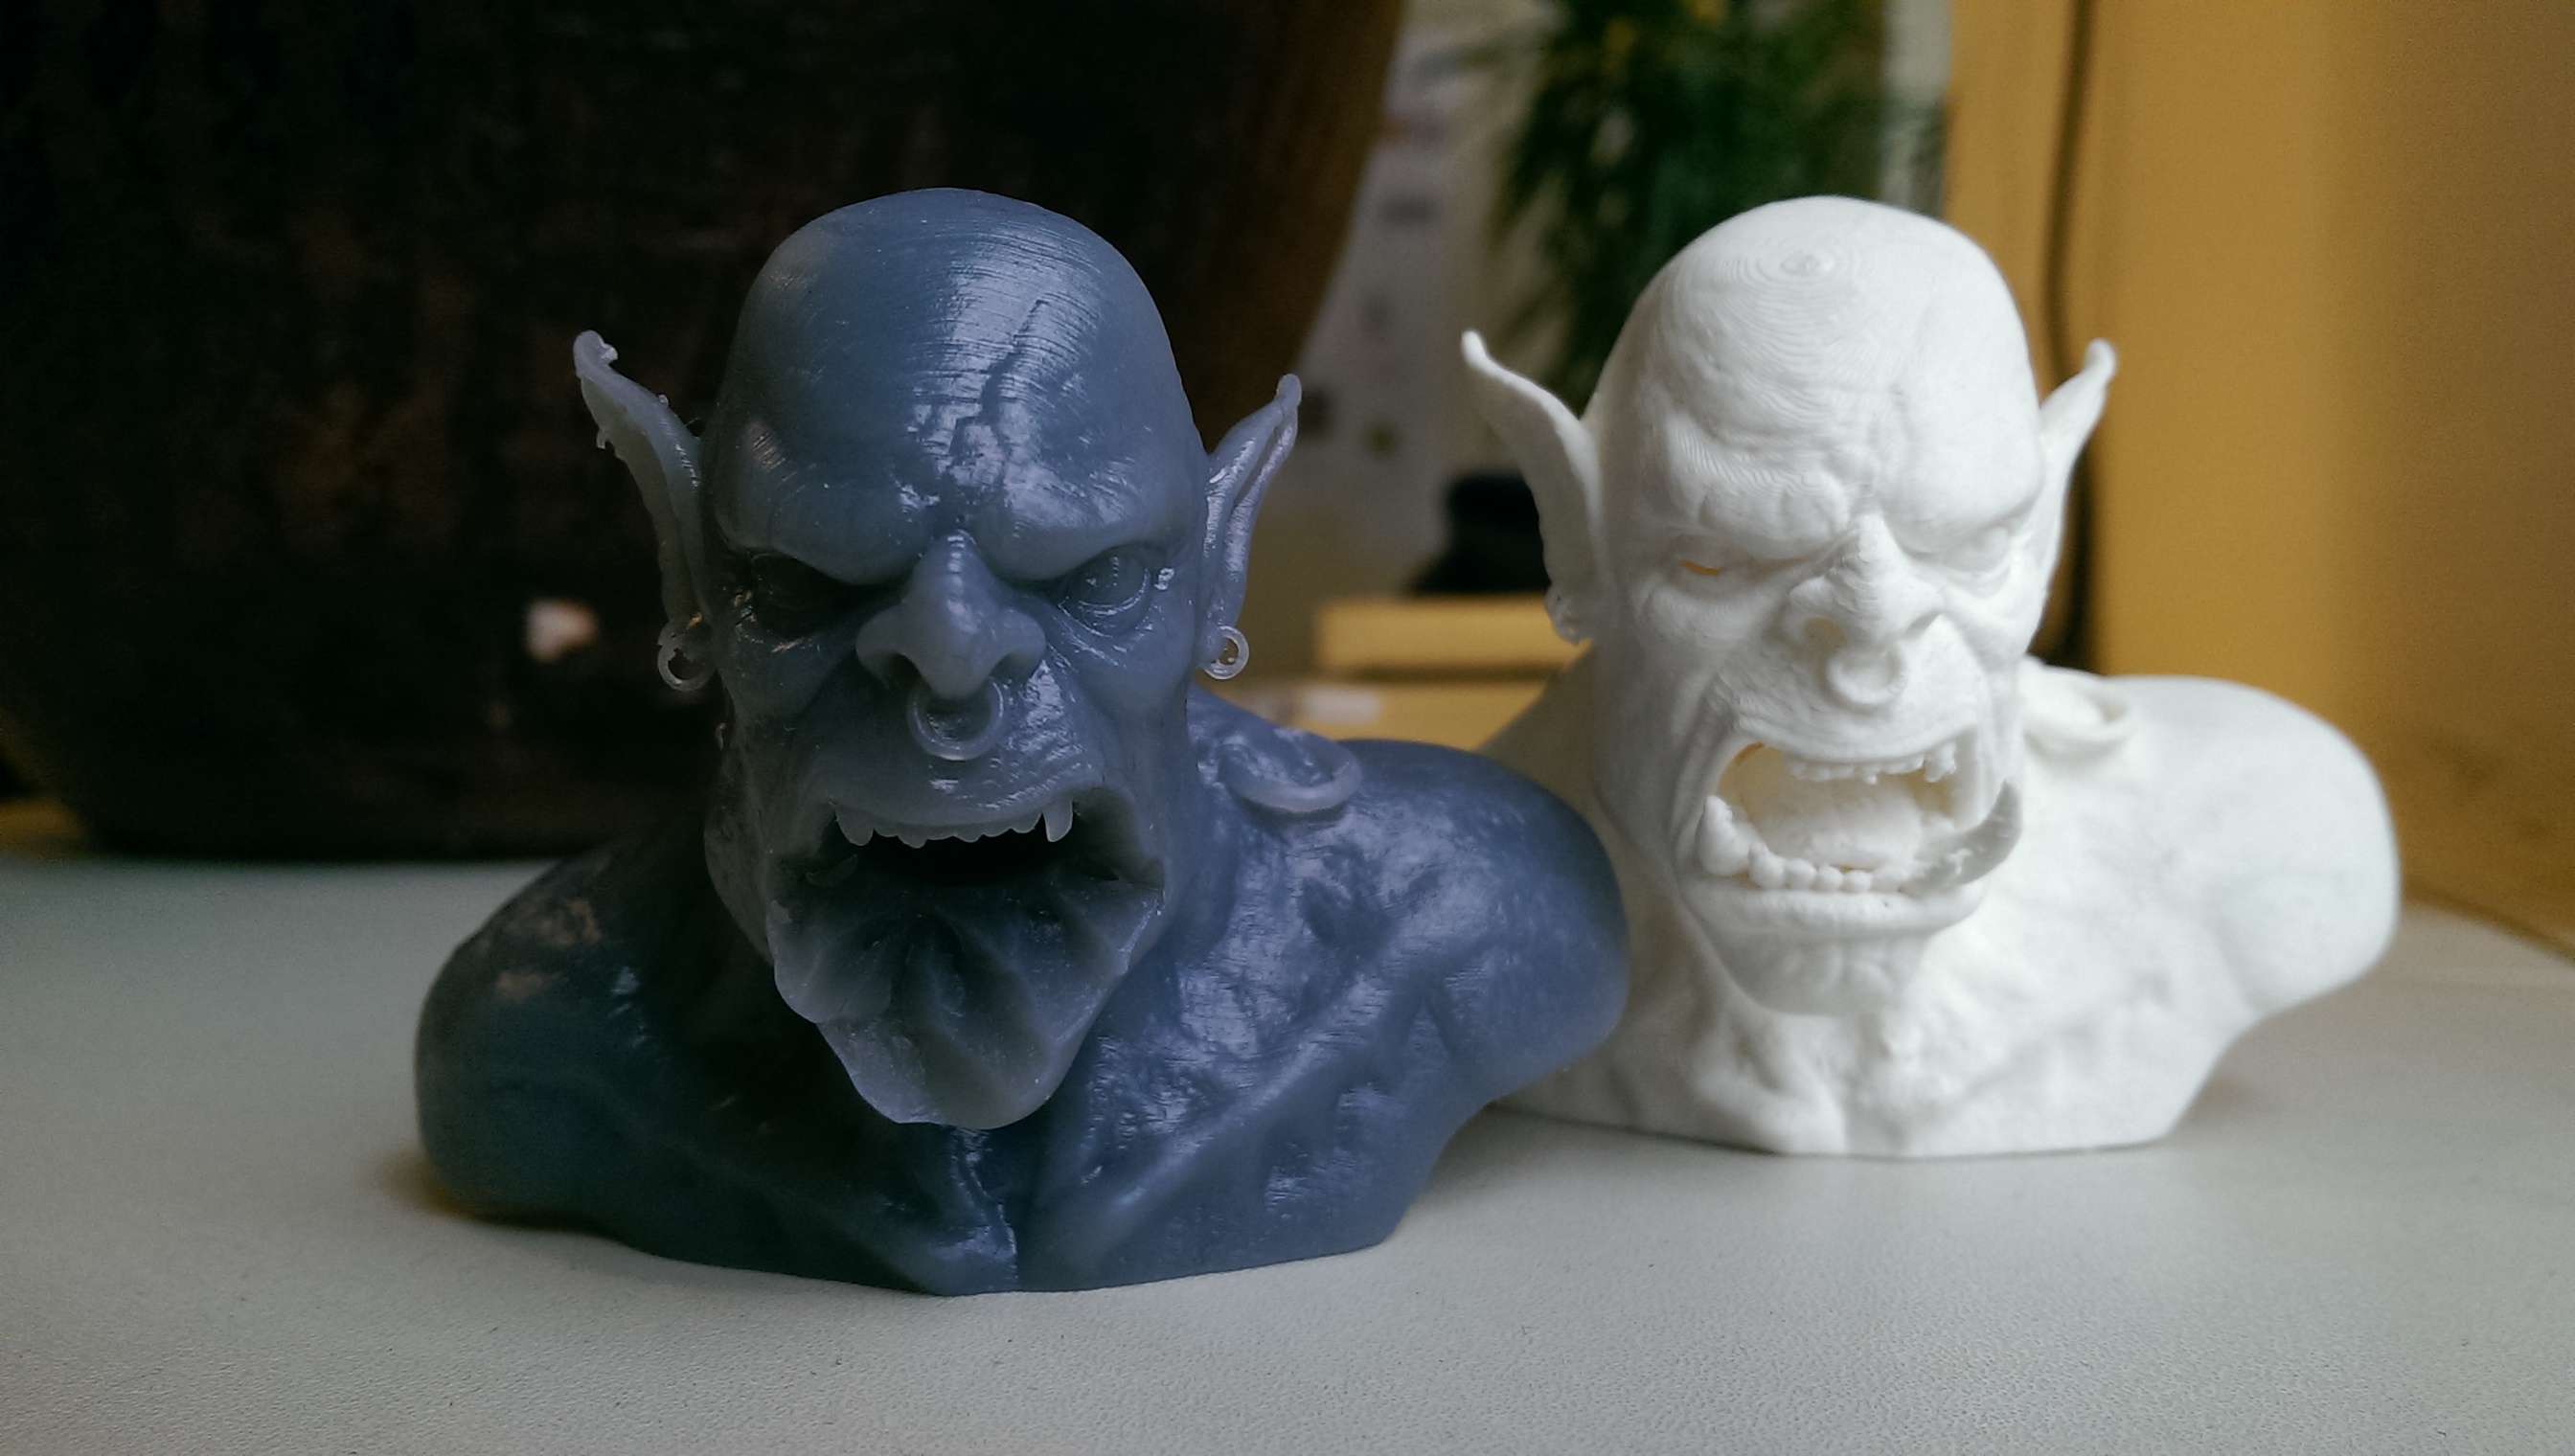
I’d like to make use of the expertise of all Form 1+ Hubs, I’m experimenting on the Form 1+ myself with a couple of my models and I’ve gotten some great results but also some disappointing failures. I was wondering if any of you had a clue as to what would have caused the print to fail here:
The model in the background gives a better image of what the print is supposed to look like. (This print was made on an Ultimaker 2 by Unifi3D 3.) The back of the model was actually facing the build-plate so the jaw was the last part that had to be printed.
What should I change to get better results? Orientation, support or something else? Or doesn’t the Form 1 like Orcs?
The biggest thing I see is that you’d want to look at hollowing the model. Reducing the surface area at each layer decreases the tension during the peel step. I’ve been using Meshmixer for this step.
Additional option specifically for this piece would be to cut out the lower jaw and print it separately. The orientation of the model likely led the unsupported jaw piece to get torn off.
From my personal experience, the Grey Resin is a bit more finicky than Clear. The pigment settles and the opaque nature of the liquid makes it harder to fish out failed bits from the tank.
This looks like a typical " lack of enough supports" fail. If a build layer fails to stick to the model and remains attached to the vat, it will grow the failure out. Each build layer around the piece attached to the vat will continue to fail and produce a roughly conical build error in the part…
Been there and it happens.
Check vat for “sediment” and try a different orientation, more supports too…
your problem seems to be the mouth cavity which has no venting duct. Depending on which direction you print a model like this, the peeling operation will result in a suction cup effect (either sucking out left over resin or air out of the cavity)
The suction will then destroy the fragile new layers, and once the damage is done, subsequent layers will fail even harder, resulting in the “funnel” visible in the picture.
Either print it so the direction of his mouth cavity is in x or y (not z) or (better solution) place a venting cavity at the back of his mouth all through the head of at least 3-4 mm diameter (you will have to close the hole in the back of his head manually later)
The answer is probably all of the above. Except Form 1+ dislike of Orcs of course (:
Your best bet would be to open a ticket with Formlabs. They are pretty good at replying.
You can also upload here a snapshot of the part showing the supports in preform and I will give you my two cents. If the supports are ok the could be a few other issues:
- the tray has to have a clear bottom. Hazing of the silicone bottom can diffuse the laser beam
- the resin in the tank has to be clean free of residue. Use a comb after each print to catch all peices of loose hard resin
- the mirrors may be dirty. Formlabs will provide you with a procedure to clean them
- laser beam calibration. While unlikely, it is possible, Formlabs will send you a procedure to verify laser
Hi Kurtis, thanks for the tip! I was trying to hollow out my model using Maya but due to the complexity of the model, Maya wasn’t able to do a proper boolean operation. Maybe I’ll have more luck using Meshmixer in this case.
Hi Matthew, I actually had a lot of supports on the backside of the model and for the earrings which somehow, actually made it through the print. (I’m guessing the thickness of those earrings are less then a mm)
I wanted to make sure the front of the model, which is usually what you would look at, didn’t have any trace of supports. I guess I succeeded there… haha!
I’m getting good results with hollowing solids using netfabb private. It’s not free tho. Again, whenever you have a (larger) cavity, or a hollow object, you need vent holes, otherwise the print will fail. I’m printing a lot of shells and some open ones can be printed by just adjusting orientation, but normally, I like to adjust orientation so that the supports are on the back of the object (like you did) and then a venting duct (or two) really make the difference.
Hi Robin, I got a Form 1+ and I have printed complex models but sometimes I got the same result. One trick that I found it´s usefull is to increase the quality of the model to 0.25 mm because this gives more time to the resin to catalyse beetwen layers. Another thing you could try is to change the orientation of the model to avoid the vacuum in that area. The vaccum that it´s generated in the resin tank when is peeling the layer is generating the rupture in your part. I have tryed also to increase the support but to be honest they broke also with the piece. Another thing you can also try is to generate a thin wall in your model (about 1.5 mm). When I export the CAD file, the sofware has an option to create a wall so It creates a hollow model. With this option you can reduce the cross section of your model and the vacuum in the resin tank.
Id like to go with Tobias his trouble shoot this will probebly work, taken in account that the peeling proces of the form 1 an + is a physical proces its likley the cause of the failed print. The less stress on the physical peel the better the result! its hard to judge but you wil get a feel for it when you keep on printing more and more.
Did you used internal supports ? make sure that you check your layers carefully in the slicer and manually ad support if suspiciouse don’t save to much on supports there there for a reason! If there is residu of the failed layers in the vat make sure you filter the resin with a panty hose (that is what i’m doing when things like this happen) flakes in your resin compromises prints when continuing with residu
There could be several reasons why the jaw didn’t form. I’ll start with Orientation.
Orientation is always important with the Form1 and Form 1+.
I have had the most success when I orient the part with the largest cross section thickest region of the part closest to the build platform and the smallest details furthest away from the build platform.
The largest cross section/thickest region of the part should be furthest away from the hinge side of the build platform.
The part should be oriented along an axis perpendicular to the hinge side, so if there is a long side to the part it should be perpendicular to the hinge side of the build platform.
Resin: The resin could be old or maybe there are partially cured blobs that need to be filtered out (fine mesh paint filter should work)
Mirrors: Carefully wipe the large mirror, as per instructions on FormLabs web site.
Temperature: did the temperature fluctuate, i.e. get much colder during the printing process? If it gets too cold the resin flows less easily then it is intended too.
Resin Tank: is it cloudy anywhere in the PDMS layer? This can happen after 1-2 bottles of resin. There is some discussion about using a surficant (spelling?) called Rain-X in the US, that is claimed by some Form 1+ users, to inhibit the clouding.
I am almost forgot to ask if your part is hollow/shelled. This is important as it is creates less physical stress on the material during printing, so there are fewer chances of a print fail. (I didn’t read all of the comments).
Same advice as Joe. However, I doubt its dust on the mirror since the rest of the print looks pretty good.
The “suction” problem sounds like it could be feasible also. Turning the print a little more on its side might take care of that one.
Scroll through the print layers in PreForm to see if you have any islands or really thin overhangs near the layers where it failed. Make sure you click the “internal supports” box and manually add supports to the area that failed and any areas with islands or overhangs. PreForm is pretty good about turning problem areas red but it misses problem areas from time to time.
The chances of print fails go way up after you have run around a half liter or more of resin through a tray. Sometimes the trays don’t last very long before prints start sticking. That’s a function of how many peals and lazes different areas of the tray has seen and what layer resolution you are using.
Also, not in this case but in general, the taller your print the more likely it is to fail since supports can’t always hold the print rigidly enough to ensure they peal from the tray at the layers further away from the build plate.
Post up if you find out what the actual culprit was.
I’m pretty impressed at that Ultimaker2 print. That’s really top notch quality for a FDM printer.
First of all, you need to go to the formlabs user forum - it’s a must if you own a form 1. The reason for that failure looks to me to primarily have been caused by printing your model solid (or very thick). Prints on the form1 or form1+ should be hollow if possible, with a ‘shell’ around1.5mm - 3mm thick. FDM printers like the ultimaker don’t care if the model is hollow or not, that’s not the case with the form1/1+. So, basically what everyone else has said!
Sometimes prints can just fail like that due to bad luck, I’ve had a print fail like that only to work fine the 2nd time. Check for dust on the mirror and tray bottom as even a small amount of dust could weaken a single area so that it doesn’t cure properly and rips away, and subsequent layers on that spot stick and over cure which slowly brings adjacent layers with it.