I have a CTC Bizer (Clone of Replicator 1 Dual Extruder), everything works fine, the printer works, the issue is with the slicer.
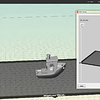
The given SD had ReplicatorG and MakerWare. MakerWare doesn’t work, it says that the background service is not running, if I try to restart it, it simply won’t start, so no slicing at all. I also downloaded MakerBot Desktop, which seems to be the latest version of MakerWare, it simply doesn’t slice files over a certain size. I tried to print the 10MB 3DBenchy.stl from http://www.thingiverse.com/thing:763622/#files 148 - it simply won’t slice it. I have another 16MB part and it won’t slice that too. MakerBot Desktop simply shows an empty view in the “Preview” screen, stating there are 0 layers and exports a 0B (empty) x3g file. Smaller files get sliced without issues, but top and bottom layer are underextruded, so it leaves giant holes in the prints. Also, MakerBot Desktop leaves gaps between the filling and the shell.
I also tried Cura and Slic3r post-processing gcode files with ReplicatorG or GPX in order to make x3g files out of them (as that printer doesn’t read plain gcode files), I can’t get it to work, if I print something, the build plate goes down and down, then it starts vibrating as soon as it reachs the printer ground (like if it’s trying to go even further down).
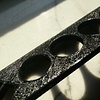
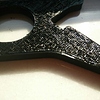
I’m attaching some pictures of the Makerbot Desktop with the 3DBenchy and empty preview, and also two photos of the CTC Bizer spool holder 56 I tried to print (which show underextrusion - so gaps of course - and gaps between shell and infill).
Is there anyone who can help?
Thank you
created
Sep '16last reply
May '17- 16
replies
- 15.1k
views
- 8
users
- 1
like
- 4
links


 Thank you! Anyway, I think we have the same printer, I have the wood one too.