

Chris, I was actually thinking of directly connecting it onto one of the unpopulated terminals of the power supply and installing another switch on the faceplate. Might also add a linear potentiometer for speed control. That way I have simple control. I already did this with the LED lighting I installed (two 12v strips connected in series so that 24V could power them without any modification). Or Ive also considered attaching it to the unpopulated “extra” accessory slot on the board, but not sure if that would give the control I’m looking for.
Skip to main content
Yeah I just got in a couple quiet fans, and cant wait to replace that screamer of a fan underneath! Noctua is awesome, used them on my last PC build and its dead quiet. Might just use two 12v fans in series for more air, that way I dont need a step down regulator either although I could just use an LM7812 or a little buck regulator. Are your linear bearings crazy noisy? After I replace that fan, that’s pretty much my only other concern… I’m quite sure its the bearings that I’m hearing, and gosh are they loud. Even after greasing with a little Superlube PTFE grease.
Ideally, the potentiometer is the best choice, along with a switch.
The reason for this is simply to have NO fan for the first 1-5 layers, and then gradually add fan speed. Also, the fan is 24v, much faster and higher rated than 12v. Try to keep the fans running on 24v circuits, there is just not enough air moving with 12v.
When you start using .10, .15 and get really daring and .05mm layer heights, the fan becomes the only way to do that fine of printing.
With a plan, you will do well I’m sure.
We have found the best grease for noiseless operation is Remington Firearm Lube.
Same 40hr interval of clean/lube.
The bearings become noiseless.
I personally do not recommend lithium grease.
Chris,
Would you mind linking to the product you use? All I can find are remington gun oils, and I was told not to use oils for the linear bearings but rather grease. Thank you for the suggestion!
In this specific case, the rem oil is teflon infused. It coats the rods, and inner surfaces of bearings to which silicon sprays and lubes will gum, and jam in some cases the linear bearings.
Switching to this oil can be useful also, as when you start to use it, it will displace the silicon and production oils in the bearings from the factory. Clean often, I also use the Rem-Oil Wipes between oilings.
Excellent thank you Chris! I will grab a bottle next time I drive past the local firearm shop. Cheap too!
Actually the better choice is to connect to the unpopilated terminal for the fan by soldering the correct FET (same FET as all the other FETS), this way you control what layer the fan goes on by the code.
The issue then is you have to add that to the G-code every time before printing an object, which would be a pain. With a switch and a pot I could simply turn it on whenever needed rather than ruining a print and having to modify the code several times depending on when the fan would be needed.
Bob, after all the mods, I can print a wide range of temperatures now it just comes out nice every time. The most noticeable effect is simply the color shade of the plastic now, and I can mess around with temperatures. High 180’s to low 200’s and I only print in pla. Can print polycarbonate and other high temp materials now but I haven’t tried it yet.
My rollers are the noise maker now. I have a drill press arriving today and will drill out some brass bushing to replace the roller bearings, hopefully this weekend.
Yeah I’ve considered making some brass or bronze bushings on my lathe, but have heard mixed things about using them. I see many people changing out bushings to linear bearings on other printers stating it to be an upgrade. I suppose if they ever went out of tolerance I could just turn a couple new sets.
Hmm, that’s an issue for you? I often change settingsfor every print job, and turning fan on is a checkmark or a 1 instead of an 0 in the gcode. After I change my gcode it stays changed, and my fan always cuts on after layer 2… I don’t have to change the fan settings ever it just stays on for layer two at all times. I only print in PLA for now though.
I am wishing to find a recommended settings information for the possible different type of models - fill not fill nozzle temp, plate heat no heat… slowly learning and gathering information but sure screwing up on the way

Hey Roni, make sure to share some of your prints as a separate post and share some of your learnings or tips & tricks on how to 3D print with a CTC machine. I’m sure it will be helpful for many of the people here. Cheers
8 days later
Chris …
HELP! I went to readjust the nozzles and quess what… I lost the set screw. Where can I get set screws. look like 3m but not sure of thread screw
Send me an email with your address and we can get one to you.
8 months later
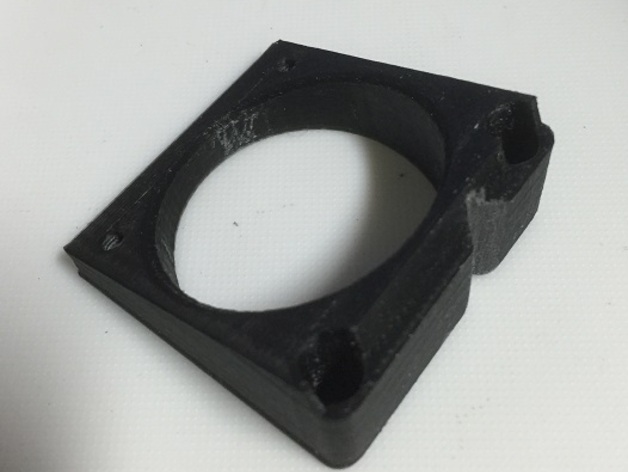
Hi Chris… I’ve designed a Fan mount for ctc printer, so you don’t have to keep taking the fan off, and you can adjust it HOT now… It’s at:-
3 months later
I’m a proud owner of a CTC dual printer and having read this comment, would someone point me in the direction of said modifications, which would allow for 50 micron precision printing?
By the way, I have recently started using a sitall glass plate and am very pleased with the results, the glass works as advertised, no need for hairspray or tape or any other type of adherent, just the glass plate - but it needs to be at real world 110ºC or higher and I managed to achieve that by switching to the Sailfish firmware and replacing the thermistor on the heat bed, from the 50K one included to a 100K thermistor (with the original one I wasn’t getting the correct temperatures as registered by the printer).
That was the only actual modification I have done to my printer, I’m currently printing a few mod parts on thingiverse, so back to 50 micron precision, if anyone happens to know of a guide or information on this, please let me know…!
Many thanks in advance!