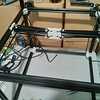
Please only put a ball screw in the middle back if you can make a strong base for it. Forget linear rods, they are too week for such a force. The smallest diameter you can use is 20mm and it will flex also.
Use proper linear rail 12mm wide: https://www.aliexpress.com/item/MR12-12mm-linear-rail-guide-MGN12-length-500mm-with-mini-MGN12C-linear-block-carriage-miniature-linear/32334017152.html?ws_ab_test=searchweb0_0,searchweb201602_2_10065_10068_10084_10083_10080_10082_10081_10060_10061_10062_10056_10055_10054_301_10059_10099_10078_10079_426_10073_10102_10096_10052_10050_425_10051,searchweb201603_8&btsid=d04fbb40-2fce-491a-9d66-1aa826bc0e30
even the cheapest Chinese one will be much better then rods, but you will need 2 carriages on one rail to make a proper support structure from ALU like this have.
https://www.youtube.com/watch?v=6EtJfaiQ9H0
(also I would use these rails for x-y motion, instead of these wheel type stuff, also the frame is too week from 20mm profiles, i would use 30x30 at least, with proper metal corner pieces)
But If you add two more profiles per sides then you can mount the 2 ballcrews. 1204 would be sufficient with proper bk10 bf10 housings. Order 40 teeth GT2 pulley for it and a 20teeth for the motor, and a closed loop gt2 belt around 1200mm long, this will move table without any problems. And put 4 linear rods (16mm) to support the table move, not the edge but around 100mm sides-side from the ball screw. The table can made also from 20x20 profile with an aluplate mounted on the bottom (where all the bearings and ball screws are fixed).
And how I know this? I built a 400x400x650 printer for a client…and just in a progress with a 500x500x500 build volume printer for an other company. The problem is resonance as you crank up the speed on the printer (for such a big printer you must to finish the print in an acceptable time) ,100 mm/s is the normal print speed. If its frame or any other component has any backlash it will affect the print quality.
CNC machine parts are so cheap now days(like linear rails, ball screws etc.) that its not really worth to tinker with home made parts. (I would also skip the COREXY mechanics above 300x300mm x-y motion, and use normal cartesian mechanics with a 1:2 gear ratio on the Y axis, the belts will be too long and will flex, also please at least use the white GT2 belts with steel reinforced core, these fiber core ones are more like a rubber band).
Hope you understand my points, and no offense here, I just don’t want you to make mistakes. I have also learned this on the hard way…
Regards,
Tamas
