Hey, I recently wrapped up a project that I took on to get some experience with using 3D printing to make molds. The project went pretty well so I figured I’d share the steps in case anyone else is interested in trying it.
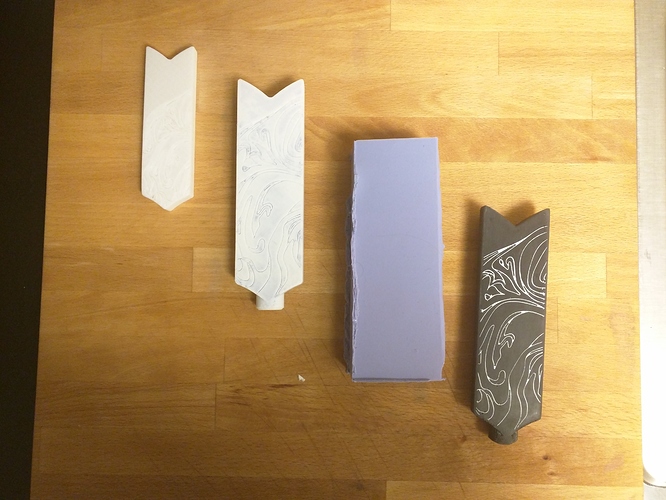
Step 1: Initial prototype. The “client” provided 2D graphics and general size descriptions, which I used to start a CAD model. I printed a few versions at a smaller scale to get iterations out of the door as quickly as possible.
Step 2: Final prototype. Once the design was finalized, I printed a full size prototype at a higher quality.
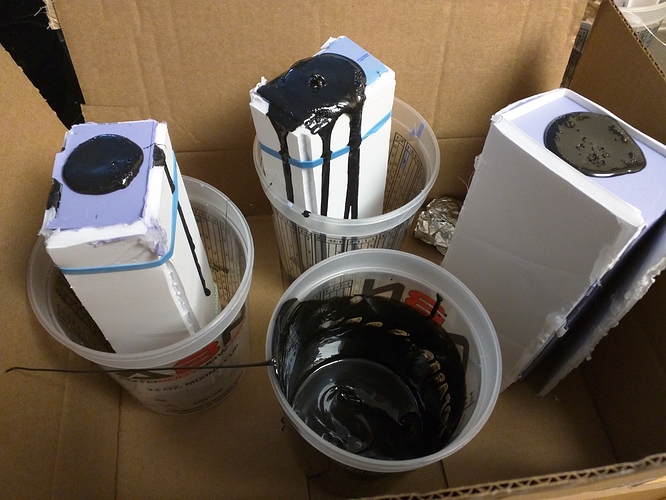
Step 3: Silicone mold making. I used Smooth-On Oomoo 30 (along with foam board and too much hot glue) to cast molds around the final prototypes. The silicone cures in 5-6 hours, at which point I could cut a parting line and carefully remove the prototype. The PLA model released from the mold without damaging any of the small details.
Step 4: Liquid plastic casting. I used a two part urethane resin to make the castings, it cures in about 15 minutes. Upon removal from the molds, I could see that the casting was “eating” some of the silicone details - no worries, I can always make more molds from the original printing.
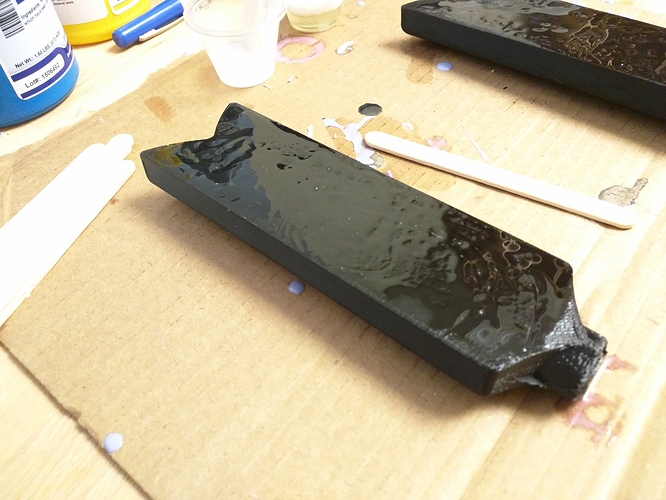
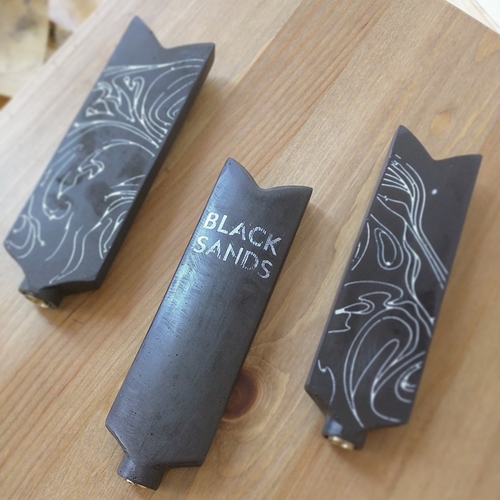
Step 5: Contrast color casting. I poured a white urethane resin onto the cast part to fill the lines with a contrasting color.
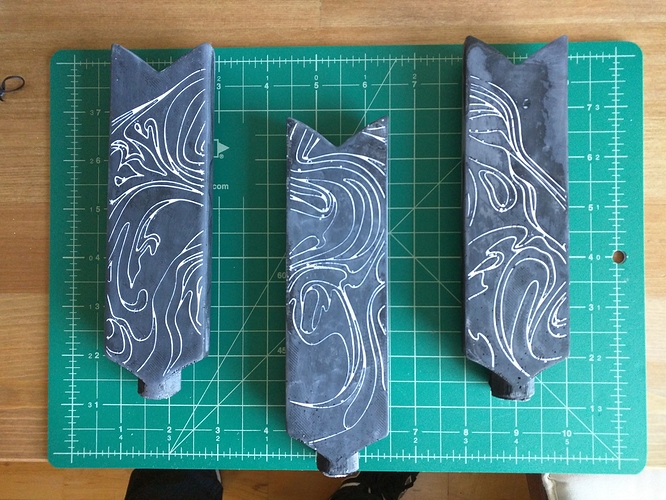
Step 6: Finishing and sanding. I finished the models by sanding away the lines leftover from the printing process. Once the outer white layer was sanded off, the contrasting lines showed the underlying pattern exactly as it had been on the original drawing.
Anyway, if anyone has any comments, questions, or tips let me know - I’m planning on trying more projects with this method now that I have a little more experience with the process. (The final product was a set of custom beer tap handles designed to match a local brewery’s design style)
-Kevin S.
San Francisco, CA
6 Likes
So awesome, thanks for sharing!
@dbosborne21 does this help your mold making project here? If not, see more threads on molding here.
Nikki
3
Hi @MOIRA! Thanks for sharing these - they are beautiful. I’d love to see the custom beer taps installed and I’m in The Bay Area this week so if you’re willing and able to share the name of the place, please do, and I’ll be sure to visit.
We’ve also got a meetup on Wednesday evening in SoMa and would be great to have you along if you’ve not signed up.
Cool! Did you use a mold release spray?
Also, there’s some slight bubbles from air not being released from the resin. I’ve read that pouring from higher up will limit the air bubbles that get trapped. Also, tapping the molds to get the air bubbles out helps too if you dont want to get too advanced with a vaccum form
Alex
I skipped the mold release because I only needed one or two parts out of each mold. Using mold release is a tricky process - too much and you get surface imperfections, too little and it has no effect - it would have required some trial and error.
I didn’t have too much trouble with bubbles, but because the resin I was using had such a short working life (3-5 minutes) there isn’t much you can do besides mixing carefully and pouring slowly. The slow pour helps in two ways, you get rid of the large bubbles and you also give the resin time to flow into the small detailed areas without leaving air trapped behind. Avoiding the smaller bubbles requires more effort for sure.
-Kevin
@gabriela3d Thanks for post! This is almost exactly what I was thinking. I was trying to skip steps 1-3 and print the actual mold.
Glad I could help! Good luck with your project