We’ve all experienced it at some point. Your prints just randomly stopping, your extruder getting clogged mid way, or anything else, the result is the same: when you come back to your printer all you see is half a print.
Delete the selection. You are now left with what you need to continue printing. Save it.
Step three
Start your printer with the saved Gcode file. Finish your print.
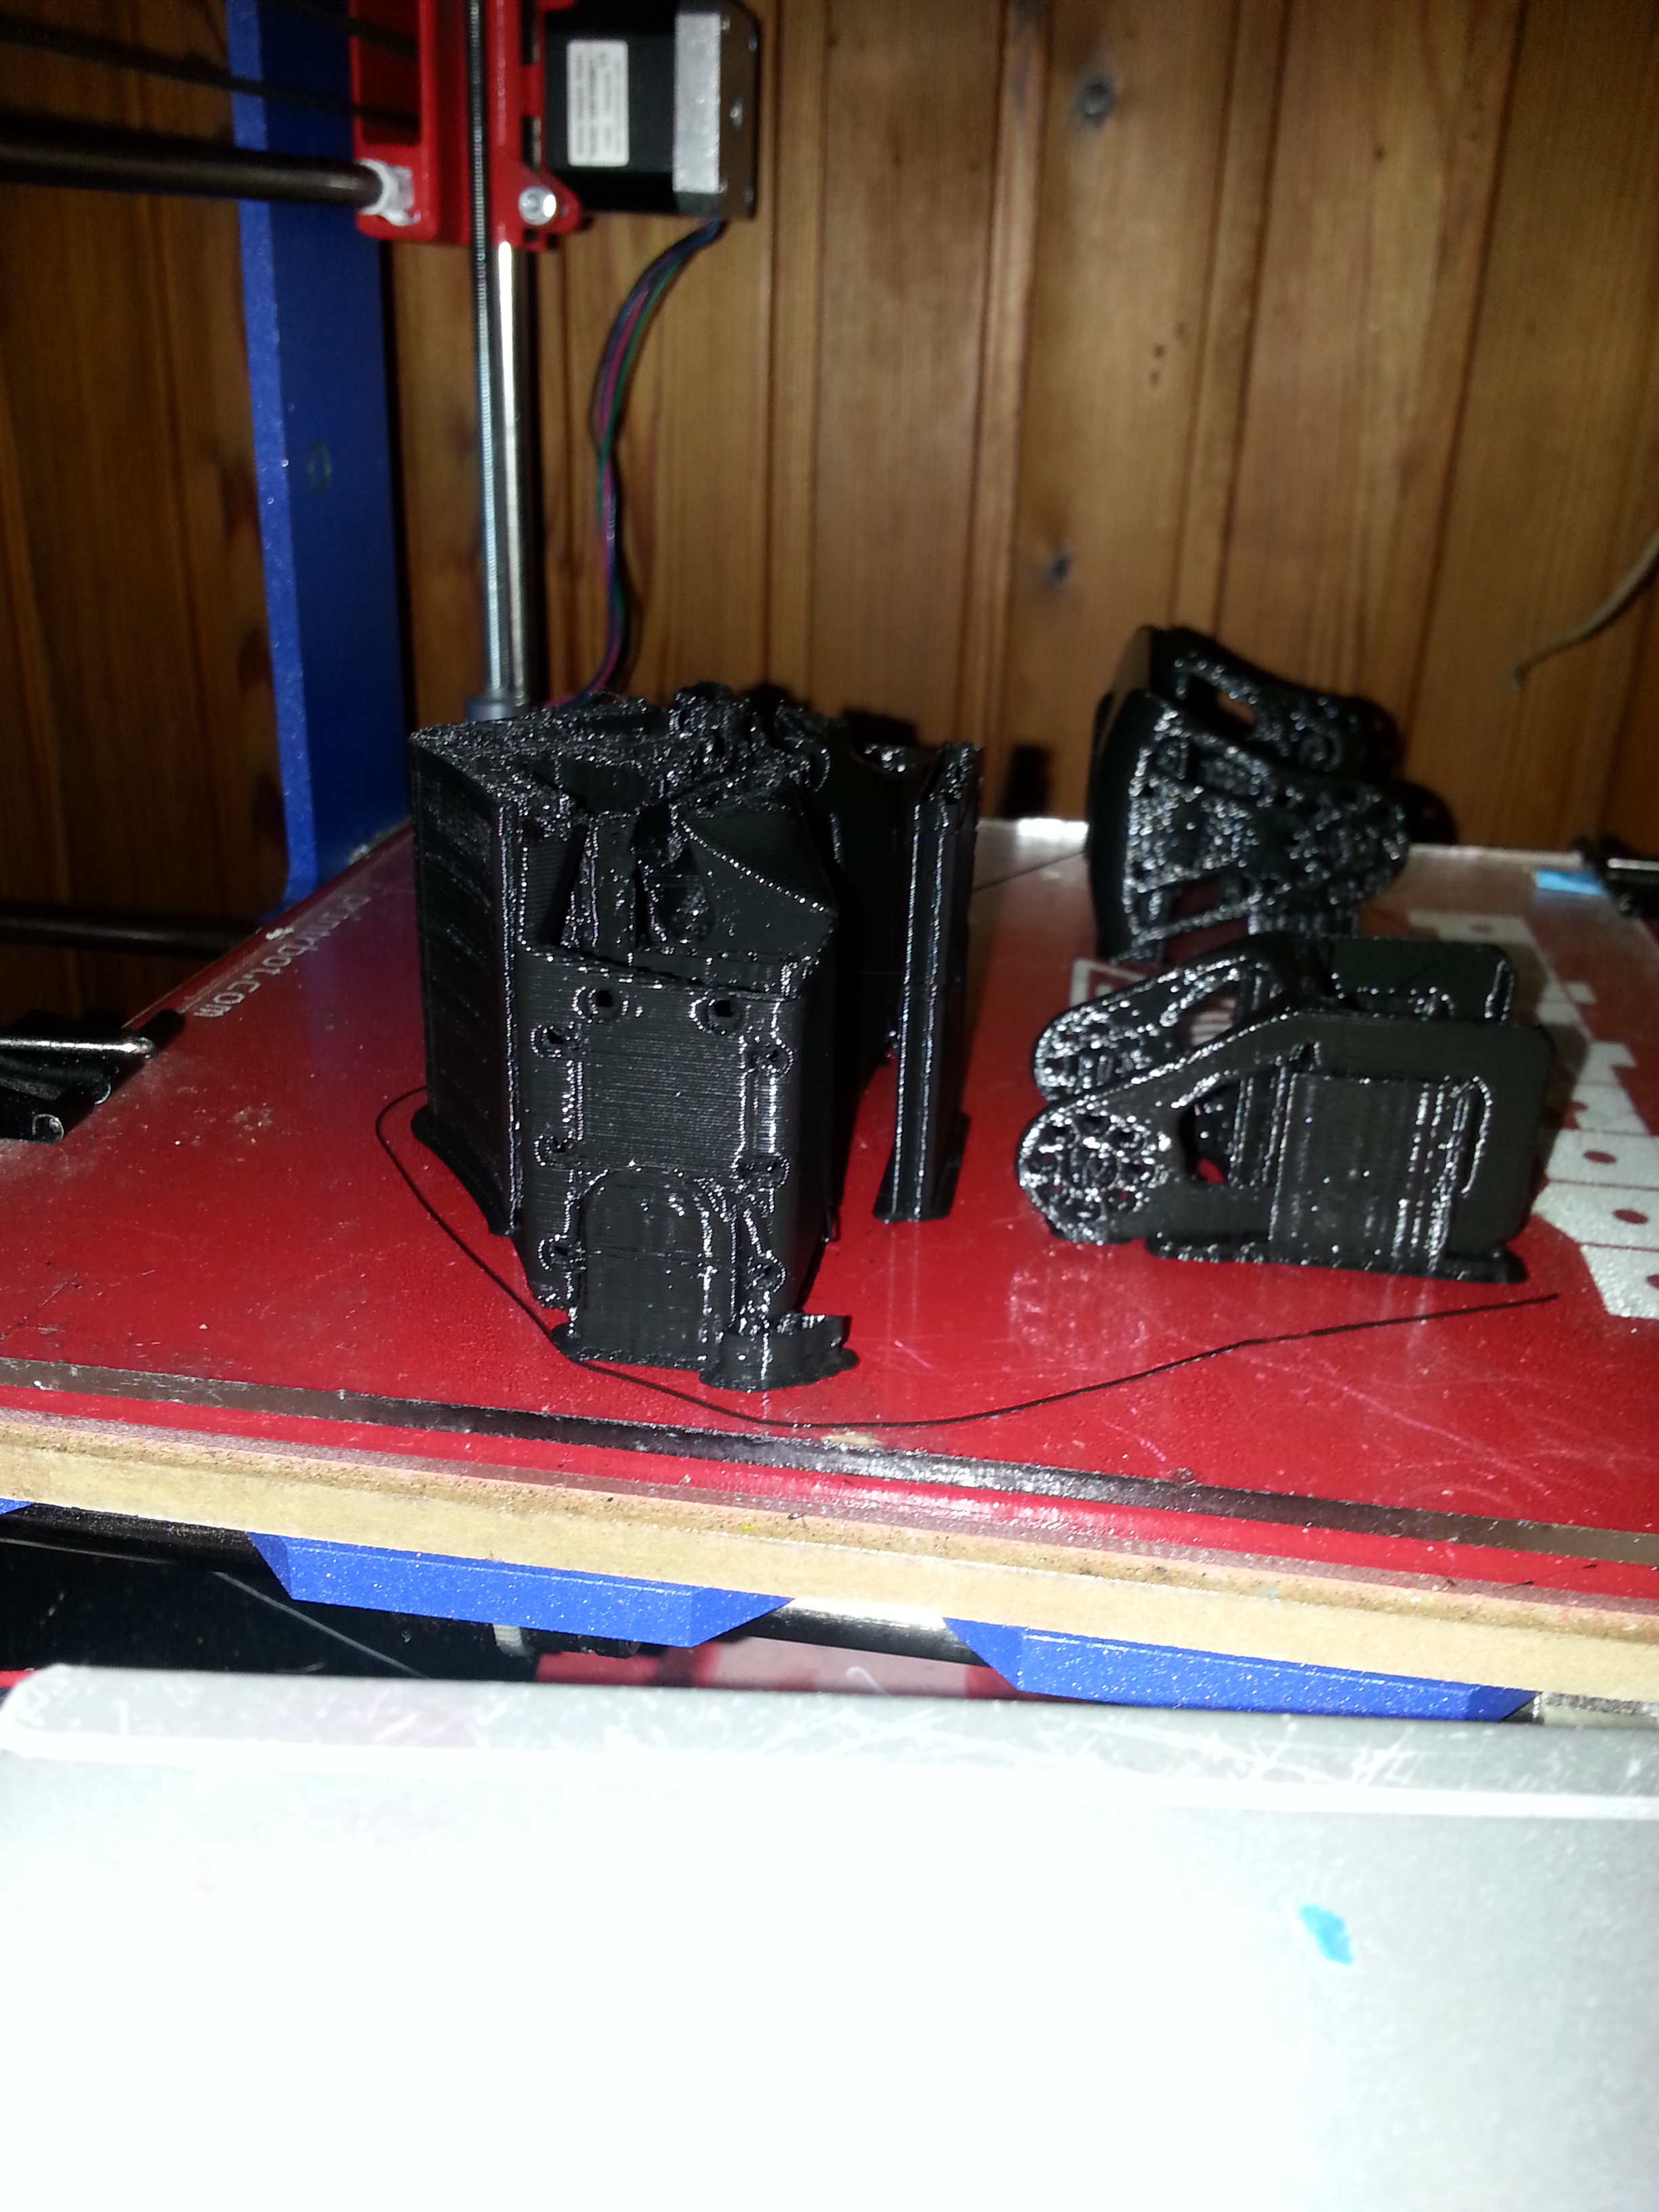
I tend to only use this for things I print for myself, nothing for clients, as there is usually a noticeable seam where the print failed. Anyway, I hope this will be of help as I keep seeing failed prints.
In return i would share my experience due to suddenly disconnected (Not sure the issue).
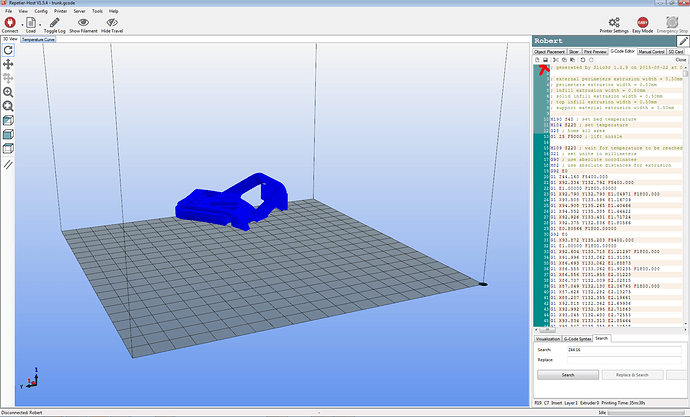
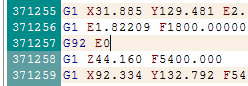
I,m using repetier with Curaengine slicer. During my exploration to find the z-axis i,ve found that at ‘Printer’ tab, ‘Job Status’ you can see last line ‘Total Line’ where the printer stopped. From there you know where to start and remove all previous line and start printing.
Just for precaution, standby to immediately stop before the nozzle crash onto your model and re-adjust your pre-setting. For me, I need to relocate manually the nozzle at X & Y axis before it goes down (homing Z, refer below). Attached the pre-setting for example. Change if required.
M106 S0 ;make sure fan is off
M18 ;turn off motors
G28 Z0 ;homing Z
G1 Z105 F18000 ;move nozzle up
M18 ;turn off motors
G28 X0 Y0 ;homing X/Y
G1 X115 Y300 F2000 ;move heated bed forward for easy access to clean
M190 S60 ; set bed temp & wait
M109 S230 ; set extruder temp & wait
G1 X115 Y150 F2000 ;move extruder to the center
Hopefully it might help others. Sorry for my English.
I use to cut and restart unfinished cnc jobs a lot when working as a machinist. the only difference here is having to know how to get the layer height it left off on.
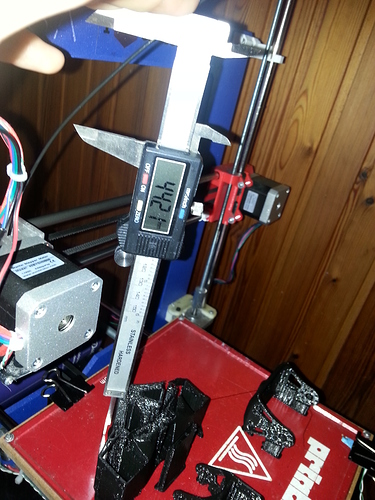
i tried this and i had a problem with one dimension being off about 1mm. i only had 5 layers left…
so results may vary. its also good to know my printers repeatability on the Y axis sucks.
I’ll have to get better switches for the endstops.