


Every other day we get requests for printer settings, hacks and tweaks that improve the performance of our Hubs’ 3D Printers. Since Makerbot 3, Ultimaker 13 and RepRap based printers make up more than half of the machines on our platform we decided to dedicate a blog post to each in which we try to demystify some best practices and tips & tricks to run your machine like a Boss. Thanks for all the help from Ultimaker and the excellent resources provided by Tom Howard in his slides 10.
Of course there are many ways to get to a great quality print. These tips may work better for some than for others as they are dependant on the calibration, machine version and the print.
We’ll cover these topics:
- Hacks & Upgrades
- Print Settings per Material
- Speed vs Quality settings
- Support types and use cases
- Hacks & Upgrades
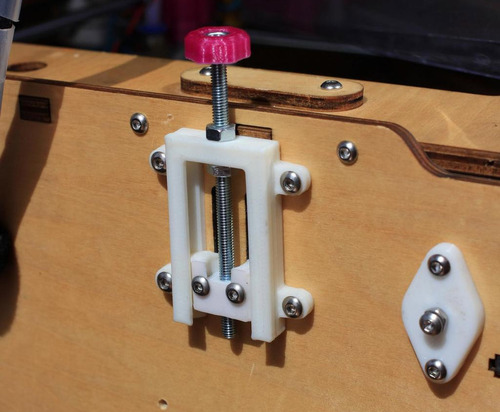
The most popular hack for an Ultimaker Original is a printable Z stage calibration tool that helps you level your bed very easy.
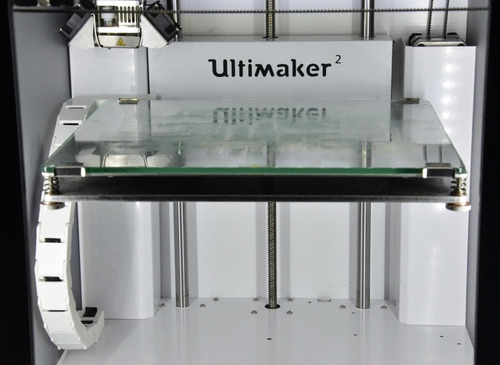
For the Ultimaker 2 a very popular add on is this Cable Chain.
Print Setting per Material
There is a wide range of materials you can print on your Ultimaker, and it’s expanding fast. We’ll list some of the basic settings here for popular materials on the Ultimaker, feel free so share more settings with us.
- PLA Print temp: 210°C notes: print with fans on
- ABS Print temp 250°C notes: print with fans off, heated bed at 110°C, don’t print too fast
- Wood Print temp: 225°C notes: use little or no retraction as the material might break, speed around 50mm/s, you can vary the temperature to get color variations
- FlexPLA Print temp 230°C: notes: add some oil in the tube, print slow at around 10mm/s - 25mm/s, heated bed at 60°C
- BendLay Print temp 210-240°C notes: great for printing light emitting objects.
- LayBrick Print temp 175-210°C notes: higher temps gives a smoother finish
- Nylon (Taulman 618/645) Print temp 260-265°C notes: very strong and flexible great for jewelry or high durability prints
Speed vs. Quality setting
The things you print may have different use cases, sometimes you find yourself making iteration after iteration of a product as fast as you can while at other times you want to print at maximum quality.
Quality
If you want to print with high quality with PLA these are some guidelines you may want to keep in mind. Print at 60 micron for a high quality surface, at 210°C and 50mm/s. 15% infill and retraction enabled, and your fan or both fans turned on.
Note: your build platform needs to be properly leveled to get a successful first layer and your short belts should all be very tight.
Speed
For fast printing on an Ultimaker you want to print at a lower resolution like 200 micron. You can print up to about 100mm/s at 230°C. However be aware that there is a maximum of filament your nozzle can push out and if you set the resolution or the speed too high you can create a plug because an upwards flow will occur. Ultimakers slicing tool Cura will give you a warning when you are pushing the limit.
Support types and use cases
There are different types of support you can use for your prints, we’ll explain you the basics and main use cases here.
Skirt
Before your print starts there is a prime to make sure your nozzle is filled and there is sufficient pressure. A skirt is meant to prevent that small thread of filament to interrupt with your print.
It will draw an outline surrounding your print. This is a standard setting and should left enabled for most cases, however it can be tweaked to your liking from the Expert Settings.
Brim
A brim basically is multiple skirts, all the way until they line up with your footprint. This enhances adhesion without leaving any marks on the print. This is a great weapon of choice to counter warping without leaving much scar on your print. Most objects will stay put with this big layer around the print, it’s also great to keep objects with a small footprint from tipping over. Again Brim can be tweaked from the Expert Settings, standard is 20 layers.
Raft
A raft does the same thing as a brim, instead of stopping at the perimeter it goes on underneath the print. The print is being build on top of this raft. This can help when you want to fight warping. However it does leave a mark on your print. You can play with the settings of your raft to fine tune it to your liking from the Expert Settings.
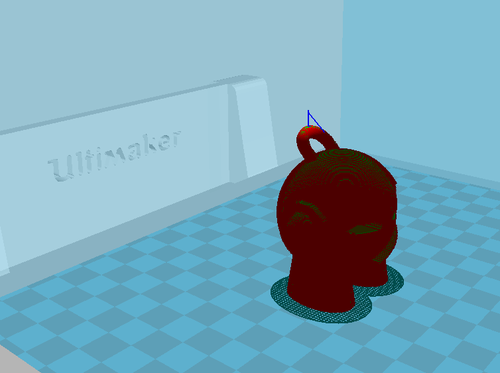
Support touching buildplate
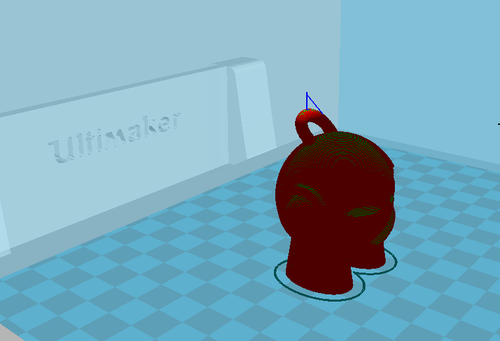
If you have objects with extreme overhang you should use Support structure, these are easy to break away structures printed in the same material as you model. There are two types you can choose from Cura, most used is the Support touching buildplate, which supports any geometry from the buildplate up.
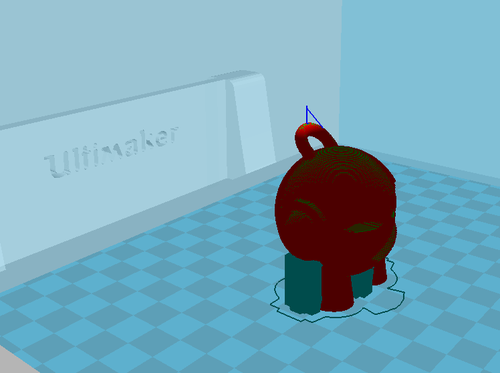
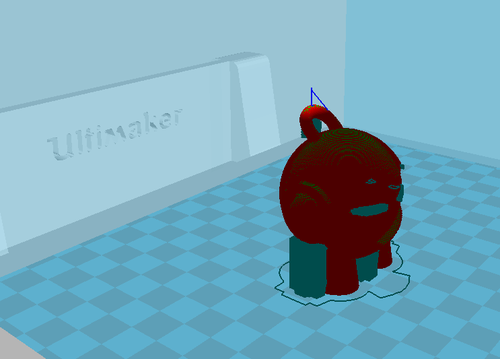
Support everywhere
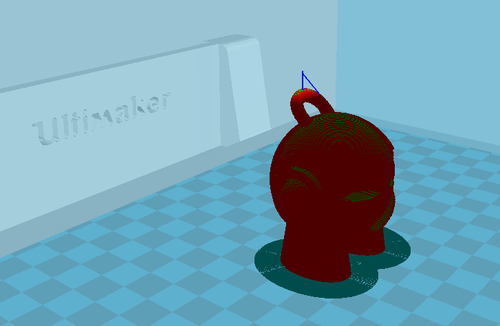
The second type of support create support everywhere where there is overhang, so if we look at Marvin we see the eyes, and keychain ring are getting support as well. Choose this type of support if the your critical geometry is not overhanging the buildplate but rather the model itself.
We’re curious what your experiences and best practices are with the Ultimaker 1 and 2. Please share your tips in the comments and we’ll combine them in our next Best Printing Practices post. If you want to dive in deeper you can also check out Calibration section on the Ultimaker Wiki.
This post was initially published on our blog on February 10, 2014 1
created
Feb '15last reply
Feb '15- 20
replies
- 10.4k
views
- 10
users
- 31
likes
- 8
links

