Is there a particular reason that you want to go back to the original FW? I’ve seen that website you mentioned before as well (back when I thought I had bricked my printer), but it seems to be easy to always get it back to either the MakerBot FW or SailFish 7.1, both of which seem better than the original.
So in short, no, I don’t know of an easy way to go back to original. But I wouldn’t recommend it anyway - SF 7.1 seems to be the best for it so far. Although I still want to get to the higher versions…
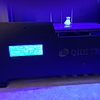
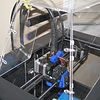
Awesome looking set up. I did print the filament guide also, a truly wonderful thing. I have done a few dual prints but just some dual color figurines and the like. I see that #3DBenchy has a dual color torture test, which I think I will try. I will let you know if I get any results from that. Benchy is a minor obsession.
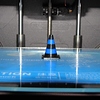
The cone looks pretty dead on, maybe just a tiny bit of shifting on the top two layers (or that could just be the photo). I have taken to clamping my glass bed (made some little stainless steel clips from old windshield wiper blades) because occasionally it would slip and produce funky print results. I would love to dampen the frame a little bit to reduce the hard jerking of the print head.
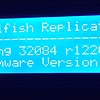
Sorry did not answer your original question: I believe you can just program whatever SF level you want. I don’t think SF needs to be incremented up. I jumped from 7.1 (via Adam’s instructions) to 7.6 directly after resetting the fuses.
My first couple of tries under SF7.7 were a disaster with the print cartridge trying to drive itself out the left side of the printer. Turns out my extruder X offset had defaulted to 399mm!!!
WARNING! IF YOU UPGRADE TO SF 7.7 DO THE NEXT TWO STEPS…
What they do is link you to the hex files and give instructions needed to reload a blank Mightyboard just like mine was.
Using a program called AVRDude google it and a couple command prompts I was able to reload the hex files giving the board back USB functionality and then the bootloader which had the added benefit of setting the correct fuse bits. I’m not going to go in to detail on how to do It. It’s all in the MakerBot Operators thread.
I had to copy and make the hex files usable then modify and run their command lines to fit my programmer and environment.
The command line I used to load the bootloader hex file.
Yikes! And congratulations on getting thru it Ron. Awesome recovery! Glad you are back up and running.
I will see if I can find anything about using AVR studio with these 3rd party vendor ISP programmers. The AVR studio way is obviously easier (and less heart stopping). I had just assumed, incorrectly it seems, that the 3rd party vendors would emulate an ISP programmer Atmel already makes.
(Perhaps just the command line for reprogramming the fuses with AVRDude…)
See my comment below on resetting the extruder offset in SF before doing any dual extruder prints. You will want to do that sooner than later…
It appears that there is some software out there for this programmer that will allow fuse bit programming.
If you could check this out and see if it works, it may be of help to others trying this (and may prevent the memory erasure and not having to go thru avrdude):