This is your need-to-know guide on setting up your own Hub and starting printing for your local community.
Once your Hub is live, go to your Hub dashboard to start customising your profile! Here’s a run through all available sections:
1. Phone number
Be sure to fill in your phone number to receive order notifications as text messages directly on your mobile.
2. Choose a community
Local is the name of the game, which will essentially bring you closer to other makers and 3D printing enthusiasts in your city. You’ll learn about new projects and get fresh inspiration from other people’s designs.
3. Hub description
A great description is paramount to any Hub, as it serves both to share the story of your Hub and for SEO purposes. For those unaware, SEO stands for Search Engine Optimization and it basically allows you to improve the position your Hub page appears at when people are using search engines such as Google or Bing.
There’s a myriad way to go about this, but ultimately the About section is your chance to:
- Tell the story of your business
- Connect with the community and customers
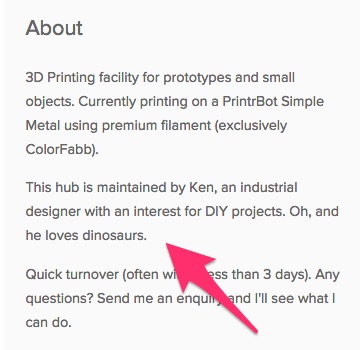
Protip: Make it memorable by sharing something unique, like how your Hub got started, as this will put a personal spin on it. See @k5o52’s below:
4. Specialties
Whether you specialise in prototypes, large volume prints, full-color prints or moulding, be sure to add them in the Specialties section. You get to pick up to 5 categories, so choose wisely.
5-6. Other Relevant Info
Right under the About section, there’s a line-up of extra details, highly relevant to the customers. We’ll also:
-
Invoices: Can you supply your customers with a valid invoice? Check box checked!
-
Delivery type: You get to choose in between pickup and/ or postal services
-
Services: Are you able to provide 3D modelling and / or scanning services? Then let your customers know - additional services will make you stand out from the crowd.
Hub Location
Next up is choosing your Hub’s location. This bit is pretty straightforward: fill in the address you want to use for your Hub as pick up location and click Save. Done!
Images
Images are a great way to tell your story and show off your skills, so make the most of this section!
Here’s few tips for getting this part right:
- Include your coolest projects - there’s nothing like a good quality print to get a customer to click Get A Quote From This Hub
And to prove my point, have a look at Ken’s Hub in Eindhoven for some truly epic visuals:
-
Show off all your materials and colors you have available through a selection of prints - i.e. the Marvin’s in the image above
-
No need to invest in a fancy camera, but nailing the right angle, light and background can make all the difference! So don’t hesitate to play with settings and keep in mind that photo backgrounds that complement each other will make your Hub look cohesive. You can find several helpful tips here.
-
Add relevant info to your designs (titles, descriptions and links to Thingiverse, Youmagine, etc if the case) to include details about the materials used, the size of the print, etc
- Same goes for the Hub header, go for something that represents you as a maker, like your awesome maker space

- Last but not least, we have found that Hubs that complete their profile image are more likely to be trusted by customers than those that do not. Just so you know
What are some of your tips for setting up a kick-ass Hub page? Share in the comments!
Cheers,
Gabriela