Hi Everyone,
It’s matt again. I appreciate everyone’s willingness to help out with my issues while I try to configure my FlashForge Creator Pro.
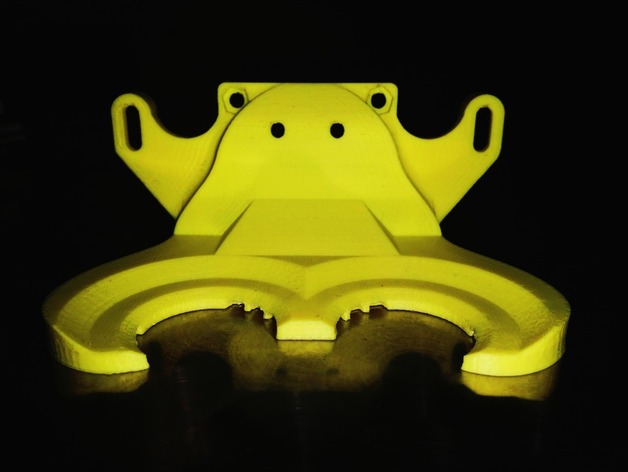
I’ve attached three more sets of images.
-
The first one (the round tube) is the test_left.x3g model that came with the printer software. It printed out no problem - the lines were still a little noticeable for me, but there were no skipped layers, and the waffle on the bottom printed smoothly and was easy to peel off.
-
The second image is a part I tried to print after the test. It’s a torso, about three inches tall. It came out “okay” but, as you can see, there is still some separation with the bands of filament, and it’s not smooth.
-
The final set of pictures is a print I set up and activated, then went to bed. It was supposed to be the second model, but about 50% larger. I have NO idea what happened.
Before I printed the two torsos, I cleaned the extruder gears as suggested by another member. I noticed some smaller pieces of debris (which were blue, even though my filaments are grey and purple), so I got those out. I also fed and refed the filament lines through the nozzle to make sure everything was clear.
The one thing I didn’t do was apply painter’s tape and a glue stick to the bed. I didn’t have any painter’s tape, and I didn’t want to risk just applying the glue stick to the bed and possibly ruining it. Can that be done without damage to the surface? I’ve got some painter’s tape now, so I’ll be trying that method tonight to see if it helps.
I also thought it might be beneficial to paste my configuration settings into this thread, in case anyone can see any glaring errors that would cause such screw ups.
If ANYBODY has ANY IDEAS, I’d be VERY GRATEFUL. This is only my first week with the printer, so I apologize for the annoyance of questions. But, you all seem very knowledgeable, and I appreciate the help.
Looking forward to hearing from you.
-matt
CONFIGURATION SETTINGS:
# generated by Slic3r 1.1.7 on Wed Nov 4 22:56:17 2015
avoid_crossing_perimeters = 0
bed_size = 228,150
bed_temperature = 110
bottom_solid_layers = 3
bridge_acceleration = 0
bridge_fan_speed = 100
bridge_flow_ratio = 1
bridge_speed = 60
brim_width = 5
complete_objects = 0
cooling = 1
default_acceleration = 0
disable_fan_first_layers = 1
dont_support_bridges = 1
duplicate_distance = 6
end_gcode = M73 P100 ; end build progress\nG162 X Y F2500; home X and Y axes\nM18; disable all stepper motors\nM109 S0 T0; set bed temperature to 0\nM104 S0 T1; set extruder temperature to 0\nM70 P5; Display “We <3 Making Things!” message\nM72 P1; Play Ta-Da song\n
external_perimeter_speed = 70%
external_perimeters_first = 0
extra_perimeters = 1
extruder_clearance_height = 20
extruder_clearance_radius = 20
extruder_offset = 0x0,0x0
extrusion_axis = E
extrusion_multiplier = 1,1
extrusion_width = 0
fan_always_on = 0
fan_below_layer_time = 60
filament_diameter = 1.8,1.8
fill_angle = 45
fill_density = 15%
fill_pattern = rectilinear
first_layer_acceleration = 0
first_layer_bed_temperature = 110
first_layer_extrusion_width = 200%
first_layer_height = 0.35
first_layer_speed = 30%
first_layer_temperature = 230,230
g0 = 0
gap_fill_speed = 20
gcode_arcs = 0
gcode_comments = 0
gcode_flavor = sailfish
infill_acceleration = 0
infill_every_layers = 1
infill_extruder = 1
infill_extrusion_width = 0
infill_first = 0
infill_only_where_needed = 0
infill_speed = 80
interface_shells = 0
layer_gcode =
layer_height = 0.2
max_fan_speed = 100
min_fan_speed = 35
min_print_speed = 10
min_skirt_length = 5
notes =
nozzle_diameter = 0.4,0.4
only_retract_when_crossing_perimeters = 1
ooze_prevention = 0
output_filename_format = [input_filename_base].gcode
overhangs = 1
perimeter_acceleration = 0
perimeter_extruder = 1
perimeter_extrusion_width = 0
perimeter_speed = 60
perimeters = 2
post_process = /Applications/GPX/gpx
print_center = 0,0
raft_layers = 0
resolution = 0
retract_before_travel = 2,2
retract_layer_change = 1,1
retract_length = 2,2
retract_length_toolchange = 10,10
retract_lift = 0,0
retract_restart_extra = 0,0
retract_restart_extra_toolchange = 0,0
retract_speed = 30,30
seam_position = aligned
skirt_distance = 6
skirt_height = 2
skirts = 5
slowdown_below_layer_time = 30
small_perimeter_speed = 30
solid_fill_pattern = rectilinear
solid_infill_below_area = 70
solid_infill_every_layers = 0
solid_infill_extrusion_width = 0
solid_infill_speed = 60
spiral_vase = 0
standby_temperature_delta = -5
start_gcode = ;\n;\n;SUMMARY\n;\n;first layer temperature = [first_layer_temperature_0]C\n;temperature = [temperature_0]C\n;first layer bed temperature = [first_layer_bed_temperature]C\n;bed temperature = [bed_temperature]C\n;\n;first layer height = [first_layer_height]mm\n;layer height = [layer_height]mm\n;z_offset = [z_offset]mm\n;perimeters = [perimeters]\n;fill density = [fill_density]\n;infill every n layers = [infill_every_layers]\n;skirts = [skirts]\n;brim width = [brim_width]mm\n;raft layers = [raft_layers]\n;support material = [support_material]\n;support material threshold = [support_material_threshold] degrees\n;support material enforced for first n layers = [support_material_enforce_layers]\n;support material extruder = [support_material_extruder]\n;\n;first layer speed = [first_layer_speed]\n;perimeter speed = [perimeter_speed]mm/s\n;small perimeter speed = [small_perimeter_speed]\n;external perimeter speed = [external_perimeter_speed]\n;infill speed = [infill_speed]mm/s\n;solid infill speed = [solid_infill_speed]\n;top solid infill speed = [top_solid_infill_speed]\n;support material speed = [support_material_speed]mm/s\n;gap fill speed = [gap_fill_speed]mm/s\n;travel speed = [travel_speed]mm/s\n;bridge speed = [bridge_speed]mm/s\n;bridge flow ratio = [bridge_flow_ratio]\n;slowdown if layer time is less than = [slowdown_below_layer_time]secs\n;minimum print speed = [min_print_speed]mm/s\n;\n;bottom solid layers = [bottom_solid_layers]\n;top solid layers = [top_solid_layers]\n;\n;\n;EXTRUSION\n;\n;filament diameter = [filament_diameter_0]mm\n;nozzle diameter = [nozzle_diameter_0]mm\n;bridge flow ratio = [bridge_flow_ratio]\n;extrusion axis = [extrusion_axis]\n;extrusion multiplier = [extrusion_multiplier_0]\n;extrusion width = [extrusion_width]mm\n;first layer extrusion width = [first_layer_extrusion_width]mm\n;perimeter extrusion width = [perimeter_extrusion_width]mm\n;infill extrusion width = [infill_extrusion_width]mm\n;solid infill extrusion width = [solid_infill_extrusion_width]mm\n;top infill extrusion width = [top_infill_extrusion_width]mm\n;support material extrusion width = [support_material_extrusion_width]mm\n;\n;\n;SUPPORT\n;\n;raft layers = [raft_layers]\n;brim width = [brim_width]mm\n;support material = [support_material]\n;support material threshold = [support_material_threshold] degrees\n;support material enforced for first n layers = [support_material_enforce_layers]\n;support material extruder = [support_material_extruder]\n;support material extrusion width = [support_material_extrusion_width]mm\n;support material interface layers = [support_material_interface_layers]\n;support material interface spacing = [support_material_interface_spacing]mm\n;support material pattern = [support_material_pattern]\n;support material angle = [support_material_angle] degrees\n;support material spacing = [support_material_spacing]mm\n;support material speed = [support_material_speed]mm/s\n;\n;\n;EVERYTHING ELSE\n;\n;complete objects = [complete_objects]\n;cooling enabled = [cooling]\n;default acceleration = [default_acceleration]mm/s/s\n;disable fan for first layers = [disable_fan_first_layers]\n;duplicate = [duplicate]\n;duplicate distance = [duplicate_distance]mm\n;duplicate grid = [duplicate_grid]\n;external perimeters first = [external_perimeters_first]\n;extra perimeters = [extra_perimeters]\n;extruder clearance height = [extruder_clearance_height]mm\n;extruder clearance radius = [extruder_clearance_radius]mm\n;extruder offset = [extruder_offset]mm\n;fan always on = [fan_always_on]\n;fan below layer time = [fan_below_layer_time]secs\n;fill angle = [fill_angle] degrees\n;fill pattern = [fill_pattern]\n;gcode arcs = [gcode_arcs]\n;gcode comments = [gcode_comments]\n;gcode flavor = [gcode_flavor]\n;infill acceleration = [infill_acceleration]mm/s/s\n;infill extruder = [infill_extruder]\n;infill first = [infill_first]\n;infill only where needed = [infill_only_where_needed]\n;minimum skirt length = [min_skirt_length]mm\n;only retract when crossing perimeters = [only_retract_when_crossing_perimeters]\n;perimeter acceleration = [perimeter_acceleration]mm/s/s\n;perimeter extruder = [perimeter_extruder]\n;randomize start = [randomize_start]\n;resolution = [resolution]mm\n;retract before travel = [retract_before_travel_0]\n;retract on layer change = [retract_layer_change_0]\n;retract length = [retract_length_0]mm\n;retract length on tool change = [retract_length_toolchange_0]mm\n;retract lift = [retract_lift_0]\n;retract extra distance on restart = [retract_restart_extra_0]mm\n;retract extra on tool change = [retract_restart_extra_toolchange_0]mm\n;retract speed = [retract_speed_0]mm/s\n;rotate = [rotate] degrees\n;scale = [scale]\n;skirt distance = [skirt_distance]mm\n;skirt height = [skirt_height]mm\n;solid fill pattern = [solid_fill_pattern]\n;solid infill below area = [solid_infill_below_area]mm (sq)\n;solid infill every n layers = [solid_infill_every_layers]\n;\n;\n;- - - - - - - - - - - - - - - - - - - - - - - - -\n;\n;\nT1; set primary extruder\nM73 P0; enable show build progress\nM109 S[first_layer_bed_temperature] T0; heat bed up to first layer temperature\nM104 S[first_layer_temperature_0] T1; set nozzle heater to first layer temperature\nM103; disable RPM\nG21; set units to mm\nG162 X Y F6000; home XY axes maximum\nG161 Z F9000; home Z axis minimum\nG92 Z0; set Z to 0\nM132 X Y Z A B; Recall stored home offsets\nG90; set positioning to absolute\nG1 Z30; move Z to waiting height\nG1 X-95 Y-73 Z30 F14000; move to waiting position (front left corner of print bed)\nG130 X0 Y0 A0 B0; set stepper motor vref to lower value while heating\nM6; wait for bed and extruder to heat up\nG130 X127 Y127 A127 B127; set stepper motor vref to defaults\nM108 T1 R3; set extruder speed\nG92 E0; set E to 0\nG90; use absolute coordinates\nM320; acceleration enabled for all commands that follow\nG1 Z[first_layer_height] F6000.000; move to first layer height\nG1 X100 Y-73 F14000.000; move to front right corner of bed\nG1 X-90 Y-73 E24 F2000.000; extrude a line of filament across the front edge of the bed\nG4 P2000; wait for ooze to slow\nG1 Z0 F6000.000; lower nozzle height to 0\nG1 X-95; wipe nozzle\nG1 Z[first_layer_height] F6000.000; set nozzle to first layer height\nG1 F12000; ensure fast travel to first print move\nG92 E0; set E to 0 again\nM73 P0; reset build progress to 0\n
support_material = 0
support_material_angle = 0
support_material_enforce_layers = 0
support_material_extruder = 1
support_material_extrusion_width = 0
support_material_interface_extruder = 1
support_material_interface_layers = 3
support_material_interface_spacing = 0
support_material_interface_speed = 100%
support_material_pattern = pillars
support_material_spacing = 2.5
support_material_speed = 60
support_material_threshold = 0
temperature = 230,230
thin_walls = 1
threads = 2
toolchange_gcode =
top_infill_extrusion_width = 0
top_solid_infill_speed = 50
top_solid_layers = 3
travel_speed = 130
use_firmware_retraction = 0
use_relative_e_distances = 0
vibration_limit = 0
wipe = 0,0
z_offset = 0