
Thank you all so much for your input. I am going to work through these ideas tonight and see what happens. I very much appreciate all of the great advice!
Skip to main content
Great call. I searched and found a version of the firmware specific to delta, and now the RH is controlling the printer. Testament to my ignorance that I thought I had the generic firmware properly configured. I will look more into the stepper configurations now, but I am concerned I’ve ruined two of my motors somehow, as the x-assigned motor seems to turn fine while the other two appear to attempt to turn but cannot.
Thanks for the upload,
That is weird. Let’s try this…
Disconnect power, take only the working motor and connect it to a different motor connection. From the configuration.h file it looks like you have a RAMPS board. So if it is X move it to Y or Z.
Leave the other motors including the extruder disconnected and try to move that motor using the control for that axis you hooked it to. If it works,move it to the other non-working axis. I’m pretty sure the extruder motor won’t work until you get to minimum temperature with the hotend, but don’t worry about that yet, we are fixing X,Y,Z for now
If both axes work using the “known good” motor that shows the drivers are functional. Now it’s time to connect the “non-working motors” one at a time to make sure they work.The orientation of the connector on the board will just reverse the direction of the motor when it spins. Just take a look at the color sequence of the wires on the working motor and make sure the non-working ones are correct…
Here is a pic of the A4998 driver chip for your stepper.
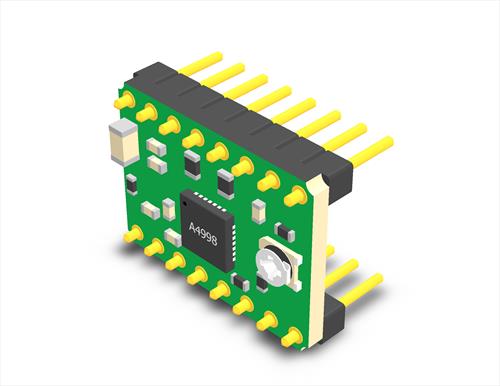
That is usually the one they ship. There is another type that is more robust but that is usually an optional thing. The round shiny circular metal object on the right is the potentiometer, See if they are all set “roughly” to the same orientation as the “working” one. Without a meter that is a rough guide to get them close but not completely accurate .
I don’t want to overload you with things to check, it would be better for you if you had somebody with a 3d printer that you knew who could give you “hands-on” help, It’s tough to diagnose over the web.
If the working motor does not move on the non-working connectors it could be the driver board itself.
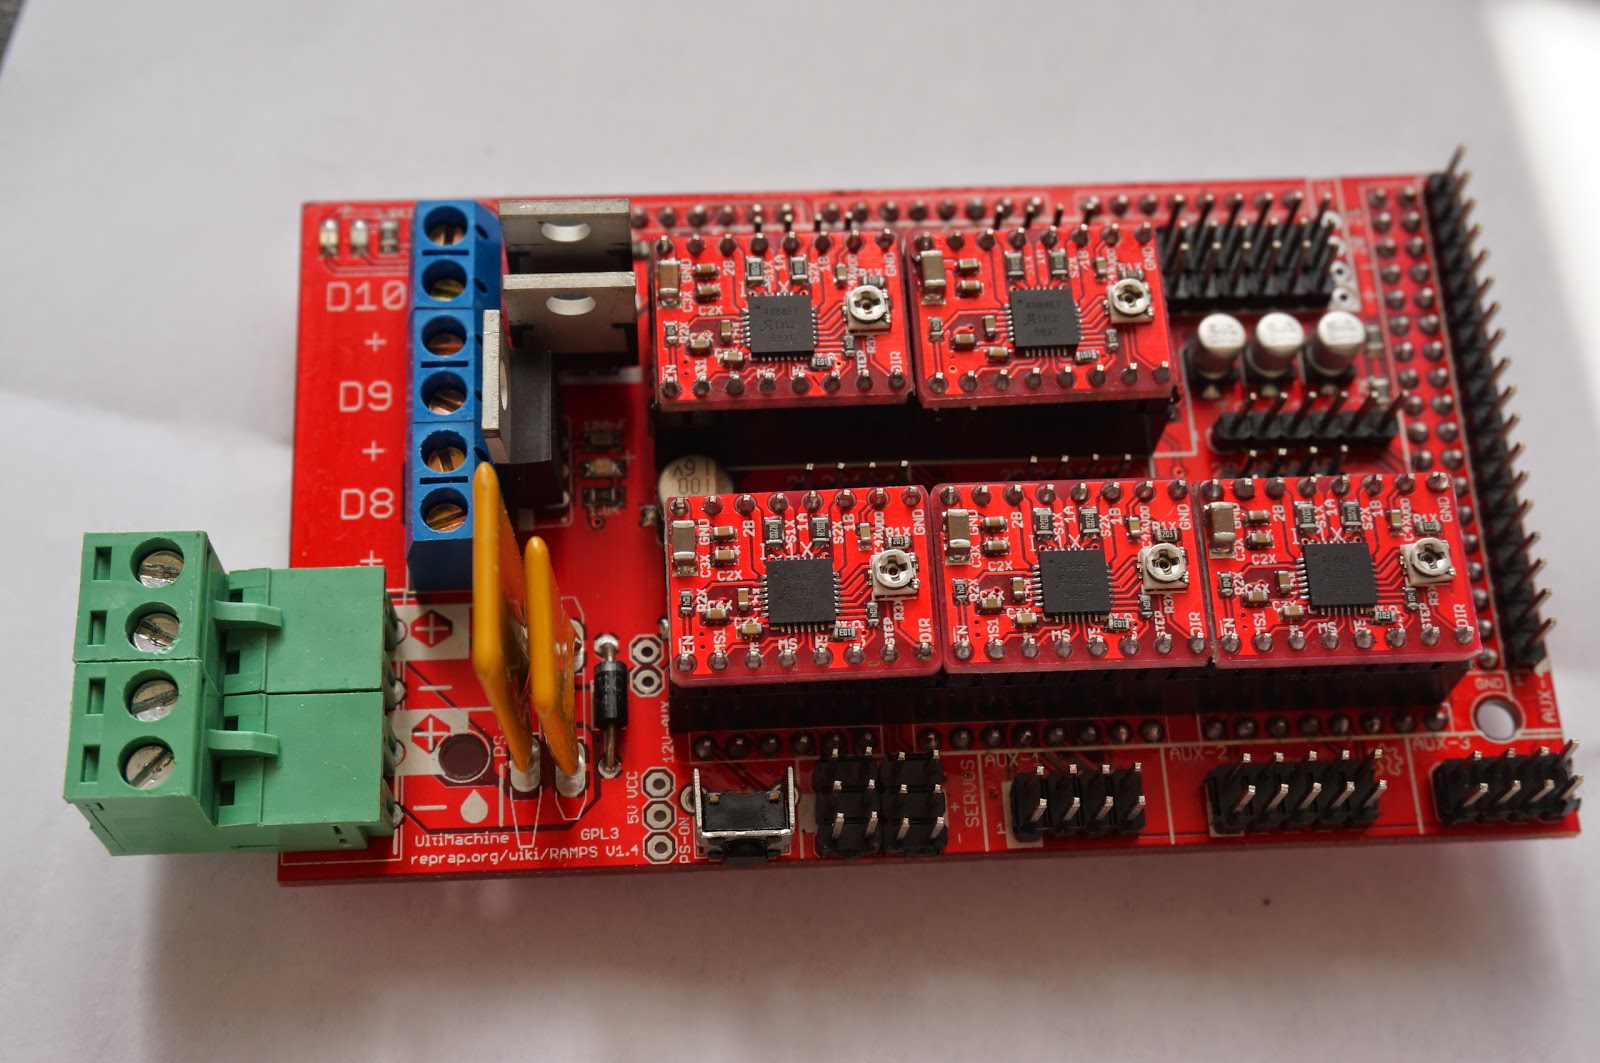
Here is a pic of the RAMPS board with the driver boards.
Is that what you have? The stepper connections are above the driver boards from Left - X Y Z
from top Left Extruder 0 Extruder 1
If it came with 5 you have a spare driver board.
Let me know what happens.
I went through the diagnostic process you described. X, Y, and Z all seem to be functional with the known functioning motor. When plugging in the questionable motor, it behaved the same as before; seeming to whir/grind, but not spinning. I have ordered a new motor to replace this, so hopefully things will go better after that. Thanks for all of your help!
To your last question, I believe the drivers are integrated, as there seem to be no removable boards on the MKS Base v1.4. You can see a photo of it here. Sorry, it’s not a great view.

OK,I see.
Your configuration.h file shows that you have a RAMPS1.4 selected as your board - define MOTHERBOARD 33
I just looked your board up and it is firmware compatible with the RAMPS 1.3/1.4.
Make sure the pins are pushed all the way into the connector when before you plug it in.
There were no instructions or downloadable files with your build from the manufacturer??
Good Luck! If you need more info after you get your replacement motors, we are here.
Nothing came with the kit, so I had to reach out to the manufacturer to get the instructions. Unfortunately, they assume everything works perfectly and did not address my specific issues.
Well, the new motor came. The good news it, when I tested it on the board, it worked great. The bad news is, now that I have the printer reassembled, one of the other original steppers motors is locked. When I try to home the device, it just makes a noise and will not move (X strut). It will not even turn by hand. The other two will turn by hand, though when I home, only the new motor behaves as it should and travels to hit the end stop. Still researching, but I’m not finding a lot on this issue yet.
Okay, so scratch this issue. I discovered my problem/solution on another forum. I’m sure everyone here knows this, but just in case, the pulley on the stepper must be a bit away from the motor, itself. I had it flush against the motor, causing the issue. As soon as I moved it out, it worked like a charm.
For a second.
When I tried to home, it went down instead of up to the end stops. Clearly an inversion issue in the firmware. I started to look into this when I noticed some smoke coming from the board. My power supply was overheating in that short span.
I feel like I’m playing Whack-a-Mole.
I suspect the positive and negative were contacting each other, so I am going to try to clean up my wiring and try again. At least, I hope the issue is that simple.
Man, what more could go wrong? Scratch that, I hope I didn’t jinx you… It sounds like you’ve gone through just as many problems as I have with mine, all I can say is that the fact that you haven’t given up by now shows that you should have a lot of success with 3d printing. Being stubborn and not giving up is half the battle. Hopefully it’ll all be worth it in the end, I’m sure if you stick with it then it shall be very rewarding!
I appreciate it!
Well, the printer is smoothly functional, manually. Everything works from the Repetier Host interface. I have done the leveling as instructed and the calibration of the Z height. I must have done something wrong on the latter, though, because when I try to print, the extruder scraps on the build plate, tearing the tape. When taking Z to 0, it is just barely above the build plate, so I am not sure why I am now having this issue. Researching 3D printing issues seems to be my new favorite past time.
Great! Job , don’t forget to calibrate for “flatness” Delta_radius and “size accuracy” Diagonal_Rod_Length, here’s a link:
Did that once with some other instructions, but I will certainly try it again with this. Thanks!
Yes! That walk-through was fantastic. I had some significant errors in the flatness. This has been corrected, and I was finally able to begin printing. I still have some fine-tuning, evidently, as each pass in the first layer that was laid down was pulling up on the edges as the extruder reversed direction. I thought, perhaps, I came out of calibration, but my four points all seemed spot on when I tested. The search continues, but I’m excited that success feels near!