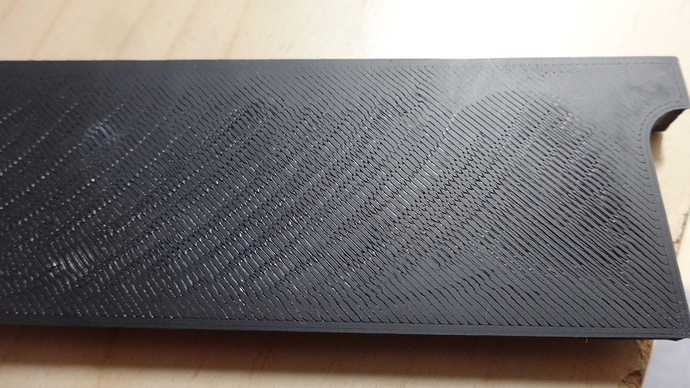
My new PEI bed is working well and warp is a thing of the past, hurrah! However, as they say, I now have a new problem… Take a look at the bottom of this model:
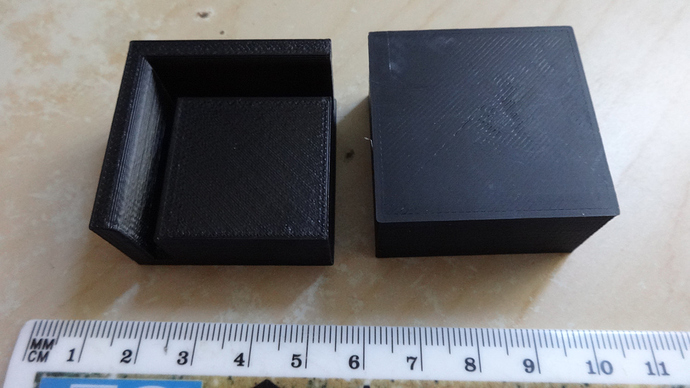
At first glance it looks like under-extrusion (doesn’t it?) but it’s not. There are parts of this surface that are totally smooth. There’s also a weird “pattern” to the holes, like the filament was “pulsing” rather than being delivered smoothly, but only in the centre of the print. Now take a look at these smaller parts:
These are roughly the same Y dimension as the first (about 35mm) but obviously a lot less in the X. There’s a similar drop-out in the fill right in the centre, but it’s much less pronounced and as we get towards the edges it’s totally smooth. I’ve included a view of the top surface for reference - that’s pretty smooth and looks fine, as are the sides. I had another print that’s half this X/Y and the entire bottom surface is absolutely smooth - perfect, I’d say.
All three prints used the same settings. All were printed under the same calibration, no recalibration done between them. All were centred on the bed (so the middle of these parts was the middle of the bed in each case).
I’m pretty sure it’s not calibration, as I’d expect the “gaps” that appeared in the first large model to be in the smaller ones, as it happened in the same part of the bed. I’m pretty sure it’s not under-extrusion, because there are no other signs anywhere in the print (in fact, if anything, there are signs of very slight over-extrusion). So what the heck is going on? It’s as though the printer simply got “tired” in the middle…
All parts netfabbed. All sliced with Simplify3D. Flashforge Creator Pro, ABS. Bed 110C, Nozzle 230C.
@cobnut Did you ever get this figured out? I am using some black ABS and am getting the exact same thing. I raised the nozzle height and reduced the extrusion multiplier a little and it seemed to help some.
It really looks like over extrusion as I watch it. If I look at the top of the first layer it is not smooth. It gets a wavy texture going that corresponds to the pattern on the under side.
Just to update (and close) this thread, it looks like @Nebbian was spot on. Fiddling with the z-height from the bed dramatically changes this effect and with fine tuning it can be solved and it certainly seems to be that too close is what causes the problem. Of course, go too high and you start to lose adhesion and the desired squishing and it really is a tiny adjustment - just 0.02mm makes a difference. Luckily, the live z adjust on the Prusa i3 Mk2 makes it easy to play with - just start printing a decent sized square and adjust in steps, allowing each step a cm or so of printed “width”. Make sure you make a note of the settings for each step, then stop the print before the first layer completes (to make it easy to see which direction it was printing in), you should then be able to pick which setting gave the best results.
I know you marked this as solved but I suspect the source cause may still exist.
I spent months trying to fix something that looked identical to your print.
Now there’s more than one reason that might contribute to this wavy effect but in my case the right side trapezoidal z nut had about 0.75mm vertical play.
The reason that it propagates as a wave like pattern is simple. As the print head moves across the layer all it takes is a tiny bit of under or over extrusion to start the pattern. On the next line the print head hits the side of that spot and because it’s a little loose the head moves vertically as it rides the bump or dip. Then it tends to expand and get more waves as the print head jumps around. Rock each side of your z axis up and down to see if you have some play like I did. Also check your print head as the play might originate there too.