


I’ve been printing in my local region using a modified Up Mini since mid last year and with the advent of my December engagement combined with a recent community software upgrade for the closed-source Mini (FixUp3D 1); decided it was time to give myself a new challenge.

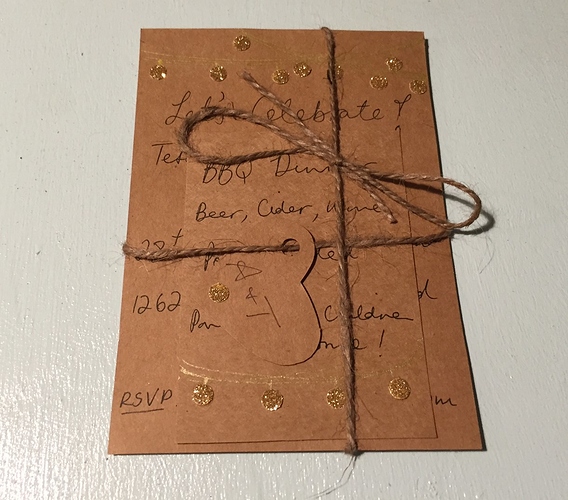
My Partner and I were in the midst of making engagement party invitations and realised although we had plenty of flair on our invitations, we weren’t too keen on having to write a return address on the back of each of 100+ envelopes, which is where the idea of getting a custom made stamp came up, and I realised I already had all the tools to make one for us. A 3D printer, some quick set silicone and the crazy eyed gaze of someone with a great idea.
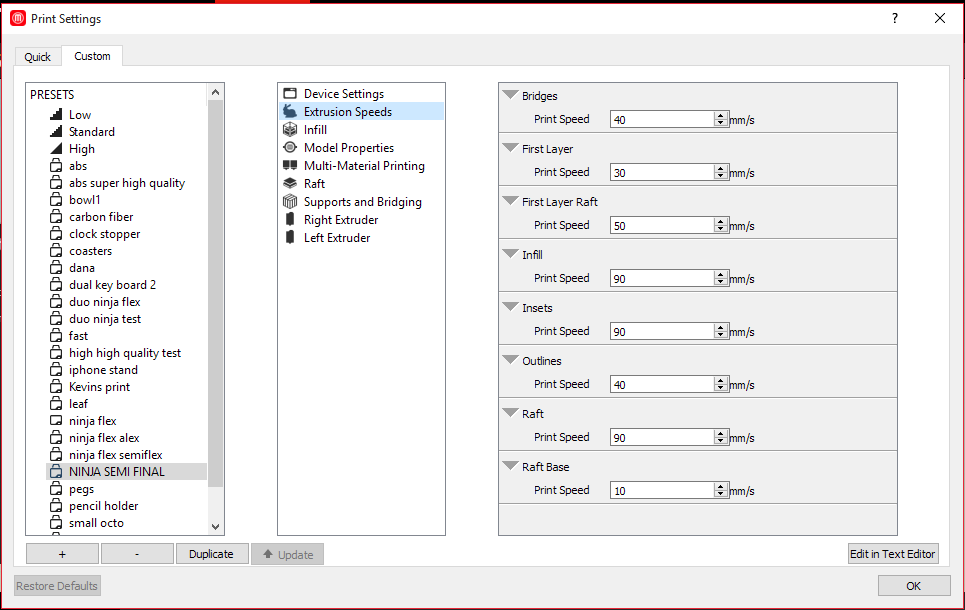
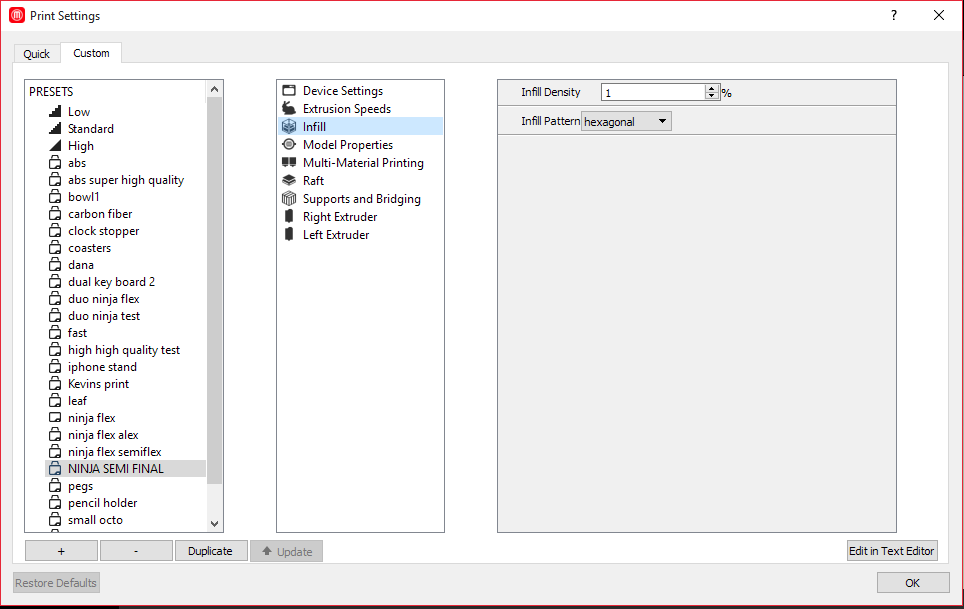
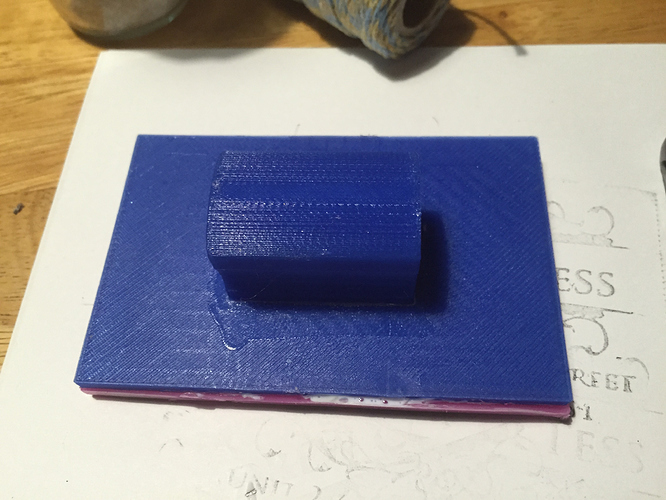
I asked her to help find a design and some artwork for the banner and address, and with that created an SVG stencil I imported into Tinkercad, using it to design a mould for what would become the ‘rubber’ of the stamp. This was then printed on my trusty Up Mini with locally produced blue PLA at a 0.1mm z-layer height, 100% infill, 3 outer layers, no raft and a slower than standard print speed (for the Up this is not measured directly in mm/s or mm/min but I’ve included a copy of the config) to ensure the outlines would be as accurate as possible. It was also printed to ensure the recessed sections were facing up and avoiding any area requiring bridges or support, making for easier removal of the silicone later on.
After the mould was printed it was then boxed up in cardboard and the silicone mixed and poured in to set; leaving it for half an hour before painstakingly slowly peeling it off the mould, reaching in between the printed and silicone layer with a fine pair of tweezers to carefully remove sections that had wedged themselves into nooks and crannies.

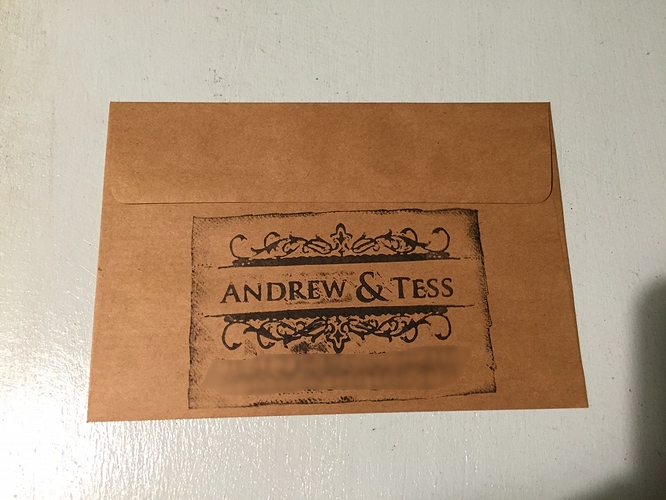
Address is blurred out for our privacy sorry ![]()
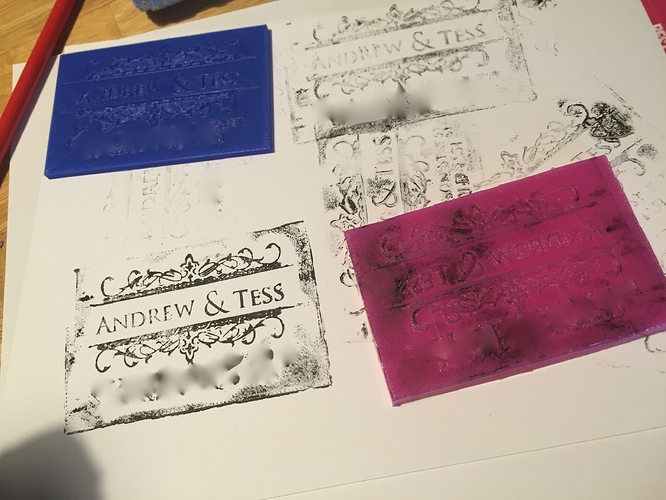
It took a few failed attempts getting the design and the height right, as there is a fine line between getting the detail on the printed mould too recessed to pull the silicone out without losing the finer thinner letters tearing off inside the mould, and making it too shallow to allow a defined stamp to be put on paper without transferring or smudging ink from the rest of the stamp but eventually we got there. A simple handle was printed and one of the old moulds was sacrificed as the base to which the silicone stamp was affixed.

The end result looked amazing and gave our invitations a special flair that wouldn’t have been possible without a 3D printer.

To top it all off, later that month I 3D printed 2 puzzles each with hidden message, inviting two of my best friends to be groomsmen at the wedding. But that’s a story for another time!
Andrew (Omegatron)
created
Mar '15last reply
Jul '15- 9
replies
- 1.3k
views
- 7
users
- 11
likes
- 1
link
