Ok everyone. Keeping everything below for reference but here’s the breakdown.
Problem: On my Robo 3d R1 printer, my bed was so out of level that the autoleveling feature could not compensate. So in order for it to be touching the buildplate in one area it was smooshing nearly through the plate in another.
Resolution: Manually adjusting height of bed.
What you need: 2x pieces of standard printer paper. M4 washers from local hardware store (optional). scissors.
Step 1: adjust y axis height.
Process: Take standard piece of printer paper and tear 2" thick strip lengthwise. With machine on but with hotend and heated bed off home z axis through software to zero out z location output.
precheck: Robo3d beds sit on magnets protruding from the underside. These magnets sit in recessed pockets on the carriage with companion magnets. ****Make sure that the magnets are seated properly in their pockets***. The pockets are ~10mm ID and the magnets feel like they are 9.9999mm OD. If you aren’t careful placing the bed back down they can be askew and throw off your leveling. the wildly overpowered magnets will make you think its sitting in the pocket but it may not be. If you suddenly start seeing 1 corner raised way above the others, Check this.
(1) Raise z axis (arbitrarily chosen 10mm) Then move hotend to bottom right corner (+x,-y). place one end of the paper between hotend and bed holding the paper at the opposite end. Using software lower z axis until end of hotend barely scrapes paper (my personal rule of thumb is when the wiggling the paper is impeded but not prevented). Record z location output.
(2) Repeat process 1 in top right corner (+x,+y) and record z location output.
At this point one value will be greater than the other. In my case (+x,+y) was about .7 mm greater *yikes*.
(3) lift the low end and add shims. Use the M4 washers for course adjustment (mine were about 0.5mm thick) and with the remainder of your paper cut out circles the same diameter as the washers for fine adjustment (printer paper is about 0.1 mm thick).
(4) lower bed back down to carriage taking care that your shims stay between both magnets and that everything clicks in as noted in the precheck section.
recheck steps (1) and (2) and compare values. They should have gotten closer together. keep repeating until satisfactory leveling has been competed (dealers choice on where that is).
now apply steps (1) ~ (4) on the -y side of your bed and apply shims as needed.
(5) perform step (1) again at the middle left edge (-x, y=0) and record value. then perform (1) again at the middle right edge (+x, y=0) and record.
(6) to bring these values equal (x axis level) bring the hotend to the higher of these two values (the high side) and perform (1) again. With the nozzle at the paper scraping height, through the software move the hotend to the other edge (x axis movement only). then reach in to your printer and twist the threaded rod by hand on the side your hotend is on (the low side) until the hotend is lowered to paper scraping height again.
Now everything should be level. I recommend printing a large 1 layer high sheet to confirm. Thanks everyone in the community for helping me out with this. It should increase my print quality significantly.
Original Post:
Afternoon All,
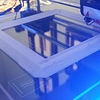
I’ve spent a lot of time dialing in my z offset and when I get just under the sweet spot I start to see this. Bells went off though because its only in one corner of the part. I have a Robo3dR1 printer with auto bed calibration and I have tried it across several different beds/substrates so I dont think it is a buildplate flatness issue.
From the picture, to me, it looks like the extruder is getting too close to the bed in that area and pushing the plastic out and up as it prints. I should also clarify. The corner closest to the camera has the issue. The other 3 corners are perfectly smooth and ideal for bed adhesion.
My suspicion is:
it has something to do with my z axis. Maybe something to do with going from one side of the bed to the other causes it to be off?
or my auto calibration. Maybe its not calculating the compensation right and is not maintaining the offset properly.
Anyone seen this before and have any suggestions?