Hi community! This is my first post here, so I hope I’m within the spirit of these forums 
I’ve got a part I’ve been trying to 3D print on my Rostock Max V2 for weeks now, and no matter what i do, I can’t seem to stop it from warping at the corners. I’ve tried increasing the heated bed temperature, using a brim, hair spray, a raft, it always seems to warp, although always by different amounts at the different corners, and some prints come out less warped than others. I’ve also tried a higher infill percentage. At this point I’m out of ideas. What might you guys and gals suggest? I’ve been printing in PLA with a printer temp of around 195 C, and a heated bed at 60 or sometimes 70 C. Should I post an STL or gcode file along with the question?
It may be cooling to fast. Try taking a card board box and putting it over the printer while printing.
Xeno
3
You could try to add a brim to the print, and the adhesion to the bed is probably not good enough, use a glue stick or hairspray (if it’s glass)
more infill will cause more warping (shrinking material) just keep it at 20%-25%.
I print PLA a lot, without a heated bed and on tape, warping is minimal.
maybe it’s just not so good quality PLA ?, maybe try another roll ?
Actually PLA is not tend to wrap in printing,Maybe you could print with bigger raft,So the bottom could stick to the hot bed.
baldy
5
You can also check your fan speed, I personally don’t use the extruder fan to cool my prints and I haven’t had any warping since. I have also however also changed my print bed material to glass and included a raft of about 5 lines to each print.
I’ve found that a glue stick + blue tape work really well to prevent warping. Whats the environment your printer is in? Are there are any weird airflows coming in or something similar?
Rule 1 : do not cool the first layer
Rule 2 : get a very clean bed. No fingers should touch it. use Isopropyl alcohol to clean it prior to applying any glue
1 Like
Have you tried re-calibrating you z-height? Proper 1st layer “squish” can make all the difference in preventing warping, or the print itself from coming off the bed. I would imagine that may be the case if even with a raft the print still warps.
Another suggestion is to re-look at the design itself. Does the walls need to be solid like that or can you get away with designing relief holes into the walls to help reduce warping? Solid walls can cause stress on the print because they cool slower where as when designed with reliefs the design uses less filament and helps promotes even cooling which help prevents warping.
The best options to stop warping out of my experience 1) Calibrate your Z height and bed height 2)ensure, your first layer is set to 150% and not too high, you should see 75% height of first layer 3) Make sure, you don’t have heat bed ON. 4) Apply a thin layer of Glue Stick 5) Brim for atleast 15mm 6) First layer speed is 50% of actual speed 7) If your Printer is nearby FAN or Windows, keep them closed or switched off. 8) May be you can also keep your sides closed with carton paper or sheets 9) watch till you see the first layer is adhered properly 10) Switch ON the shroud FAN after 3 layers. 11)) let your first layer speed be atleast 5 °C more than other layers. I think, you will love your successful prints.
1 Like
I had the same problem with my witbox 2 printer. Out of the box, warping at any print. For me , hairspray was the answer, but not just any hairspray. The strongest version of L’oreal. Now all prints on my - no heated - glass plate stick.
Pla should not need an enclosure to stop it from warping, in my experience Pla warps only when bed adhesion is poor and the corners were never “stuck” down to start with. If your bed is level and your first layer does not like overextruded (assuming your filament and flow rates are correctly calibrated) simply lower your z height slightly until it sticks or looks over extruded. If it still won’t stick you have another issue to solve, I print Pla on kapton tape heated to 50-60 degrees depending on print size and it sticks wonderfully if the z height is correct
Sra1
13
Some great advice here from Botzlab
I’d recommend all these and add one more, keep it in reserve if you’ve tried everything and still can’t stop the warping - try adding a thin wall/shield around the model, at least a few layers tall, maybe 4mm tall or so, this will trap hot air around the part and help shield it from colder air. You might think this sounds weird - even in a well-heated house environment this can still make a difference.
Also coating your build surface with something like PVA glue can help, buildtak, 3D-EEZ etc.
Edit: I’d also recommend keeping the heatbed ON.
A shield around the model is a great tool to help, Simplify3D has a name called ooze shield for it. I totally recommend this add on for trouble free print. Cheers, PP Botzlab
Warping is the shrinking of material at different rates through the print. It can only be solved one of 2 ways. A material that has a lower shrink rate like PTEG, our ensure the whole part is within a few degrees of the next layer, a enclosed build chamber and heated bed help.
He is printing in Pla not abs… Pla hardly shrinks at all, any warping I have experienced with Pla was due to poor adhesion to the build plate…
abs on the other hand shrinks considerably and you would be 100% correct
ps… Every printer should have a heated build plate, if it’s not install one.
Hi there, have you printed spray the bed with hair-spray? did you use some blue paper tape? probably yes if not start with this easy tip.
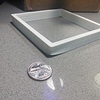
If you are able to do put at the corner of your model a circle big like a coin ( all 4 corner, you can remove it later when the print finish) 2 o 3 mm high.
You can do this with sketchup or other cad software. I mean modify your model and add this small round piece, this will spread the tension on a larger area .
Hope this will help
ciao Alberto
This can simply be prevented I found by the following method
PLA run about 215, bed 20 (basically cold) cooling on pla is essential as well.
bed prep either masking tape, blue with some elmers extreme gluestick lightly applied or use buildtak, or double sided kapton tape.
Also try to run your first layers nice and slow and make sure the settings reflect real life ie initial layer heights are the same as software etc.
but out typically just run slow with cooling on.
my two cents. Regards Dabe
Lukio
19
Hi,
When I get very bad warping like that and solutions like glue or tape won’t work anymore, I just completely deactivate the FAN of the extruder that points on the print and add a good brim. This way the heat of the plastic will cool down much more gradually and will stop most of the warping.
Considering the shape of the 3D print in the picture this probably won’t be a problem for the print quality.
I hope this will help 
So, I was finally able to get my part to stop warping! It turns out, my problem was not that the print was cooling too quickly, but that it wasn’t cooling quickly enough! Once I lowered the heated bed temperature, things started to print straight. Essentially, what I think was happening was that the bottom layers that were in contact with the heated bed weren’t sufficiently cool by the time the middle layers were cooling. So, as the middle layers were cooling, they wanted to contract, and since the bottom layers were still fairly warm and malleable, they easily went with the contraction. By lowering the heated bed temperature, those bottom layers solidify more quickly and are less malleable and can better resist the tendency to warp. Chalk up another one for counter-intuitive solutions!