Did you see @jamesleroy03 question about shipping?
Hi all,
Having built one of these for a cosplay I put together for PAX Aus, I thought I would demonstrate how it turns out when its built following instructions instead of by the creator. It turned out quite well in time for the event, and a big thanks to Yven De Haas for how amazingly well these parts are designed (especially with limited reference)
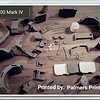
Here are some pictures of it all assembled and painted, as well as a side by side of the pipboy edition for comparisons sake and the full cosplay. (as you can see it is slightly smaller than the official one) (The colour that Haas used was off the actual colour, so I went for a slightly different paint job. It’s still not exactly accurate, but it looks better IMO). Apologies for the bad lighting.
There are also some things I would note if you intend to make one of your own:
-Some of the screws are a pain in some of the smaller nooks and crannies (primary the latch mechanism and the cassete mechanism) - many of the parts will end up crooked.This isnt a huge deal though, as the latch functioned okay regardless.
-YOUR PHONE PROBABLY WILL NOT FIT PROPERLY - So don’t be surprised if it moves around a lot. I printed the 100% version on the basis my iphone 5 would fit, and it did, however it didn’t cover up the entire screen as it was a lot smaller than the space provided. In the end, I just printed out the screenshot and stuck some perspex on, which was easier and looked better.
-Keeping it on your wrist, if you intend to wear it, is very difficult. Because of its shape (the top end being a different width to the bottom), and depending on the size of your wrist, it will either be too tight, or slide around a lot, if not fall off. I had to put 2 layers of thick socks over my wrist to be able to fit it, even then had to constantly readjust it.
-You need the right screws, and don’t underestimate the difficulty of finding some of these smaller screws. I couldnt find any of these screws at my local hardware store and in the end had to go to a specialist screw store to find the right screws - and even then had to cut some down to size.
That said, if you intend it to be a display piece, then with the right paint job its quite the looker. Just don’t expect it to stay on your wrist all the time or to be a piece of cake to put together.
Despite all this I still think it turned out great and again big thanks for the parts.
Savas
I was honored to print a complete set for a 3dhubs member. Here’s the completed pictures he sent me. Now my son wants one too. So, we’re working on round 2.
Be careful when taking the order!!! This takes weeks to do right non-stop, and will tie up your printer the whole time with 8+ hr prints. While 1 or two orders is fine, think carefully about taking more if you plan to hub other orders. I just printed 3, it took 3 weeks to do that many parts. And yes, you will have misprints and need a lot of support material. 3Dhubs needs to account better for that, have a better pricing for taking this order ($100 +).
Also, do not buy filament from Bee Supply. They wound it too tight on small spools, it did nothing but snap on the printer.
I actually managed to get a Pip-Boy Edition (Preordered on Amazon, June 24th) but of course when it finally arrived (They screwed up the shipping on mine like they did everyone else’s so I had to buy the game on Steam on the 10th…and got the box on the 11th…) it turned out the bloody thing didn’t fit. It’s a hella display piece though. But I’m going to need to print a bigger one.
Too bad the retail version doesn’t fit your phone, which phone are you using? Hope 3D Printing will get it right in one go
With 3 printers and 2 rolls of abs it takes less than a week.
https://www.3dhubs.com/sacramento/hubs/palmers-printer-farm 2
Sacramento CA
I’m temped…but I never 3D printed anything…
I see one hub 10km away from me making the thing for 70$, can that be well made?
All the other hubs want more than 120.
Not sure where you’re at, but the client paid only $60.32 for the one I printed. I thought it turned out well. So I would say yes, $70 not a bad deal. But maybe if you wait till Black Friday, there may be better deals
Nice prints! What brand filament did you use? The FlashForge extrudes some nice prints. I think it’s time for a printer upgrade…errrrr…thanks a lot! $$$$->>>>Fly away…However, I’m thinking about a Delta. We’ll see. Anyway…off topic. Thanks for sharing.
Keep in mind the 20% discount is only valid until tomorrow
Does anybody know where I can get the files for the build? I have a hub on here and can print the parts myself
Hey @nt86, the files are attached in the thread above - see the Print Small, Medium and Large buttons above (I’ve attached the screen shot of them). Happy printing
I found them on the site, I was lazy I don’t look long enough haha Thanks!
Unfortunatly I don’t have the money right now Maybe in a couple of months.
Thanks!
I’ve been able to print just about anything from amazon or ebay so long as I measure each roll. The grey was Gizmo Dorks, white was Flash Forge, Clear was Mg Chemicals., Black was Esun PETG
Add Simplify3d to your overall cost, Its worth every penny.
It would be easier to tell you what to stay away from ( black Shaxon ABS). I generally try not to bad mouth a product but that stuff was terrible. I cant vouch for the other colors since I refuse to use it. Shaxon PLA prints just fine.
First build in progress, if it goes well I’ll consider selling it or making additional ones for sale
I really like hatchbox filament, consistent quality across all color variants