What is countersinking?
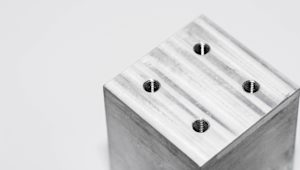
Countersinking is the process of creating holes that allow screws to "sink" into a surface, so they don’t stick out. This technique is used when engineers require a smooth surface, either due to form or function. The conical shape of a countersink hole is angled to match the head of a screw or fastener, in contrast to a counterbore, which creates a flat-bottomed recess for flat-headed fasteners, like bolts. Countersinking is most commonly used in CNC machining and sheet metal fabrication because they use screws and fasteners more frequently than in injection-molded and 3D-printed parts, where snap-fit or press-fit joints are more typical.
How do you use countersinking holes?
Countersinking holes are used whenever a flat-head screw or fastener with a conical profile is needed to sit in line with the material. This serves multiple purposes—whether it’s to improve safety, make something look better, or simply make assembly easier.
Methods for countersinking
There are several ways you can create countersink holes, and it is just a matter of choosing the method that’s best for your project’s material and application.
-
Manual countersinking: For small-scale projects, people often use handheld tools, such as countersink bits, to get the job done. These are attached to drills that work well in softer materials like wood and plastic.
-
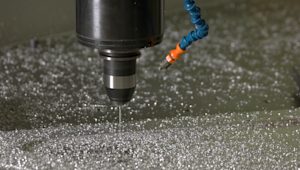
CNC countersinking: In high-volume or precision machining, CNC machines are the best way to keep the countersink holes consistent and precise. Accuracy is built into the basics of CNC machining — machines follow programmed paths to ensure uniformity across all parts, making this method a good fit for production runs that call for tight tolerances.This works best for metals and hard composites.
-
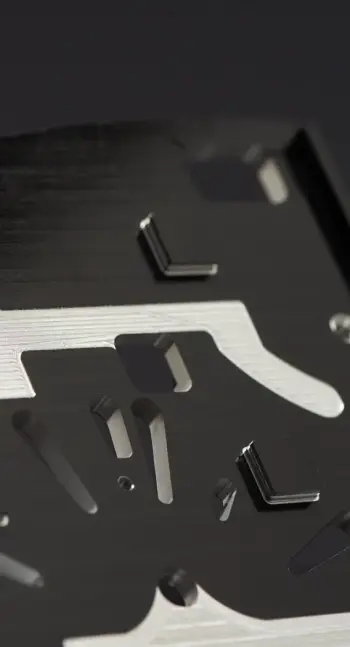
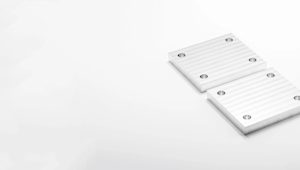
Sheet metal countersinking: In sheet metal fabrication, countersinking is used for thin metals like aluminum or steel. Here it is key that the material thickness can accommodate the countersink. Specialized fasteners, such as self-tapping screws or rivets, are often used to preserve the material’s structural integrity.
-
Drilling and countersinking combo: For faster production, drilling and countersinking can be knocked out in one step using combination bits that both drill the pilot hole and form the countersink in one go. The softer materials, like woods and plastics, work best for this combination. It saves time but may not provide the level of accuracy needed for harder materials.
Applications of countersinking holes
All you have to do is turn over your phone or laptop and appreciate the bump-free surface to enjoy countersinking in action. Given its versatility, countersinking is widely used across various industries
-
Aerospace: Ensures screws and rivets sit level with the surface to reduce drag and create smooth finishes. This is important in both CNC-machined components and thin sheet metal parts used in the industry.
-
Making furniture: Improves the appearance of furniture pieces by hiding fasteners and keeping material from splitting.
-
Electronics: Provides a smooth surface for device casings and reduces the risk of sharp edges or screws poking out. Sheet metal casings often rely on precise countersinking for both aesthetic and safety reasons.
-
Automotive: Used for smooth surfaces on vehicle panels and critical components.
Benefits and drawbacks of countersinking
Like any machining process, countersinking comes with its advantages and potential downsides. Once you understand the strengths and weaknesses of countersinking, you can decide when and how to apply this technique in your manufacturing process. Below are the key points to consider before using countersink holes into your designs:
Benefits
-
Improved aesthetics: Countersinking hides fastener heads, which makes for a visually appealing, sleek surface.
-
Enhanced safety: Prevents injuries by getting rid of sharp edges or pointy fasteners. A screwhead sticking up could catch on clothes, hands, or other equipment, potentially causing damage or injury.
-
Improved structural integrity: Lowers the risk of fasteners coming loose over time and prevents material damage around the screw hole.
Drawbacks
-
Precision requirements: There’s not much margin for error with countersinking. If you use the wrong angles or depths, the whole thing can turn into a mess of weak joints and mangled material.
-
Material suitability: Certain materials, such as thin metals or brittle plastics, may not be strong enough to weather countersinking and could crack or deform.

Best practices when countersinking holes
When designing parts that require countersinking, planning ahead can help keep your project up to spec. Here are some best practices for engineers:
-
Know your numbers: You need to define the countersink diameter, countersink angle, and pilot hole diameter. The most common countersink angles are 82° and 90°. Check that the angle matches the requirements of the fastener head in your design. If the angle is off, it can hurt the efficacy of the fastener.
-
Account for material thickness: If you are designing parts with thin materials, like sheet metal, make sure that the countersink doesn’t go so deep that the material cracks. If you think you are running that risk, you can use countersunk fasteners specifically designed for thin materials.
-
Specify tolerances: Add the appropriate tolerances for both the countersink angle and depth to your CAD drawing to make sure the fastener fits correctly.
-
Look at the load: Take into account the load that the fastener will bear in your design. If the fastener will be under heavy stress, double check that the material and countersink design can handle the load without cracking or deforming.
-
Leverage CAD tools: Most CAD programs come equipped with tools specifically for creating countersinks in your designs, which makes it easy to add manufacturing callouts.
Play by the book: Check your countersink designs against ISO, ANSI or DIN standards to make sure your technical drawings are correctly defined. These standards ensure compatibility with fasteners, improve manufacturing consistency, and reduce the risk of errors during production.
Surface finishing after countersinking
Countersinking may result in some rough edges or burrs left on your parts, especially in metals or harder materials. The right surface finish can buff those out and add everything from strength to shine. Here are some common finishing techniques used after countersinking:
-
Deburring: For metals, deburring tools or machines are used to smooth the area around the countersink, making the part easier to assemble and safer to handle. This process is included by default for parts CNC machined with Protolabs Network.
-
Anodizing: Anodizing, typically used for aluminum parts, adds a protective oxide layer to the material, improving corrosion resistance. Anodized surfaces can also be dyed in various colors, so you see it used frequently in consumer electronics.
-
Powder coating: This process involves applying a dry powder to the surface and then curing it under heat, resulting in a protective and smooth finish. It is commonly used in automotive or appliance components.
-
Electroplating: For parts that need better corrosion resistance or a snazzy metallic finish, electroplating fits the bill. Materials such as zinc, nickel, or chrome can be plated onto the surface of metals after countersinking, resulting a smooth and shiny finish.
-
Bead blasting: Bead blasting can be used to remove surface imperfections and create a uniform matte finish. This method is used in aerospace and automotive applications when smooth finishes are essential for performance.
Where to learn more about CNC machining
If you’re interested in learning more about CNC machining, or have specific questions about how to use countersinking for your next project, check out our detailed guides and resources.
Get a quote
Get an instant quote for CNC machining services, including countersinking and other essential machining techniques.
Frequently asked questions
Can you countersink any material?
You can countersink most materials including wood, plastic, and metals. However, brittle materials like glass or ceramics require special care and tools to avoid cracks or damage.
What is the standard countersink angle?
The most common countersink angles are 82° and 90°, though other angles may be used depending on the fastener head design.
What is the difference between countersinking and counterboring?
Countersinking creates a conical hole, while counterboring creates a flat-bottomed hole. Counterbores are used when the fastener head needs to sit below the surface but without a tapered profile.
Is countersinking suitable for thin sheet metal parts?
Yes, countersinking can be performed on thin sheet metal, but it requires precise control over depth and angle to prevent deforming the material. Using specialized tools and CNC machinery helps achieve the necessary precision to maintain the integrity of sheet metal components.
