Injection molding is one of the most widely used manufacturing methods. It is used to create almost every plastic part in all industries, from automotive to aerospace to consumer goods and more. To create injection molded parts, your manufacturer will use an injection molding machine.
In this article, take a close look at injection molding machines and their components, as well as walk you through the injection molding process, step by step.
What is an injection molding machine?
Injection molding machines are industrial machines used to create plastic parts by injecting molten plastic into a mold. The plastic the cools and solidifies into the shape of the mold. Injection molding machines have two main components: the injection unit and the clamping unit.
The injection unit
An injection molding machine’s injection unit is used for melting and injecting the plastic. It consists of several components, which we’ll examine below.
Hopper
The hopper is a large container that holds the raw plastic material, which is typically in pellet form. These pellets are gravity-fed from the hopper into the barrel of the injection molding machine.
Barrel
After the hopper, the plastic pellets enter the barrel, which is responsible for melting the plastic before it is injected into the mold. External electric heaters work to uniformly heat the plastic as it moves through the barrel, although the temperatures must be precisely controlled to prevent it from degrading.
Screw
Inside the barrel, a rotating screw plays several roles: it transports the plastic pellets forward, mixes them, and, because it generates frictional heat, helps melt them (along with the external heaters).
Nozzle
At the end of the barrel, the molten plastic is pushed through a nozzle, which directs the flow into the mold cavity. The nozzle can be fitted with a valve to prevent plastic from leaking between cycles.
The clamping unit
The clamping unit holds the mold securely closed during the injection process, ensuring that the molten plastic does not leak. It also opens the mold after the part has cooled and helps eject the finished part. The clamping unit consists of the mold and the clamping mechanism.
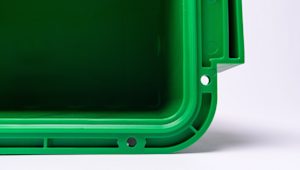
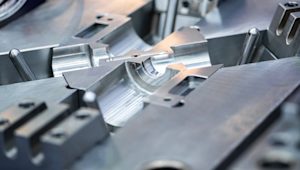
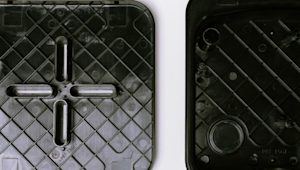
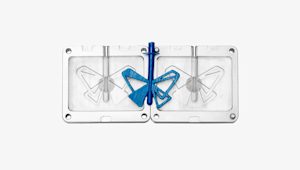
Mold
Molds are often made from hardened steel, aluminum, or another metal that is durable and can withstand high pressure. Typically, molds consist of two halves: the cavity and the core. The cavity shapes the exterior of the part, while the core shapes the interior. Each half of the mold comes together to form a hollow space that creates the final part’s shape.
Ejection pins are usually embedded in the mold’s core half. Once the part has cooled and solidified, the pins help push the part out of the mold. Ejector pins are connected to ejector plates, which are connected to ejector rods. Together, they form a system (which is usually hydraulic or mechanical) that moves the pins forward in a synchronized manner to eject the part.
Clamping mechanism
The clamping mechanism can be hydraulic, mechanical, or electric. It helps open and close the mold, and keep it securely shut during injection. To do so, it relies on tie bars and platen. Tie bars are strong, cylindrical rods that hold the clamping unit together and bear the load of the clamping force. This helps keep both halves of the mold aligned.
Platens are heavy steel plates that are attached to the tie bars. The halves of the mold are attached to the platens. One platen is stationary. The other can be moved when the clamping mechanism opens or closes.
The injection molding process
An injection molding machine works through what can be boiled down to a five-stage process. Each stage is critical and cannot be skipped. In the following section’s, we’ll take a close look at each stage of the injection molding process.
Clamping
Injection molding starts with securing two halves of the mold together with the injection molding machine’s clamping unit. It exerts enough force to ensure that the mold halves are pressed together tightly enough to prevent molten plastic from leaking during injection. The clamping force is carefully controlled, and must be enough to keep the mold closed against the pressure of the injected plastic.
Injection
During injection, small plastic pellets are fed into the injection molding machine through the hopper. The material enters the barrel, which is heated by electric heaters, as well as by the frictional heat generated by the rotation of the screw. The screw moves the molten plastic towards the front of the barrel.
Once enough molten plastic has accumulated in front of the screw, the screw moves forward and acts as a plunger, forcing the molten plastic through the nozzle and into the mold cavity. The pressure and speed of injection must be closely monitored and controlled, as they greatly affect a part’s quality.
Cooling
After the mold cavity is filled, the plastic inside the mold starts to cool and solidify, taking the shape of the mold cavity. Cooling time depends on the type of plastic, the wall thickness of the part, and the mold’s cooling efficiency.
Mold temperature is often regulated by circulating a cooling medium like water through channels in the mold. Proper cooling helps avoid defects like warping, sink marks, and residual stresses. It also works to create part that maintain their dimensional accuracy.
Cooling is by far the largest component of injection molding’s cycle time (up to 80%) and the biggest contributor to high unit price. This emphasizes how important it is to maintain a uniform wall thickness in your injection-molded parts.
Ejection
Once the part has cooled and solidified, the mold is opened. Ejector pins or other mechanisms push the finished part out of the mold cavity. The design of the mold and the placement of ejector pins are key factors in making sure your part is ejected becoming damaged or deformed.
Cycle time
The cycle time is the total time required to complete one full cycle of the injection molding process, including clamping, injection, cooling, and ejection. An optimized cycle time helps boost production efficiency and reduce overall costs. The duration of each phase of the injection molding process is carefully controlled and adjusted based on the part's design, material properties, and production requirements.
Start an injection molding project
To get started with an injection molding project, upload a CAD file to receive a free quote and comprehensive DFM analysis.
You can also learn more about the injection molding process including important design considerations.
Frequently asked questions
What is the injection unit?
The injection unit heats and injects the material into the mold cavity.
What is the clamping unit?
The clamping unit holds the mold closed under pressure during injection and cooling.
How is mold temperature controlled?
Mold temperature is often controlled with water-based cooling systems.
Are there different zones of the screw in the barrel?
Yes, there are three zones in the screw. The feed zone moves pellets forward, the compression zone melts them, and the metering zone helps uniformly melt the plastic.
Why is uniform melting important in injection molding?
Uniformly melting plastic helps ensure a part’s overall consistency.
What is back pressure control and why is it important?
Back pressure control regulates the screw's backward movement in the barrel. This helps the melted plastic be properly compressed, as well as removes air bubbles for increased uniformity.